Visit Japan Web Guide: How to Register, Add Family, and Get Your Japan Entry QR Code
Japan online arrival form
How to register for Visit Japan Web
How to add family members, enter visa details, flight number, and country name
How to fill in your address and phone number in Japan
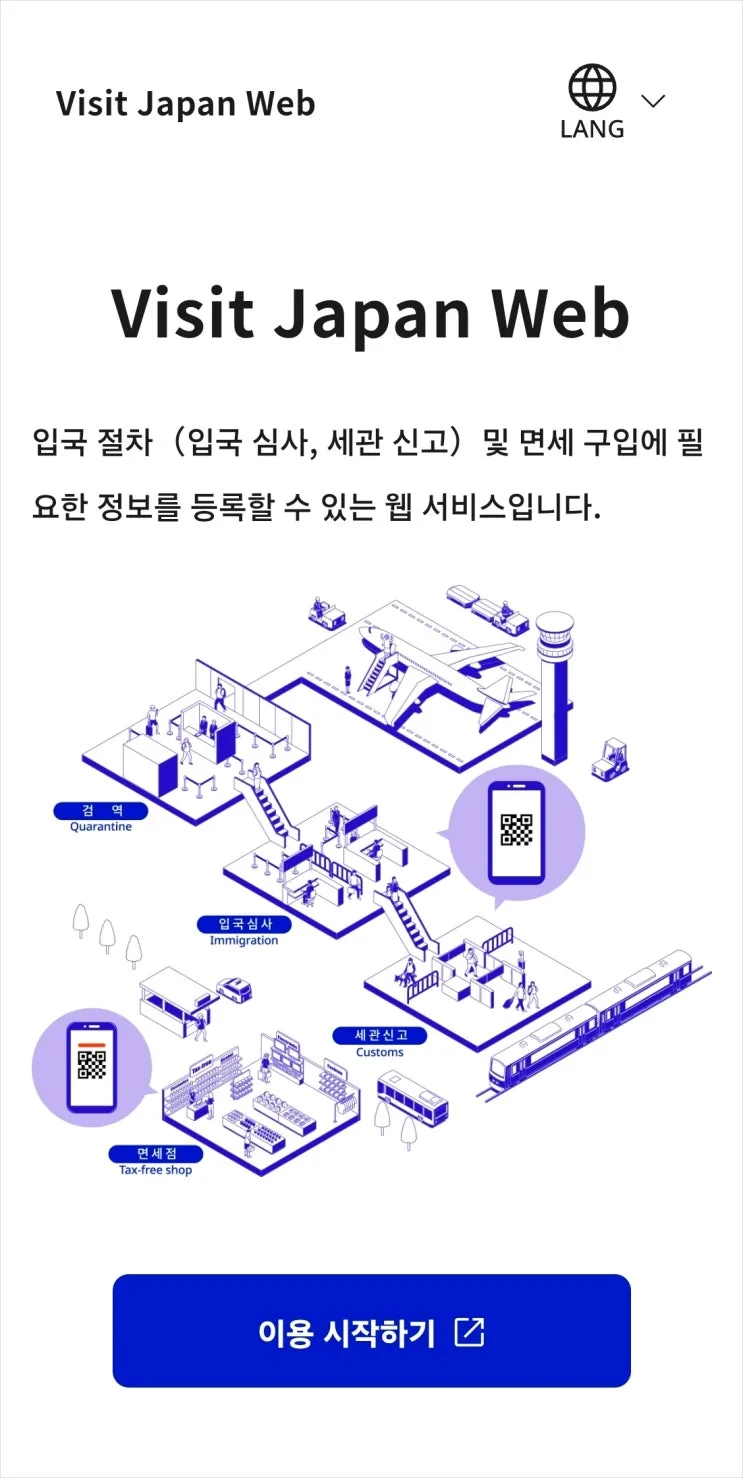
If you’re heading to Japan, one of the most important things to do before your trip is complete your Visit Japan Web registration. In this Visit Japan Web guide, I’ll walk you through the entire process from start to finish, including how to add accompanying family members and get your immigration QR code.
First, go to the Visit Japan Web website.
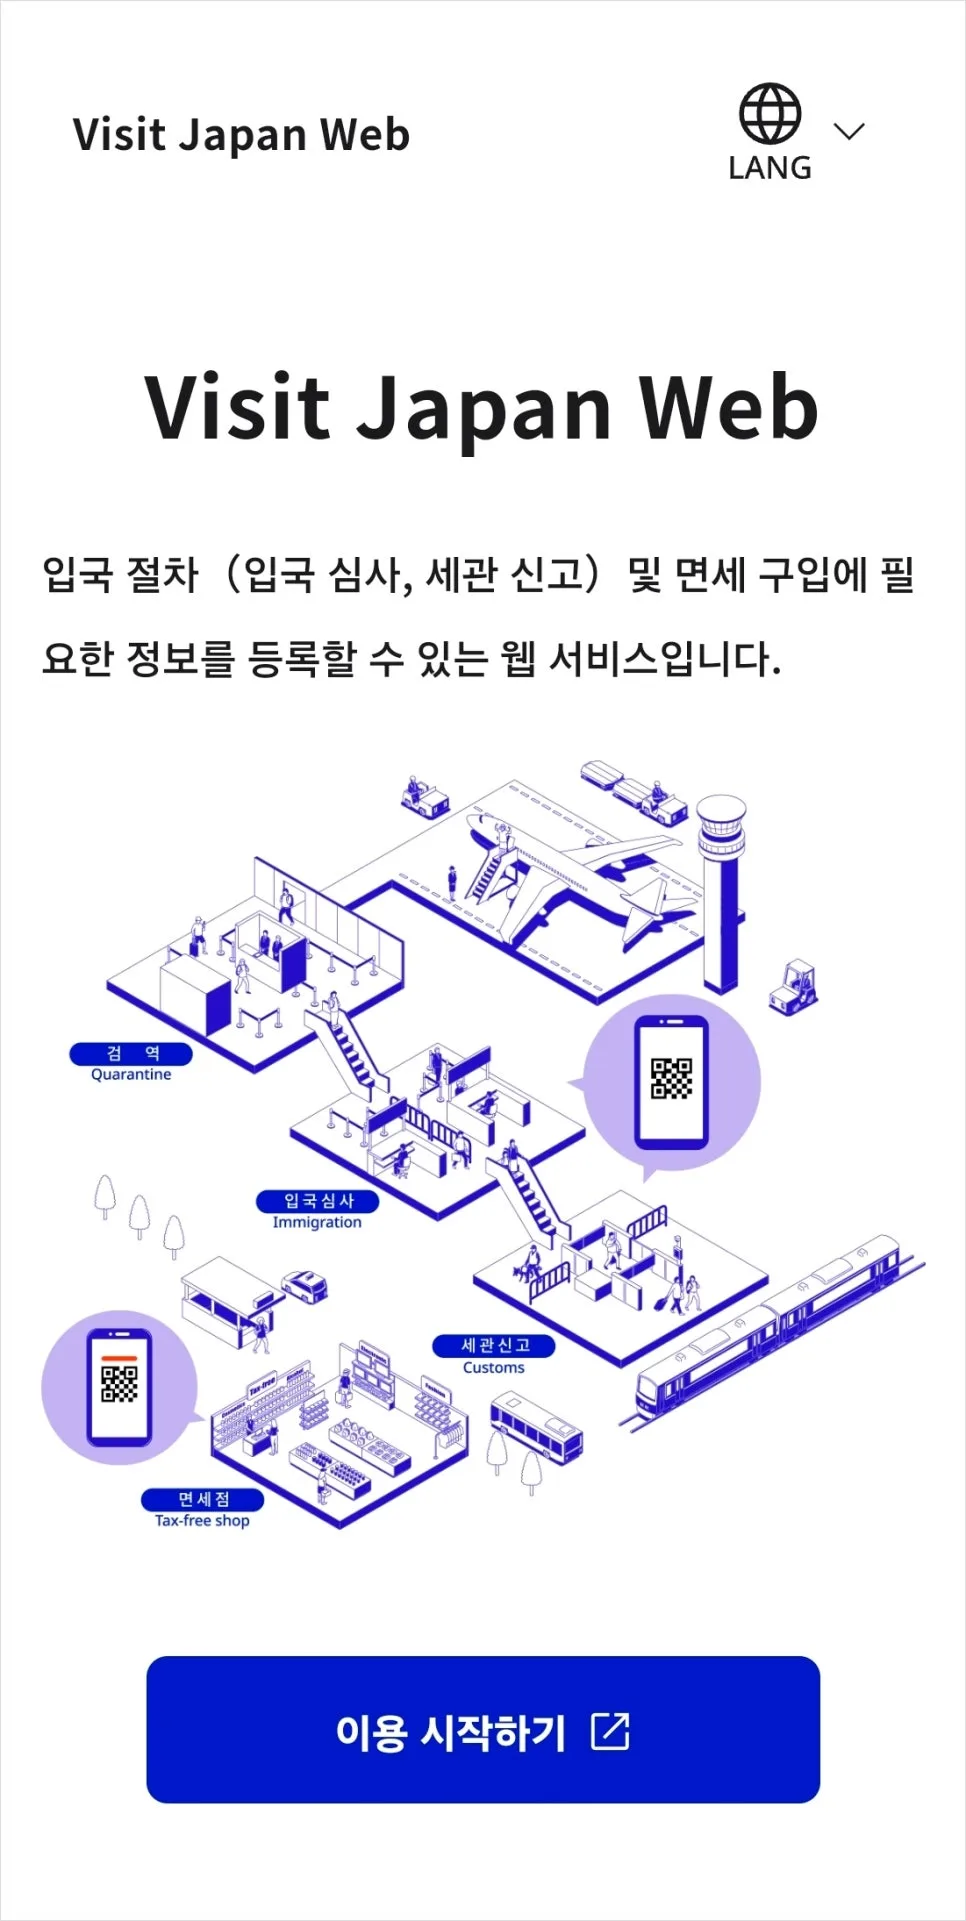
Tap “Start using the service,”
and if this is your first time, select “Create a new account” to sign up.If you’ve used it before, enter your email address and password to log in.
1. Register your personal information
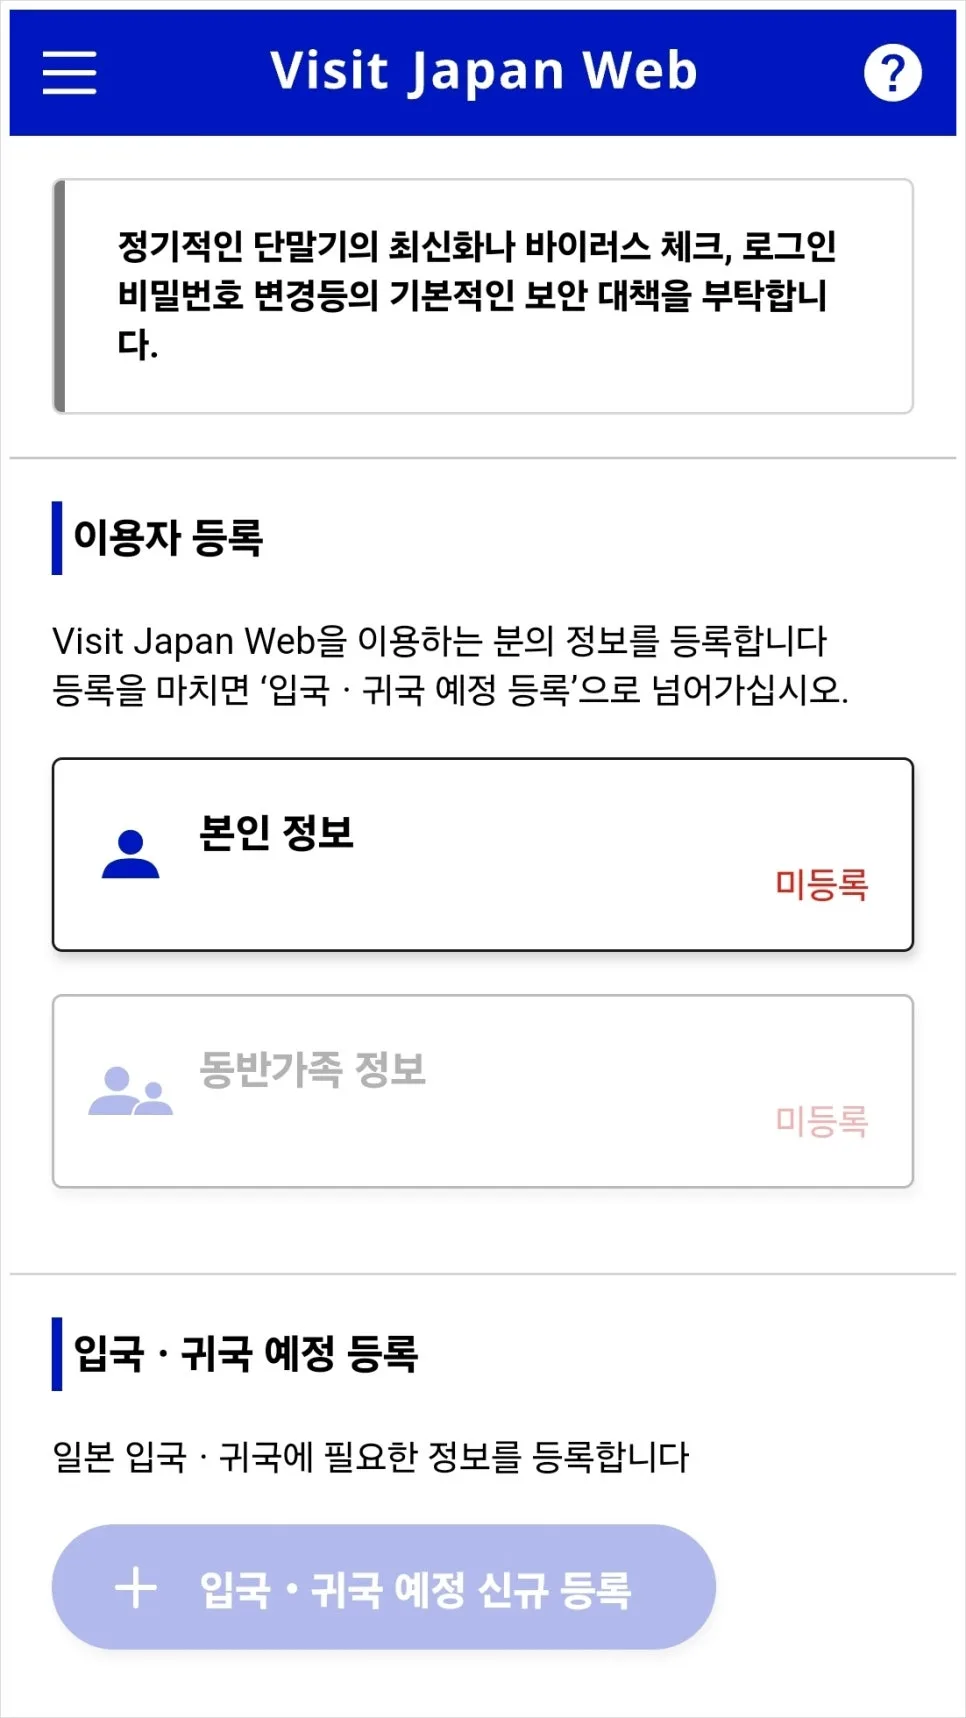
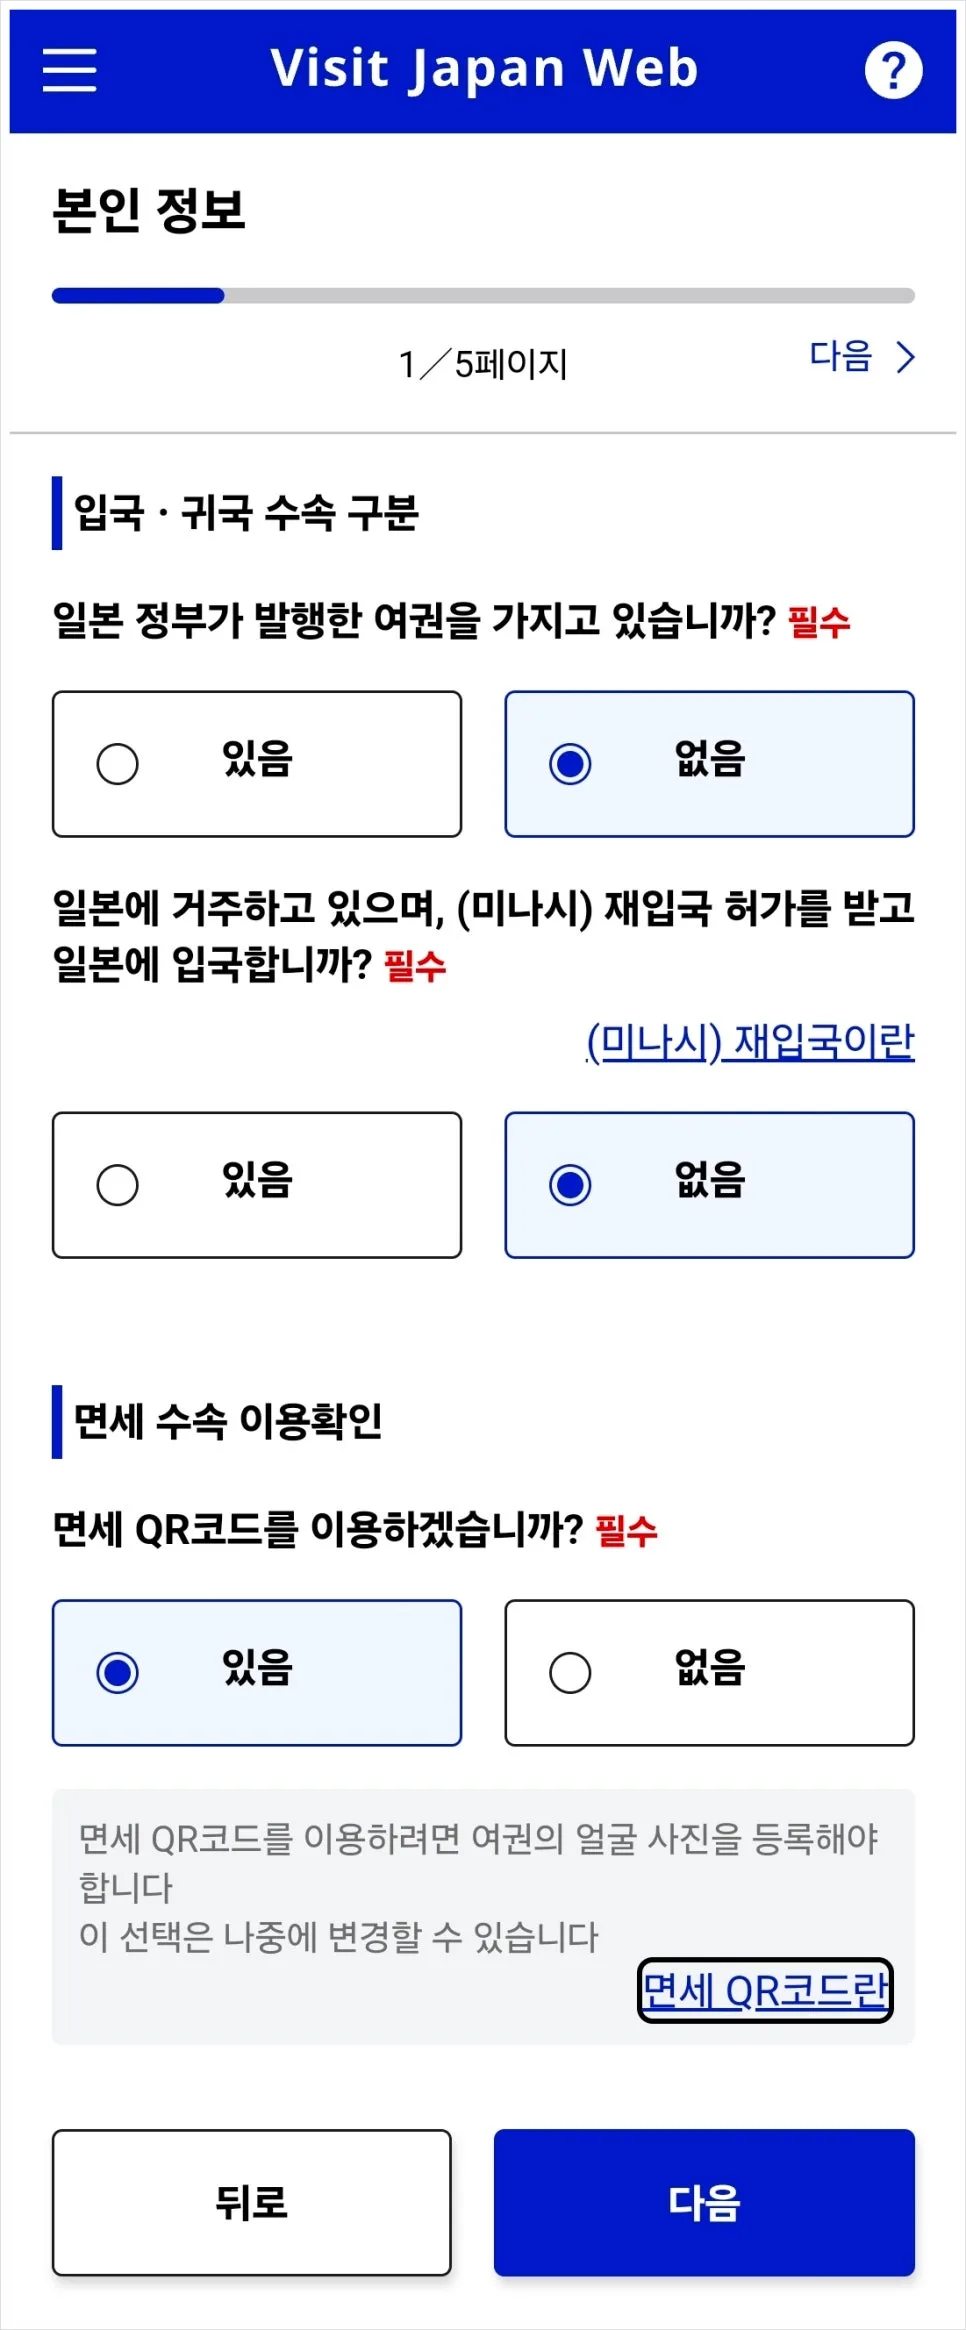
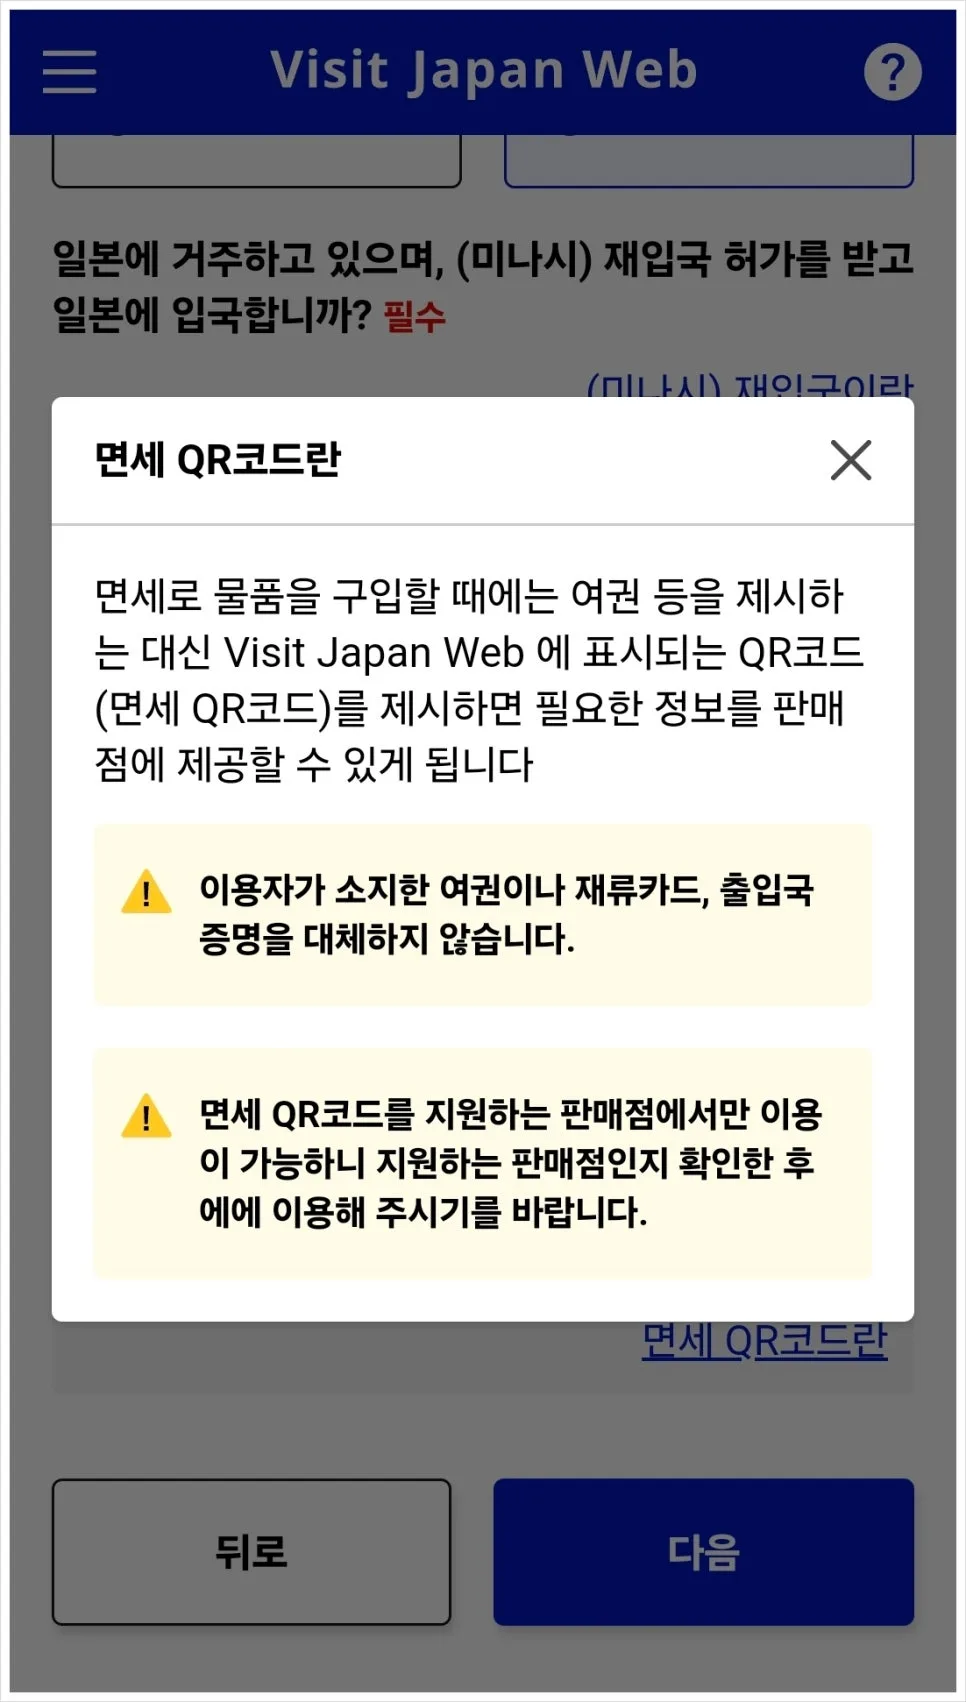
When you first sign up, the very first step is entering your personal information. If you’re a typical tourist, you can select “No” for the special re-entry permission option.
Would you like to use the tax-free QR code?If you want to show the Visit Japan Web QR code instead of your passport when shopping at duty-free stores, choose “Yes.” If you’d rather just show your passport, choose “No.” Either way is totally fine.
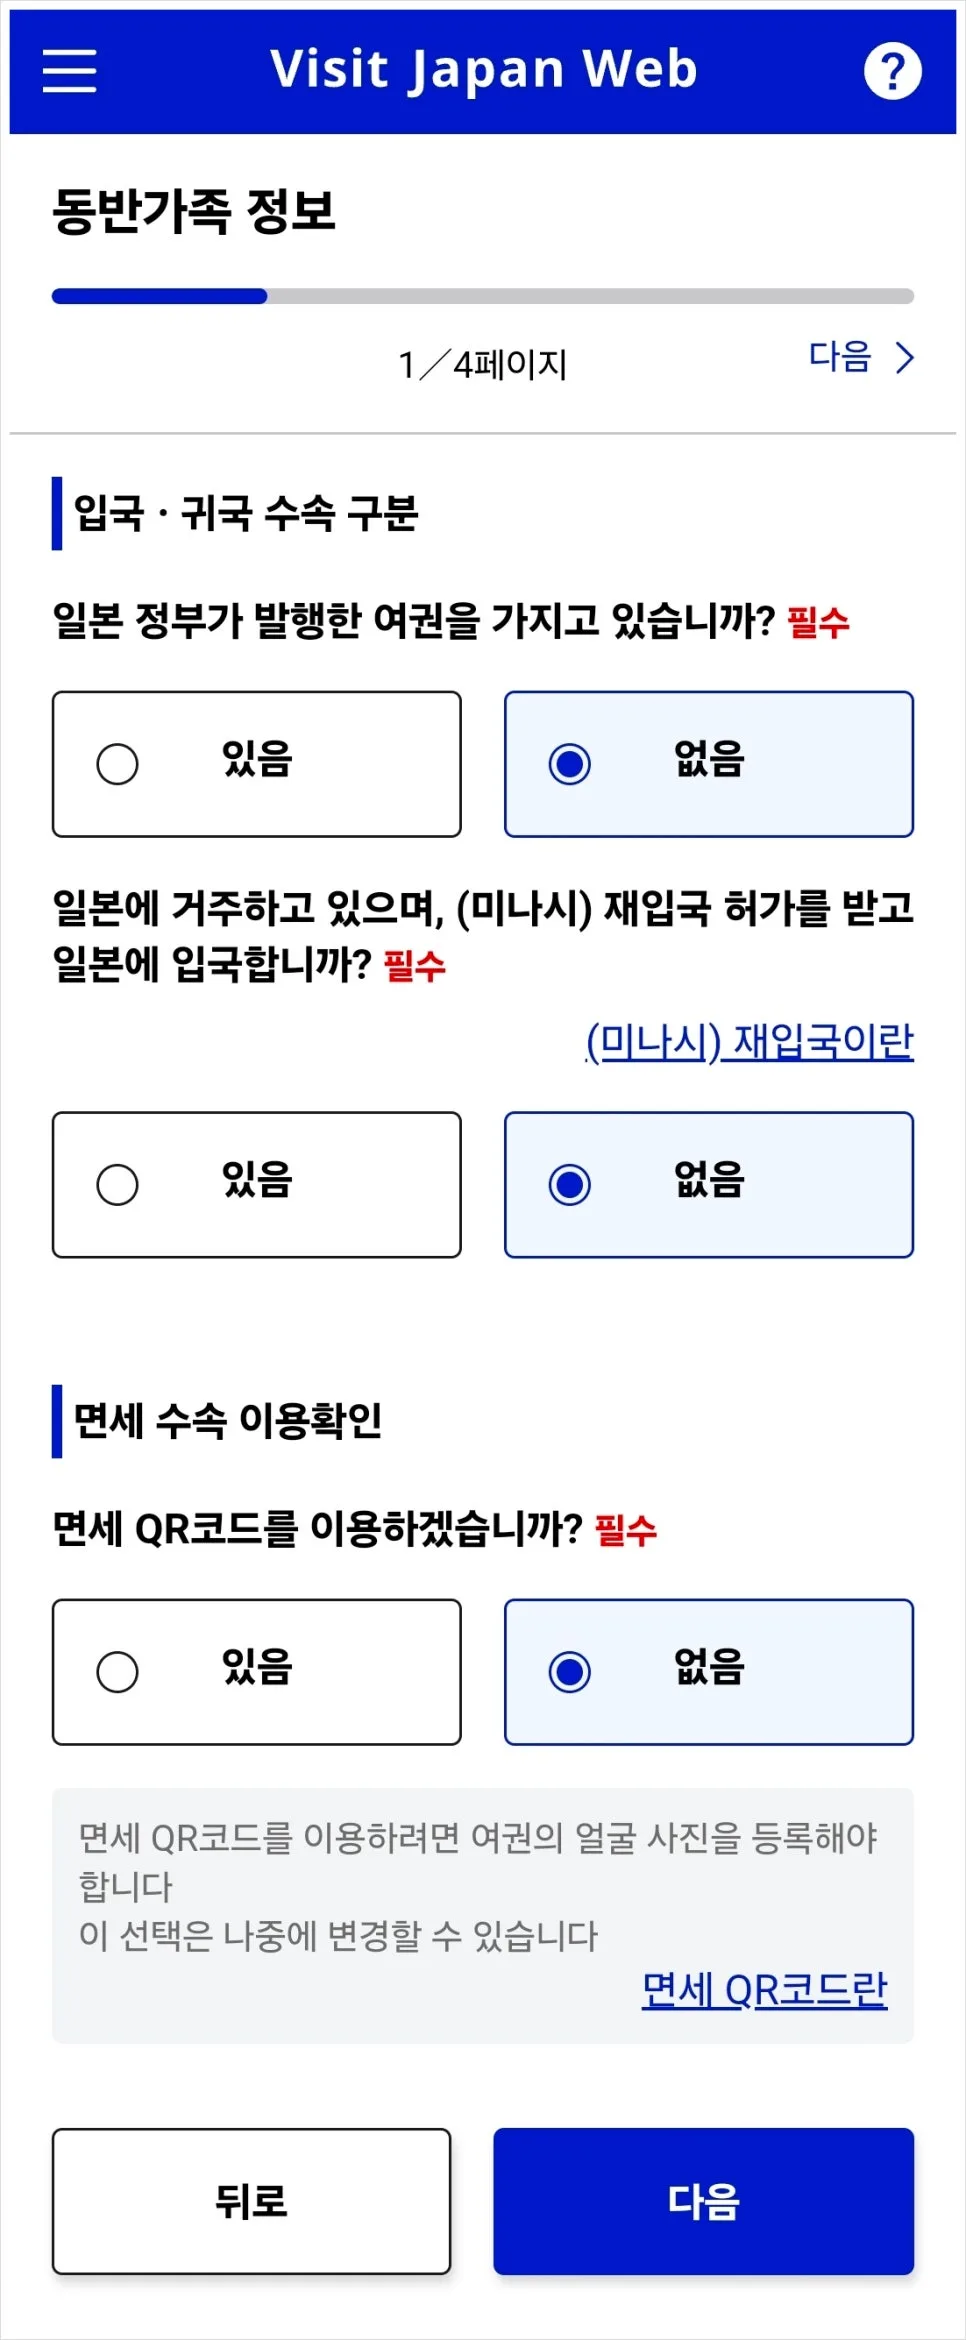
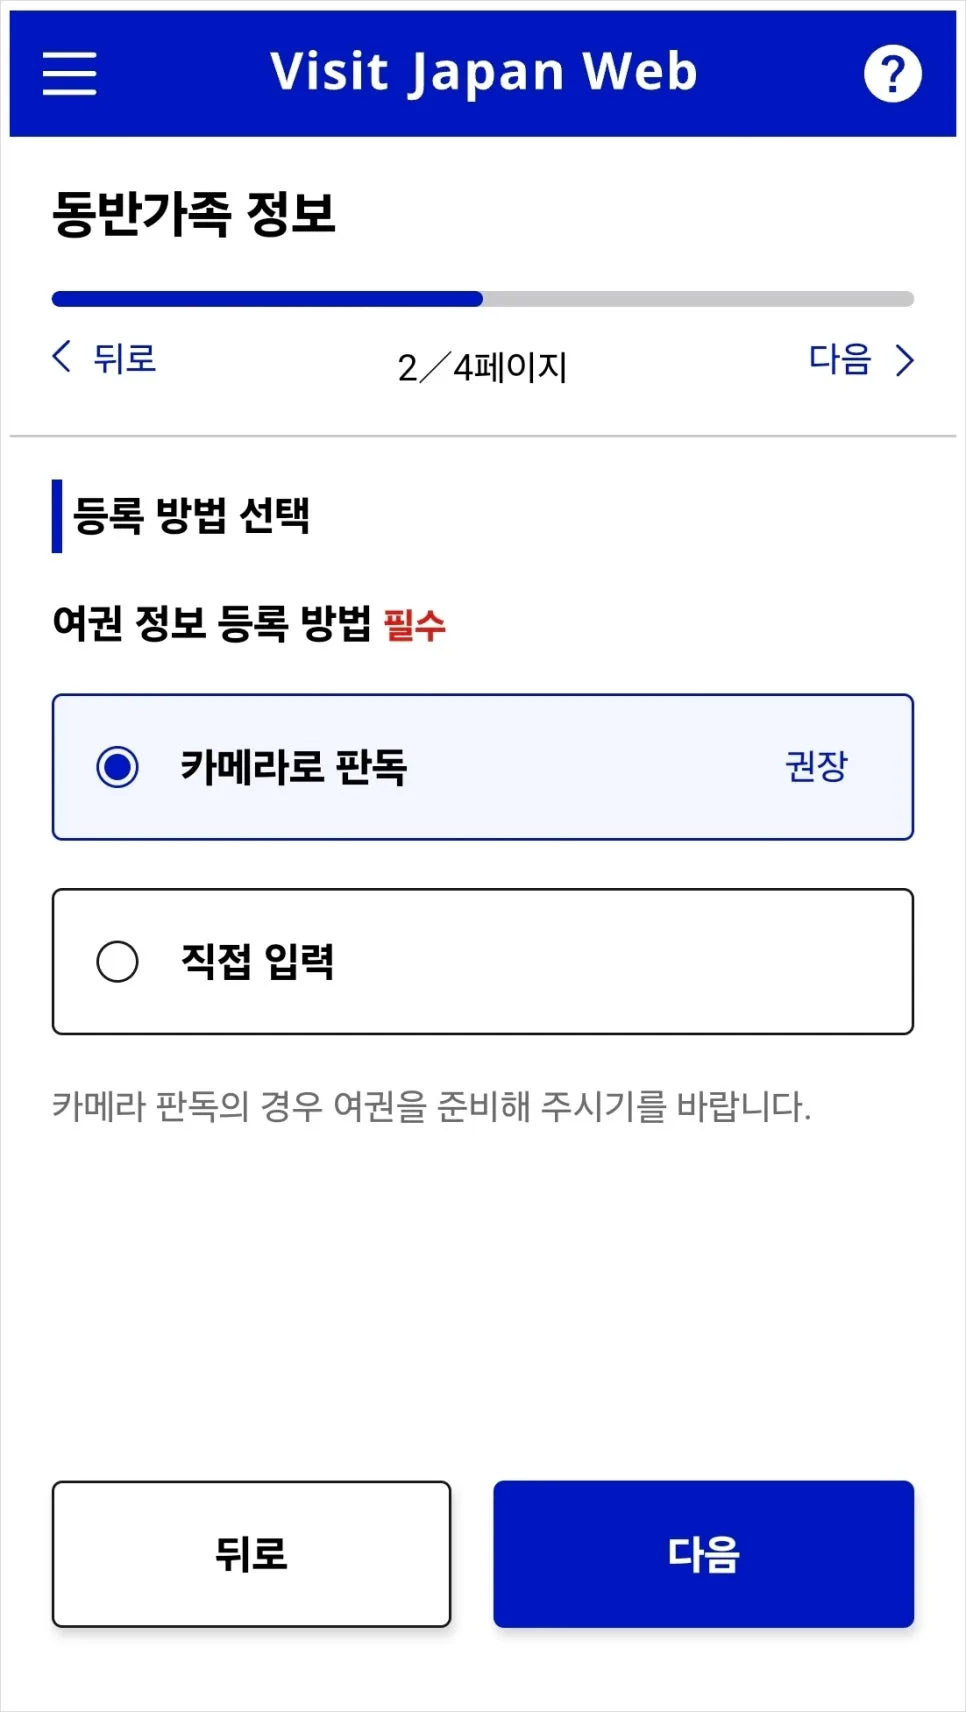
The only difference is that if you choose“Yes,”you’ll need to scan your physical passport with your camera when entering passport details. If you choose“No,”you can either scan it with your camera or type the information in manually.
So if you have your physical passport with you right now, scanning it is easiest. If you only know the passport details or have a photo file, manual entry works better.
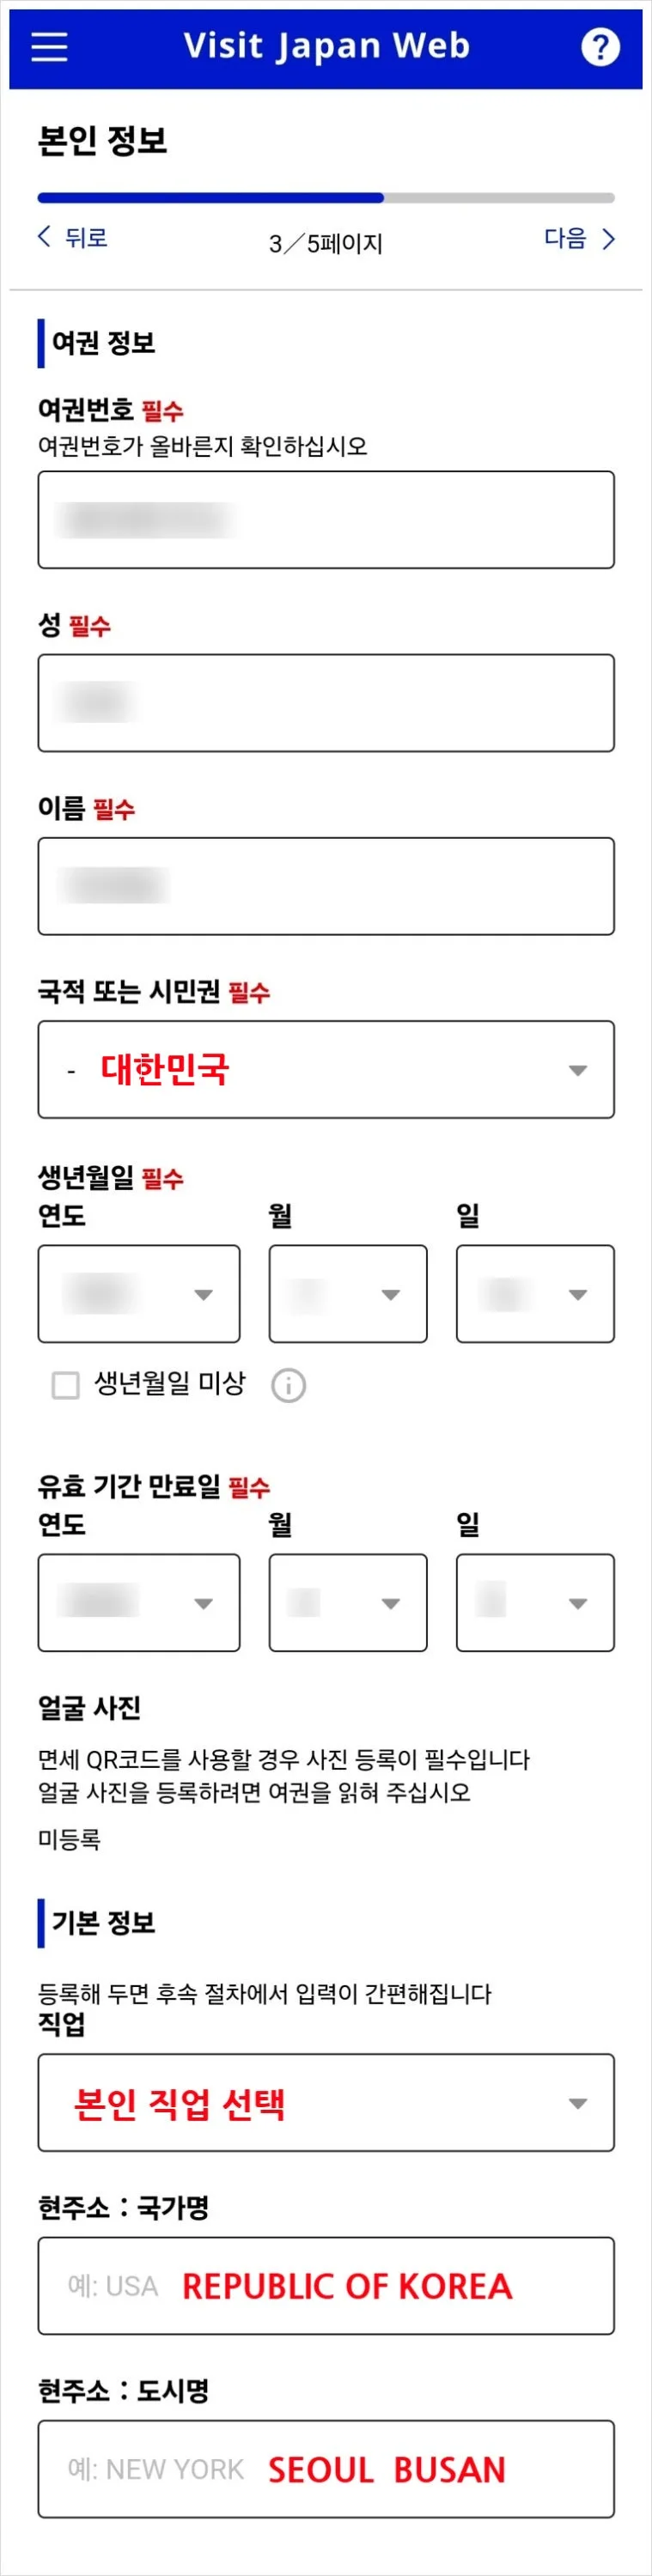
When you scan your passport, some fields will fill in automatically. You’ll need to complete any blank fields yourself. For nationality, select “Republic of Korea,” and at the bottom, make sure to enter your occupation as well as your country and city name.
Enter the country and city in English. For the country name, use REPUBLIC OF KOREA.
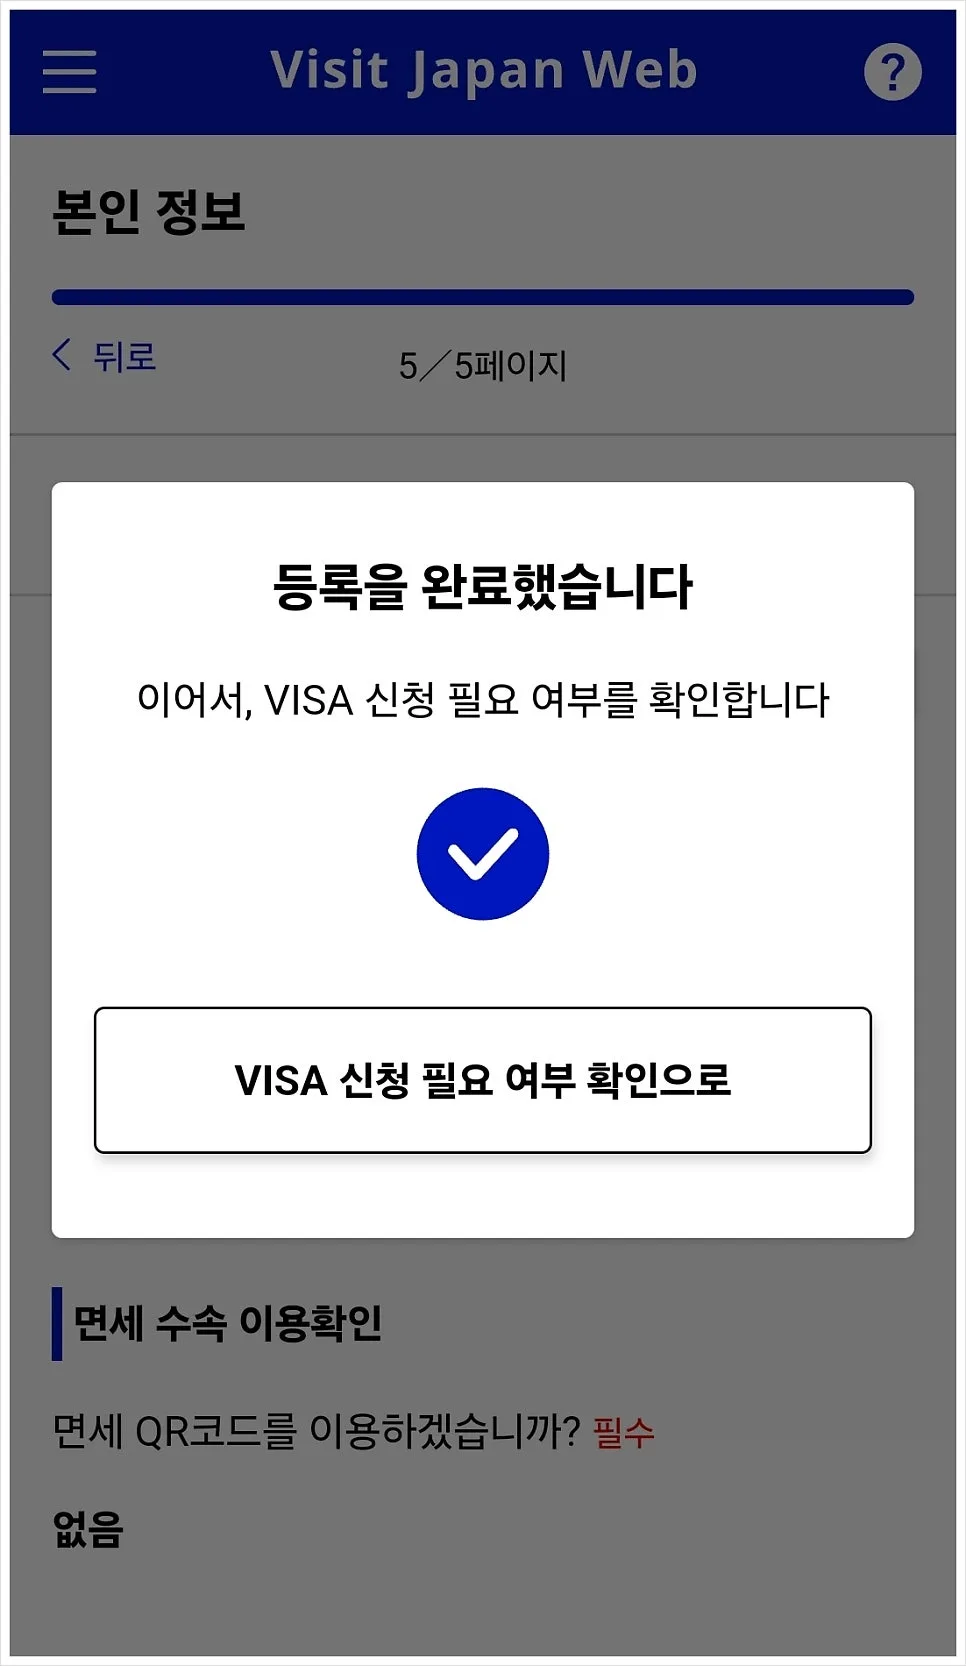
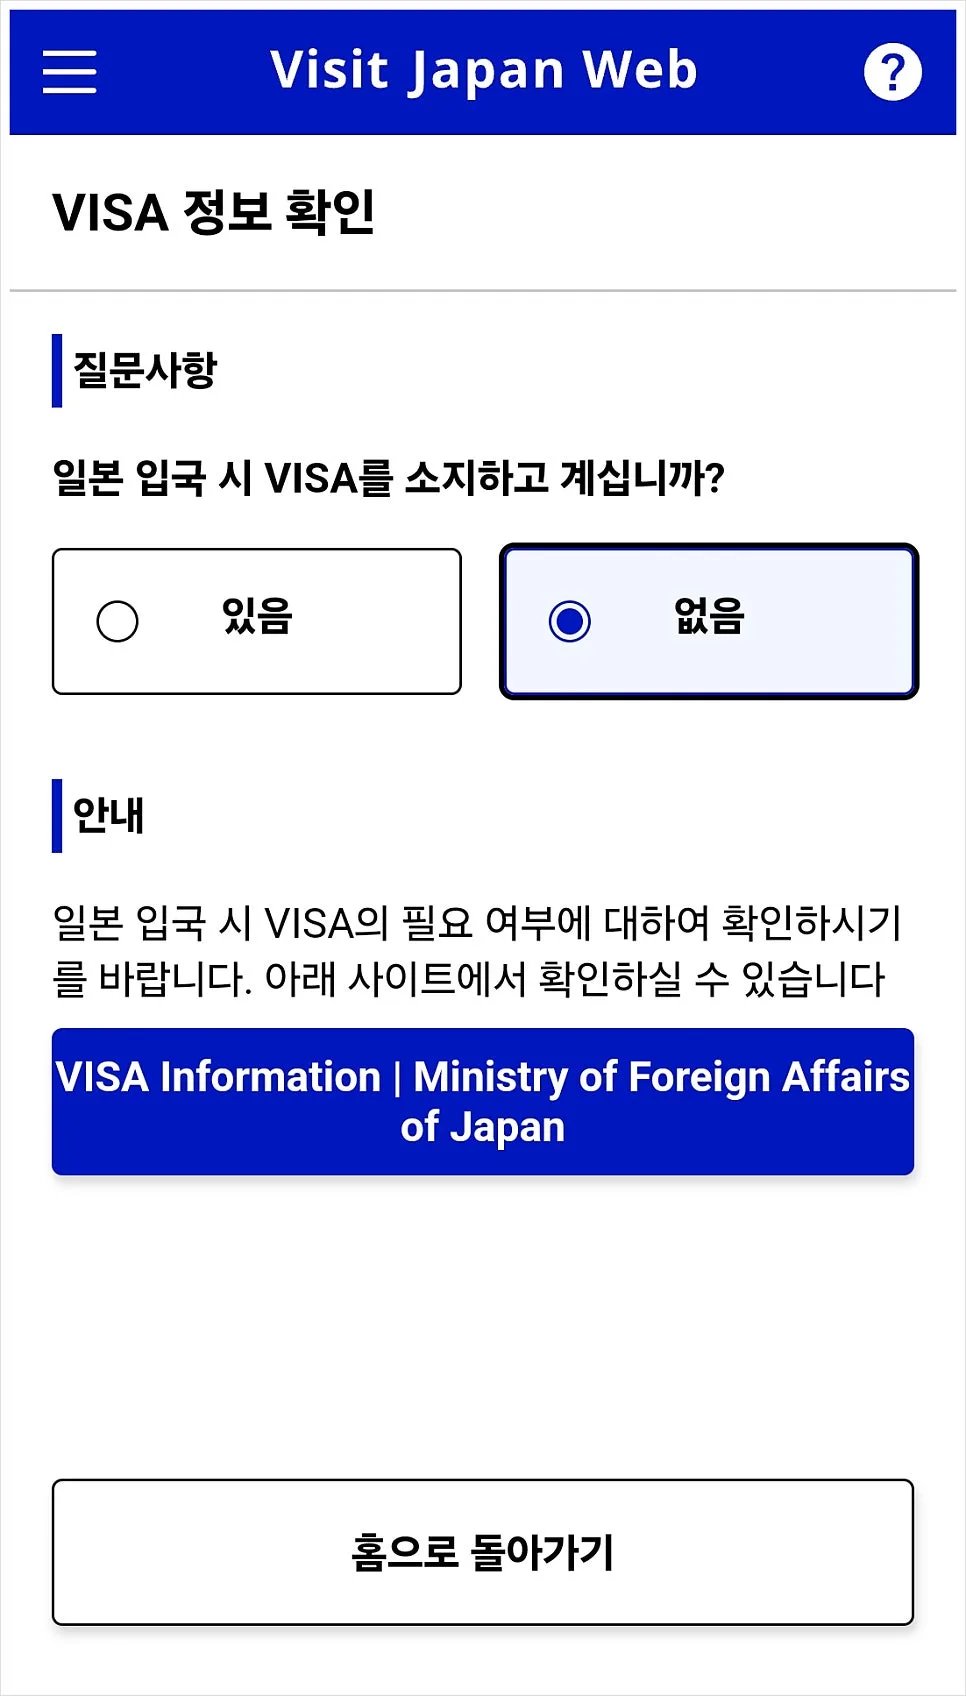
Once you finish registering your personal information, a pop-up like the one on the left will appear. Tap “Confirm,” then answer the next question, “Do you have a visa for entering Japan?” If you’re visiting as a regular tourist, select “No.”
When you return to the home screen, you’ll see that your personal information registration is complete.
If you’re traveling with family members, check section 2 below. If not, you can skip straight to section 3.
As a quick tip, if only adults with smartphones are traveling together, it’s usually easier for each person to register their own account separately. The accompanying family feature is most useful when you’re traveling with young children or older family members who may have trouble using a phone.
For example, if a married couple is traveling together and each person fills out their own Visit Japan Web form, there’s no need to register one another as accompanying family members.
2. Register accompanying family members
The process for registering accompanying family members is basically the same as registering your own information.
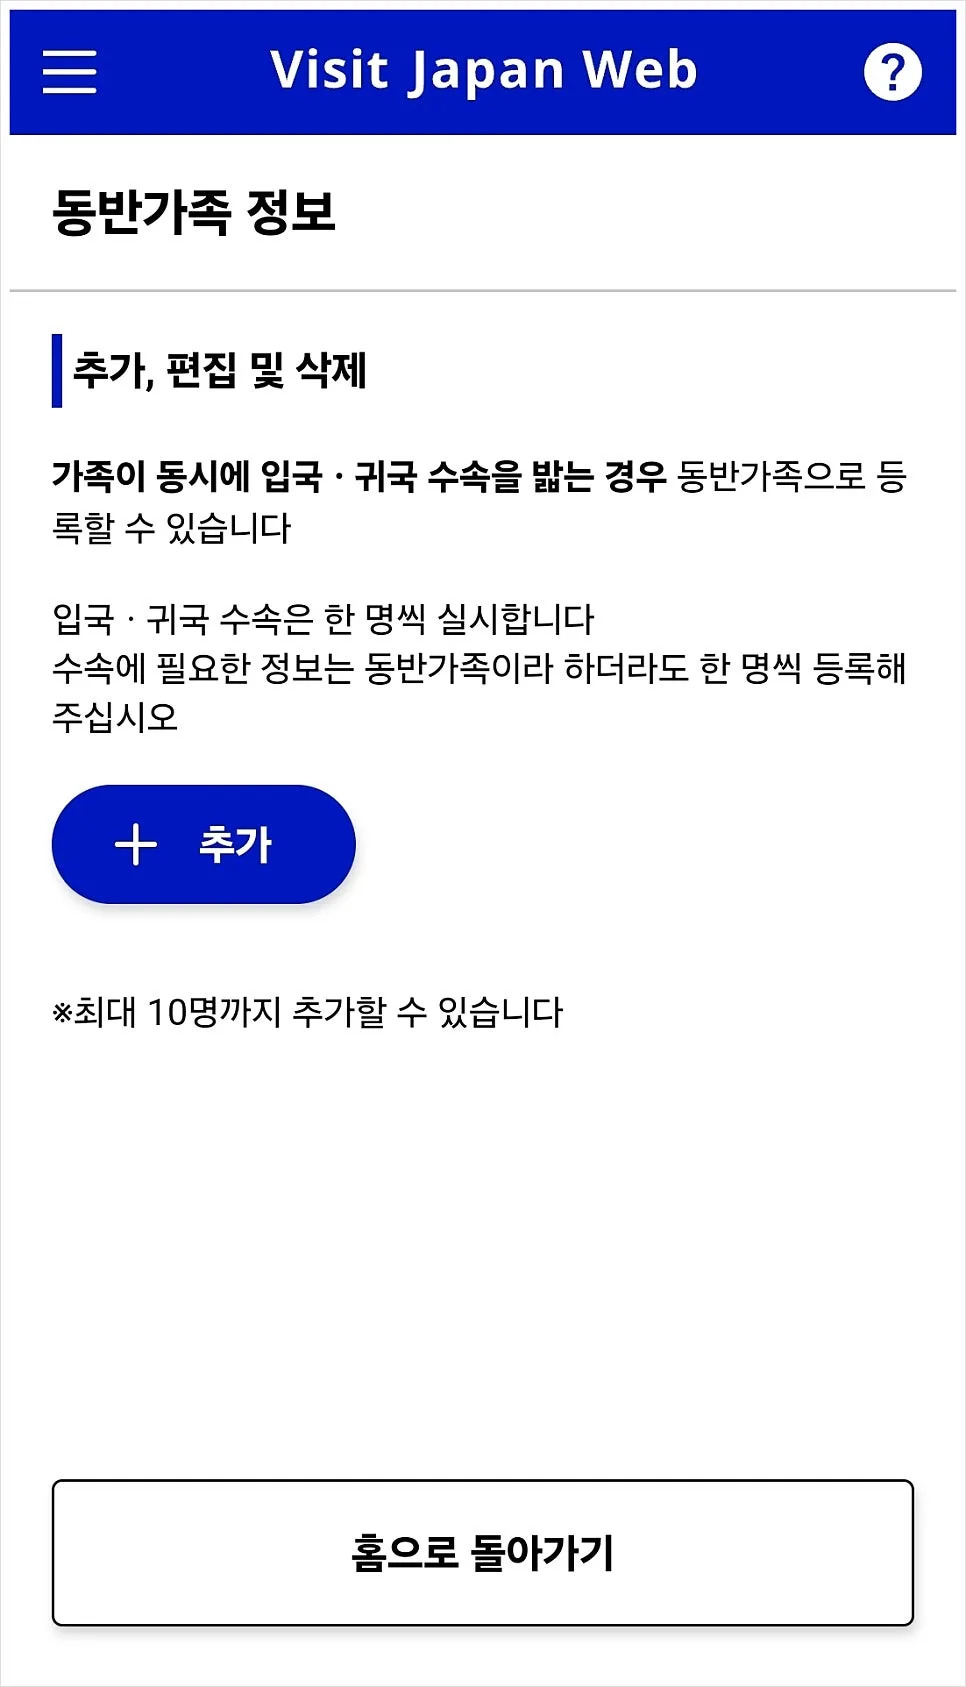
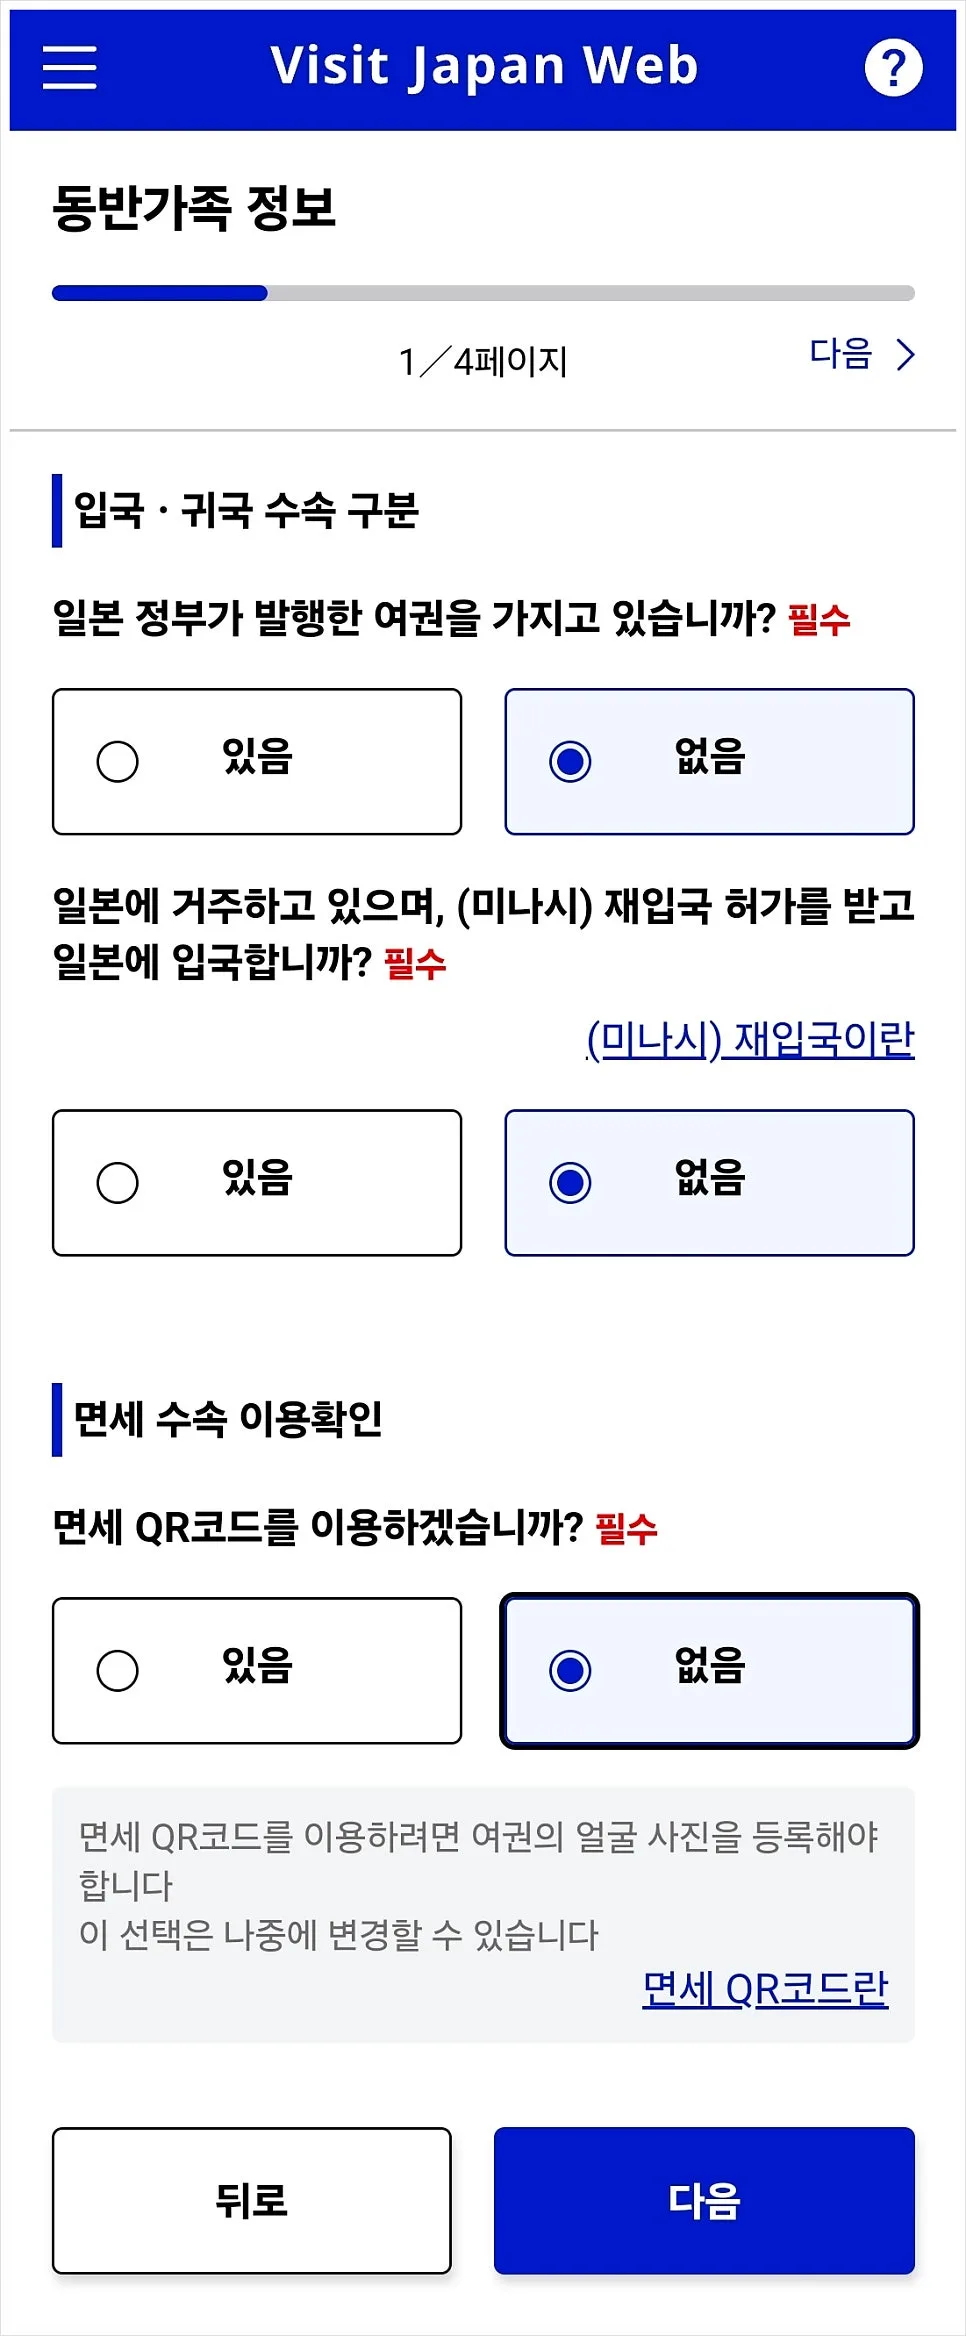
Just like with your own passport, you can either scan their passport or enter the details manually.
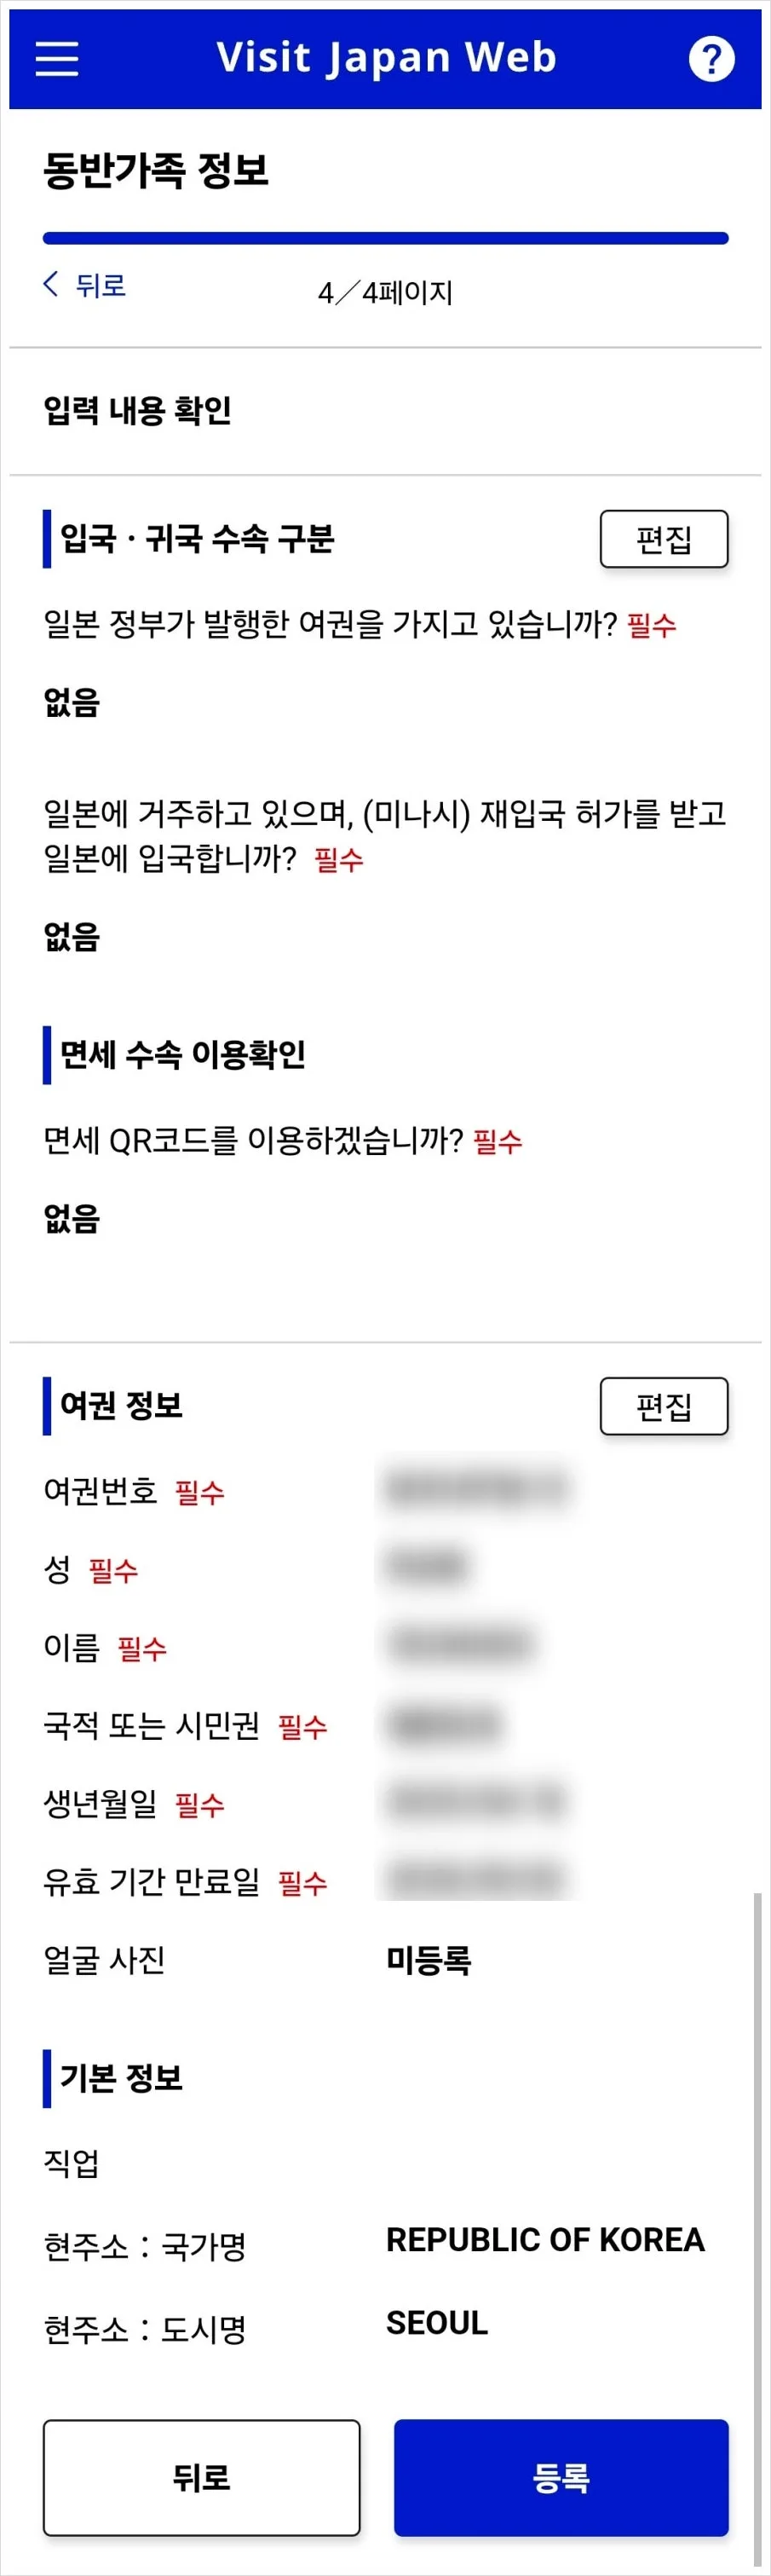
This is the screen you’ll see once the information has been entered.
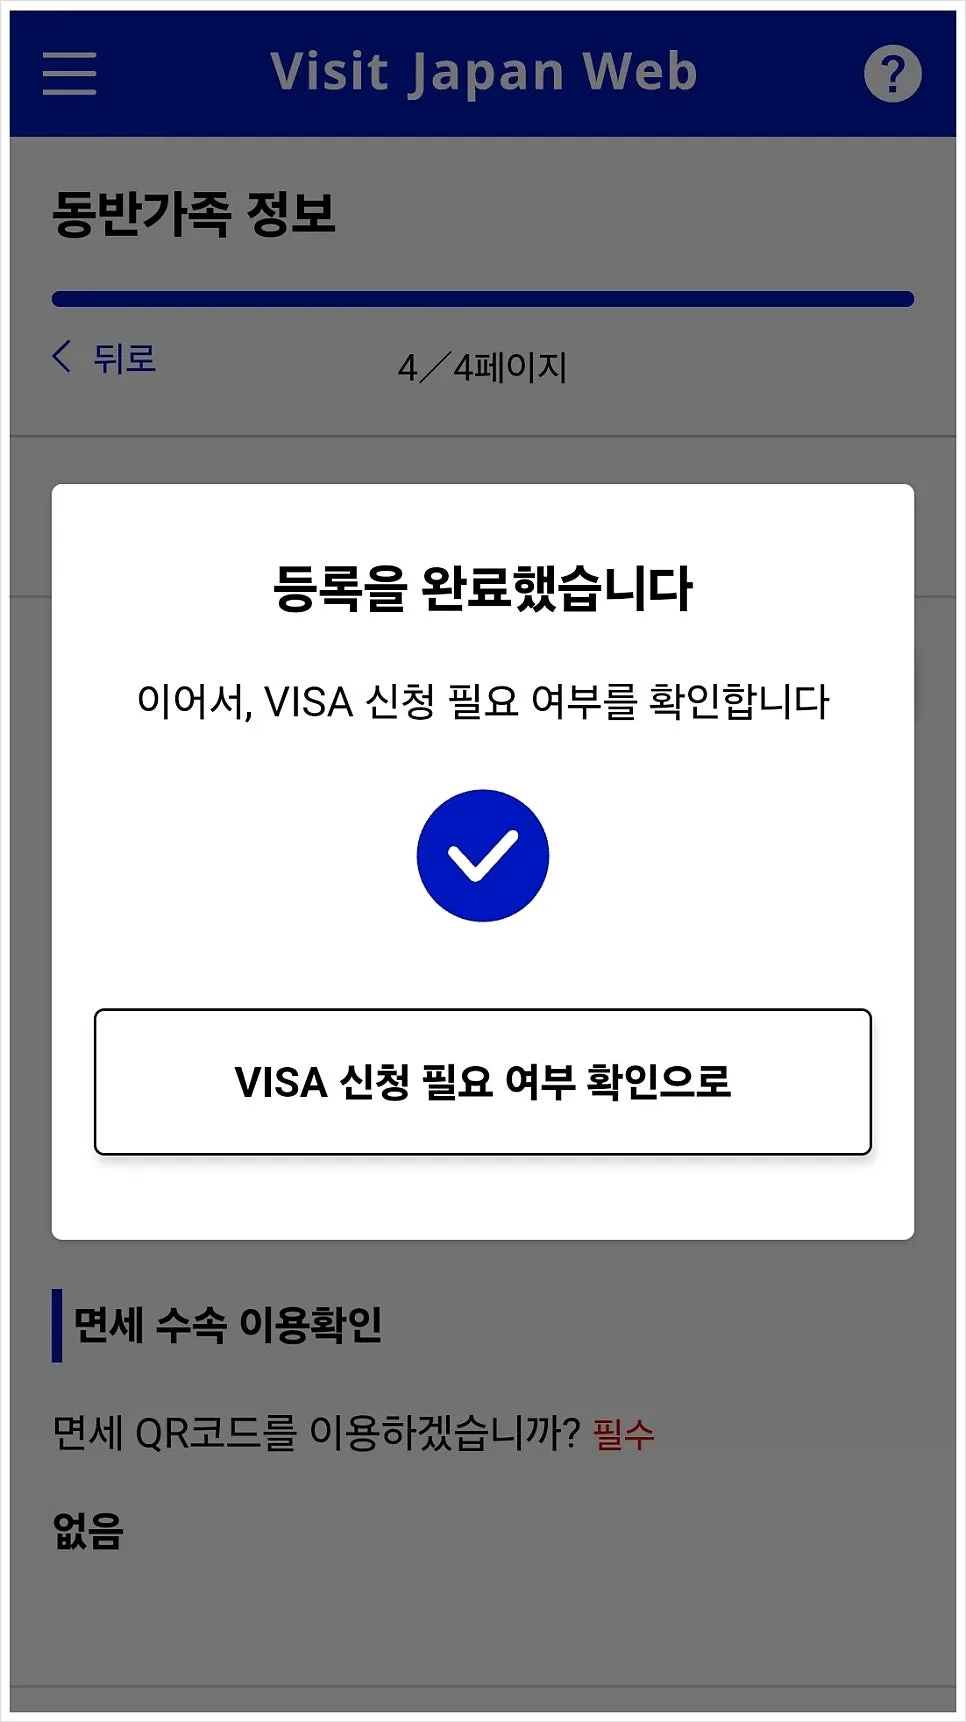
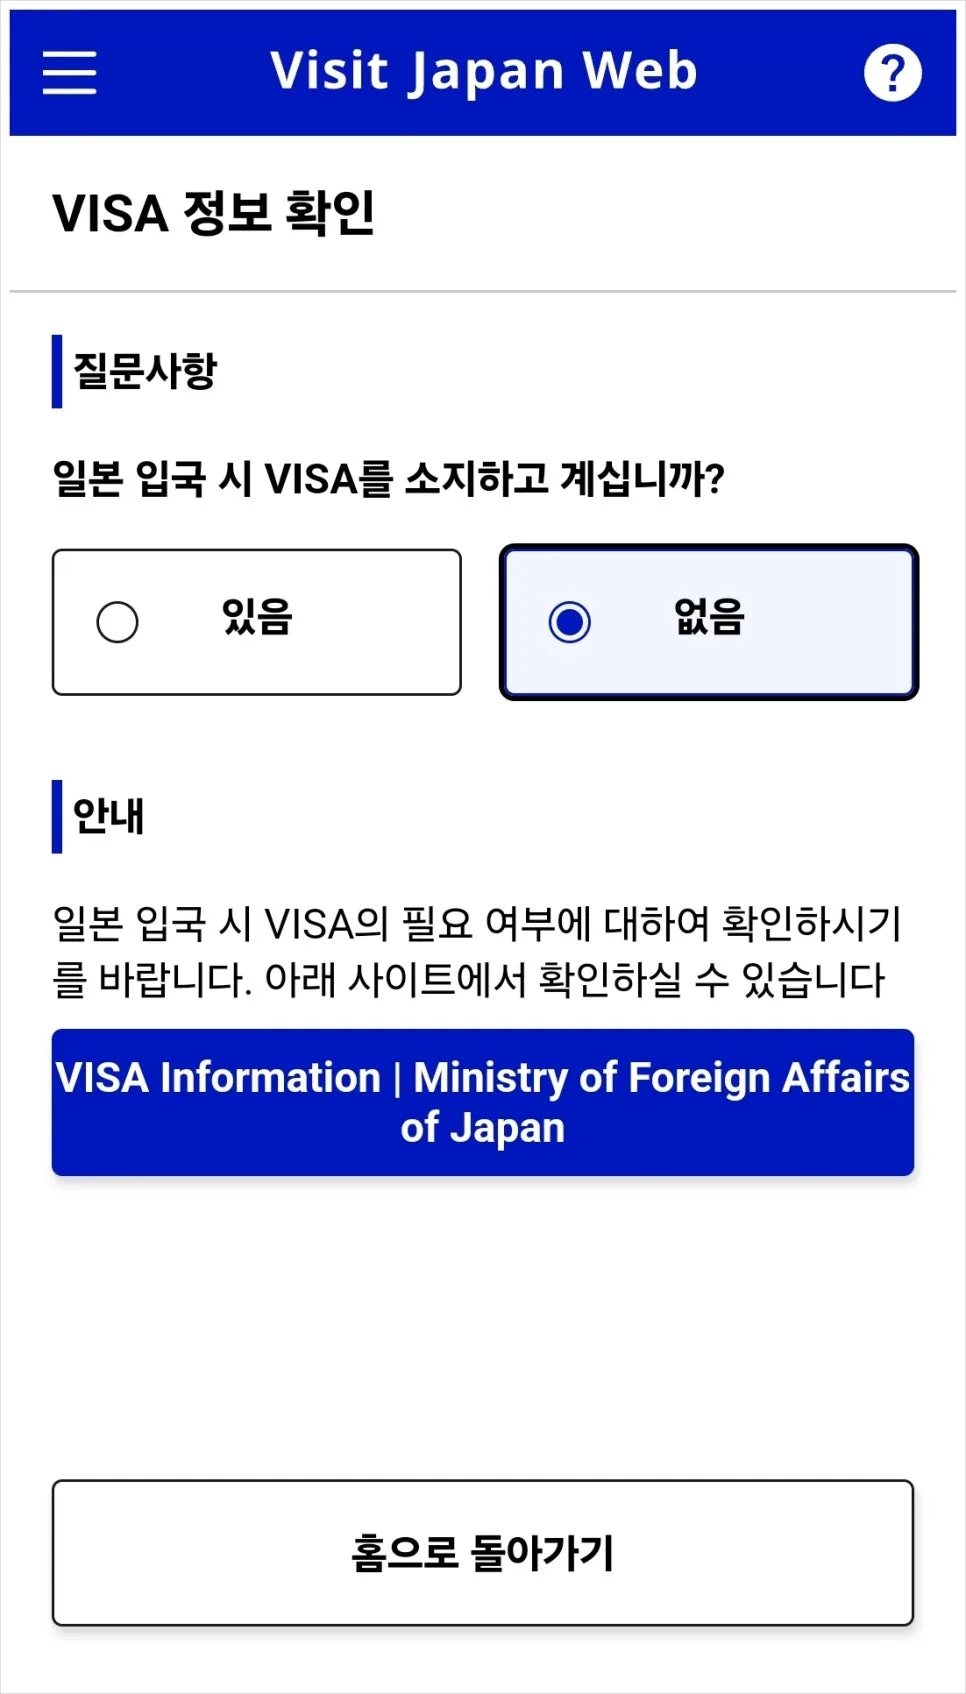
For the visa question, choose “No” here as well.
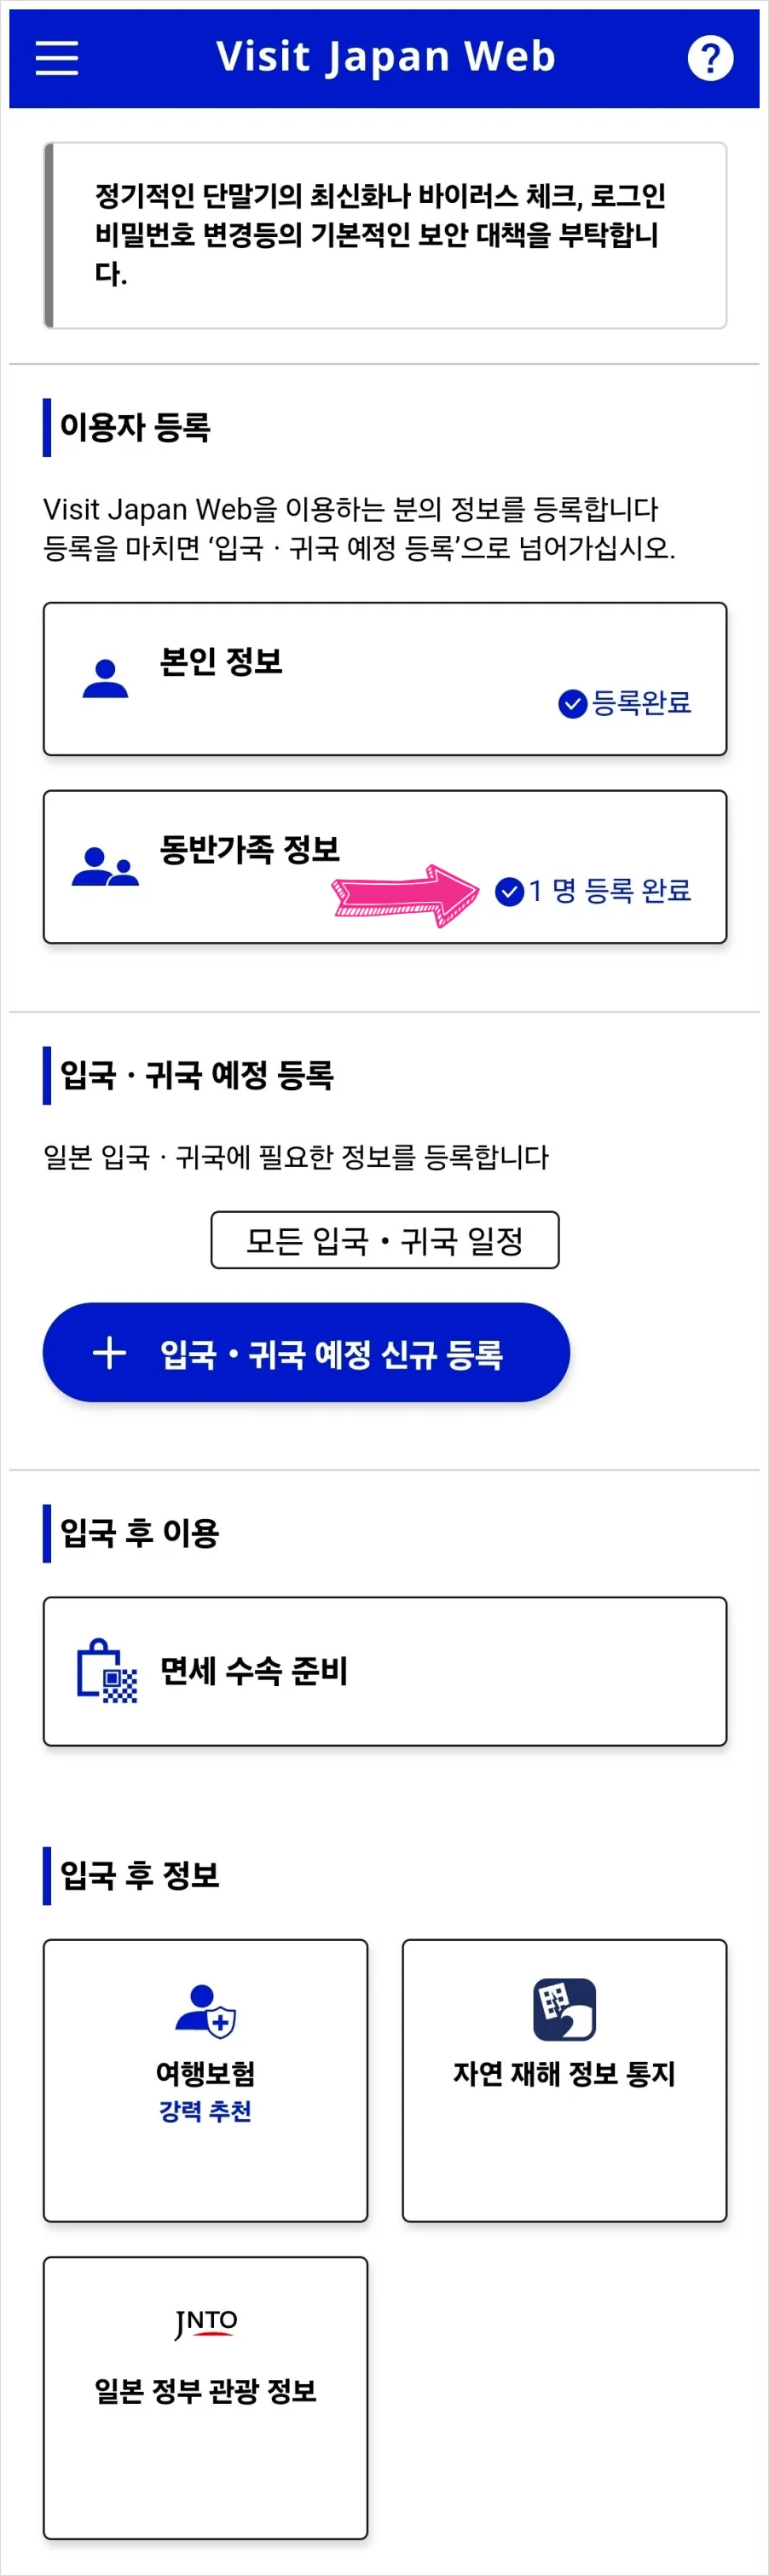
Then you’ll see “1 family member registered” under accompanying family members. If you’re traveling with multiple children or relatives, just repeat the same process for each person.
Next, tap “Register planned entry/return.”
3. Register your planned entry/return
This is the step where you enter the details for your current trip.
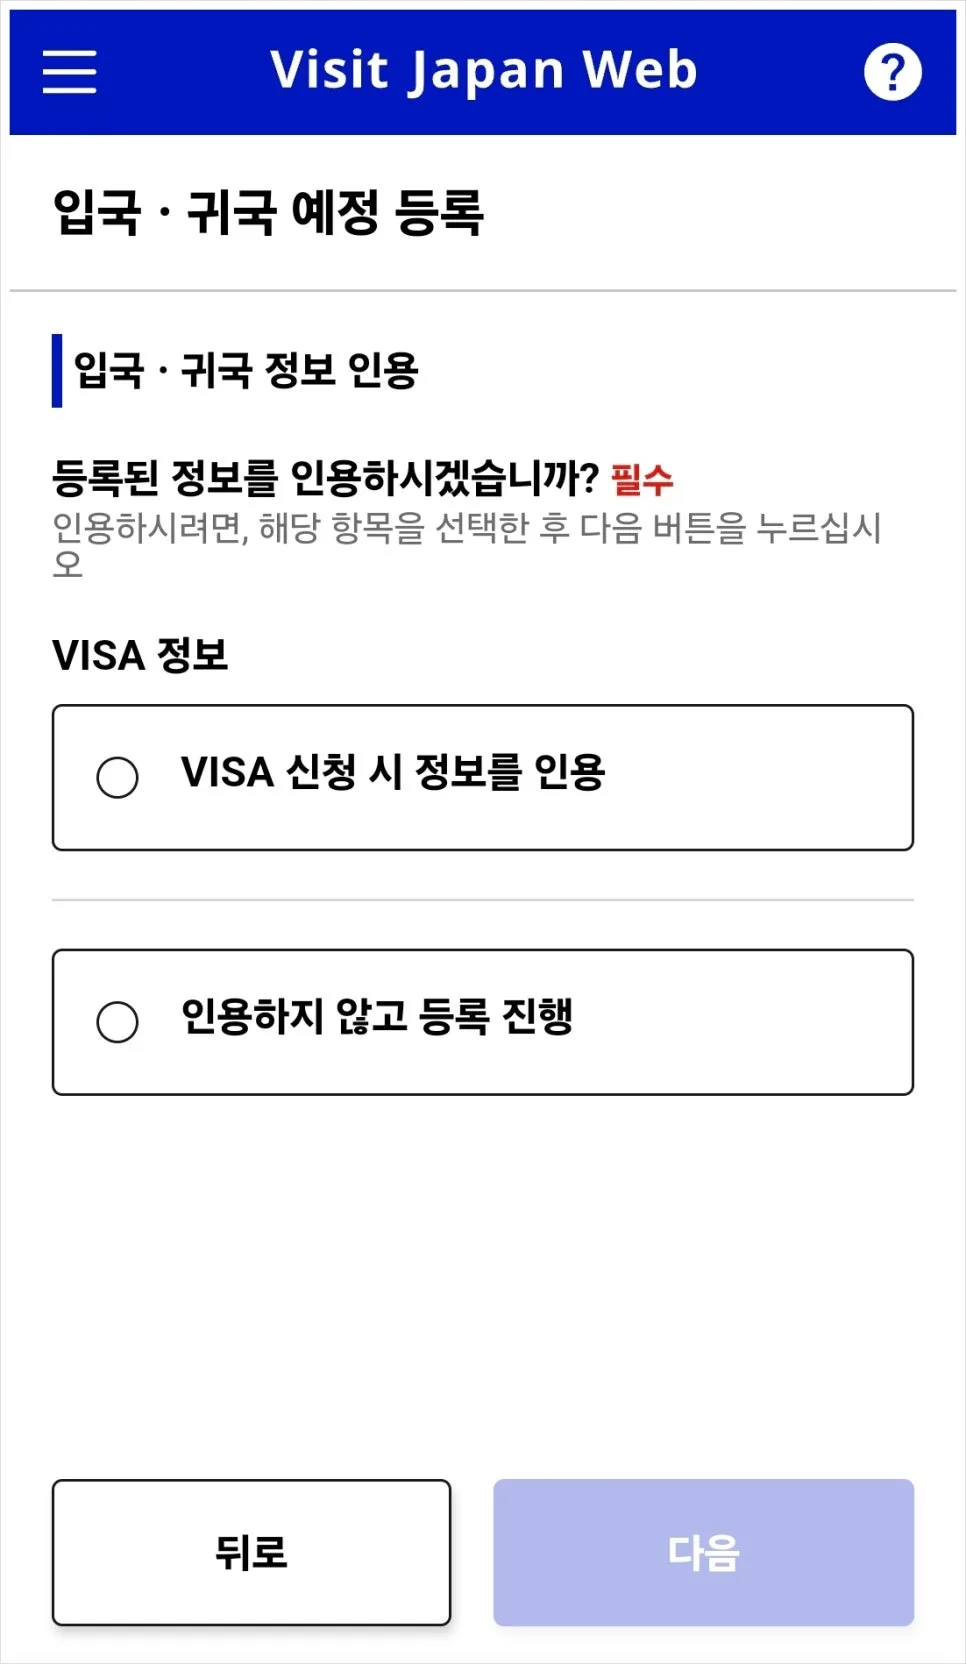
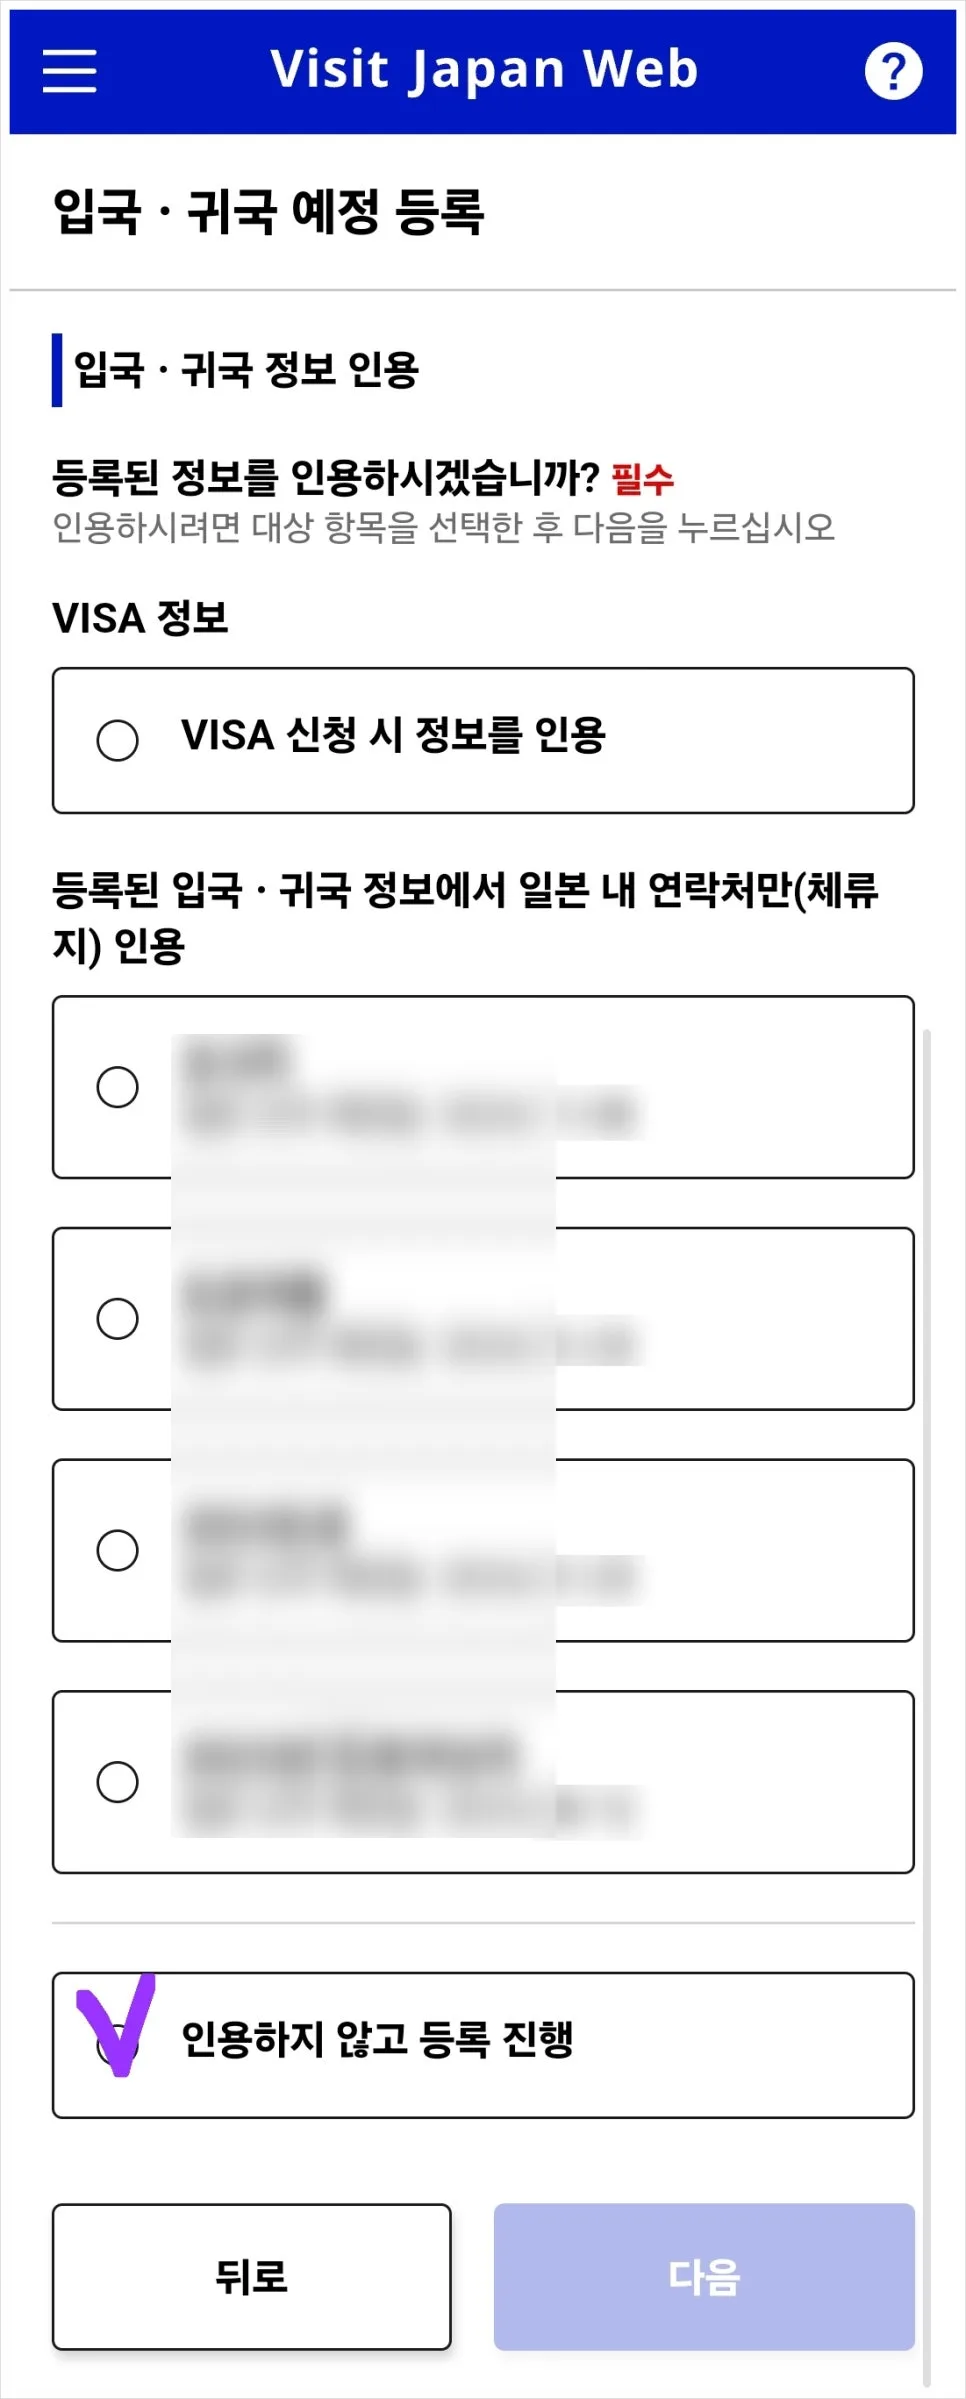
If this is your first time, you’ll probably only see two options like the screen on the left. For the visa information transfer question, choose “Proceed without quoting.”
If you’ve entered Japan before and used Visit Japan Web then too, your previous arrival records may appear. You can ignore them and still choose “Proceed without quoting.”
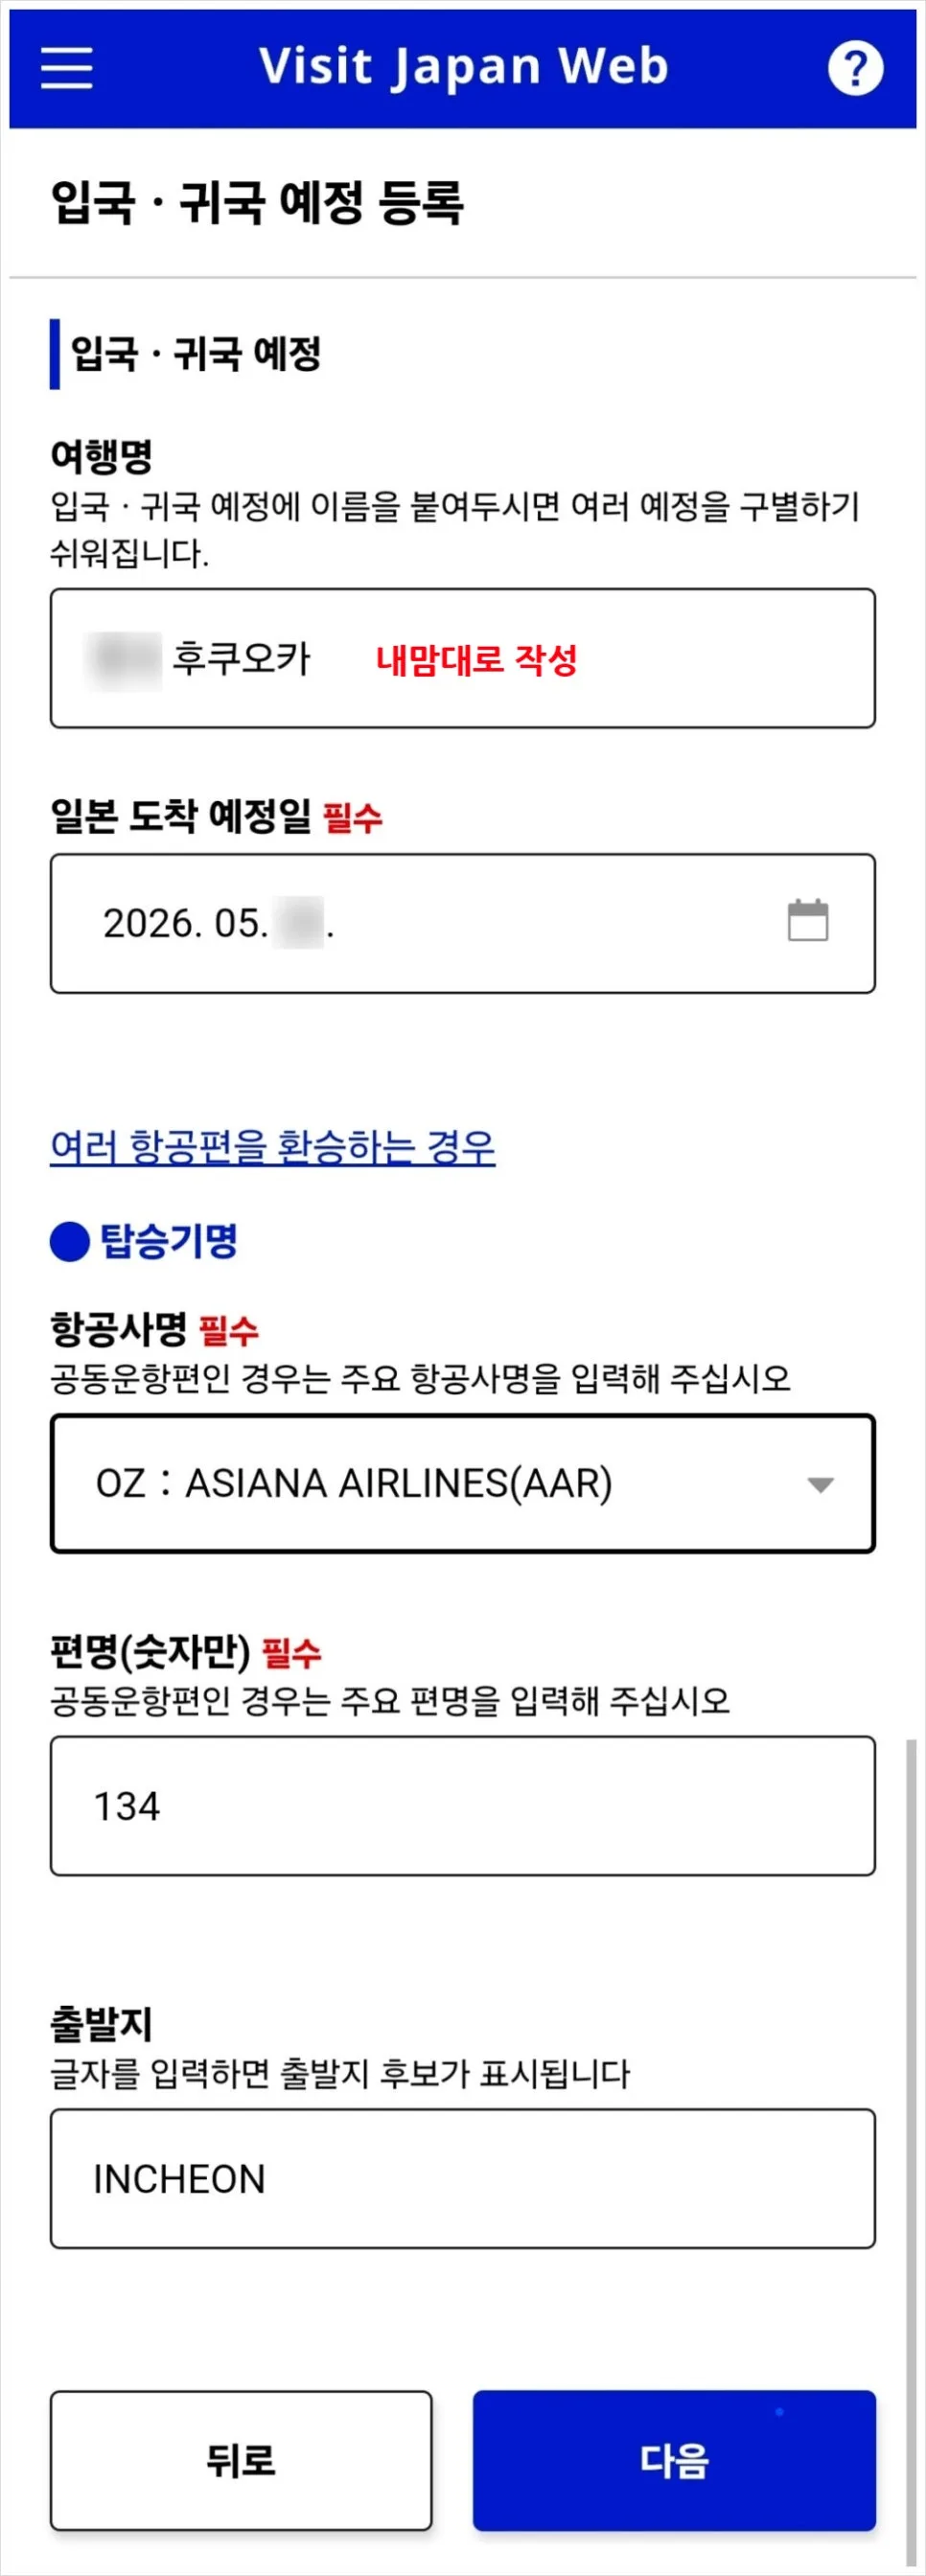
Next, you’ll reach the page where you enter your trip name and flight details. Trip namecan be anything you want, but it may be visible to immigration officers. Just make it something easy for you to recognize and not too strange.
For example: “Sapporo in July” or “Okinawa with Mom”
Planned date of arrival in Japanshould be the actual date your flight lands. If your flight departs before midnight but arrives after midnight, choose the arrival date, not the departure date.
Airline namecan be selected from the list, but since there are so many airlines worldwide, typing it in directly is often faster.
Examples include Korean Air KE, Asiana Airlines OZ, Jeju Air 7C, Jin Air LJ, T’way Air TW, Air Busan BX, Air Seoul RS, EastarJet ZE, Air Premia YP, Japan Airlines JL, All Nippon Airways NH, and Peach MM.
Flight numbershould be entered as the 3- or 4-digit number only, for example2147for KE2147.
Departure cityrefers to the airport city, not your home address. So enter INCHEON, BUSAN, CHEONGJU, DAEGU, MUAN, or JEJU as applicable. If you’re departing from another country, enter the city where that airport is located.
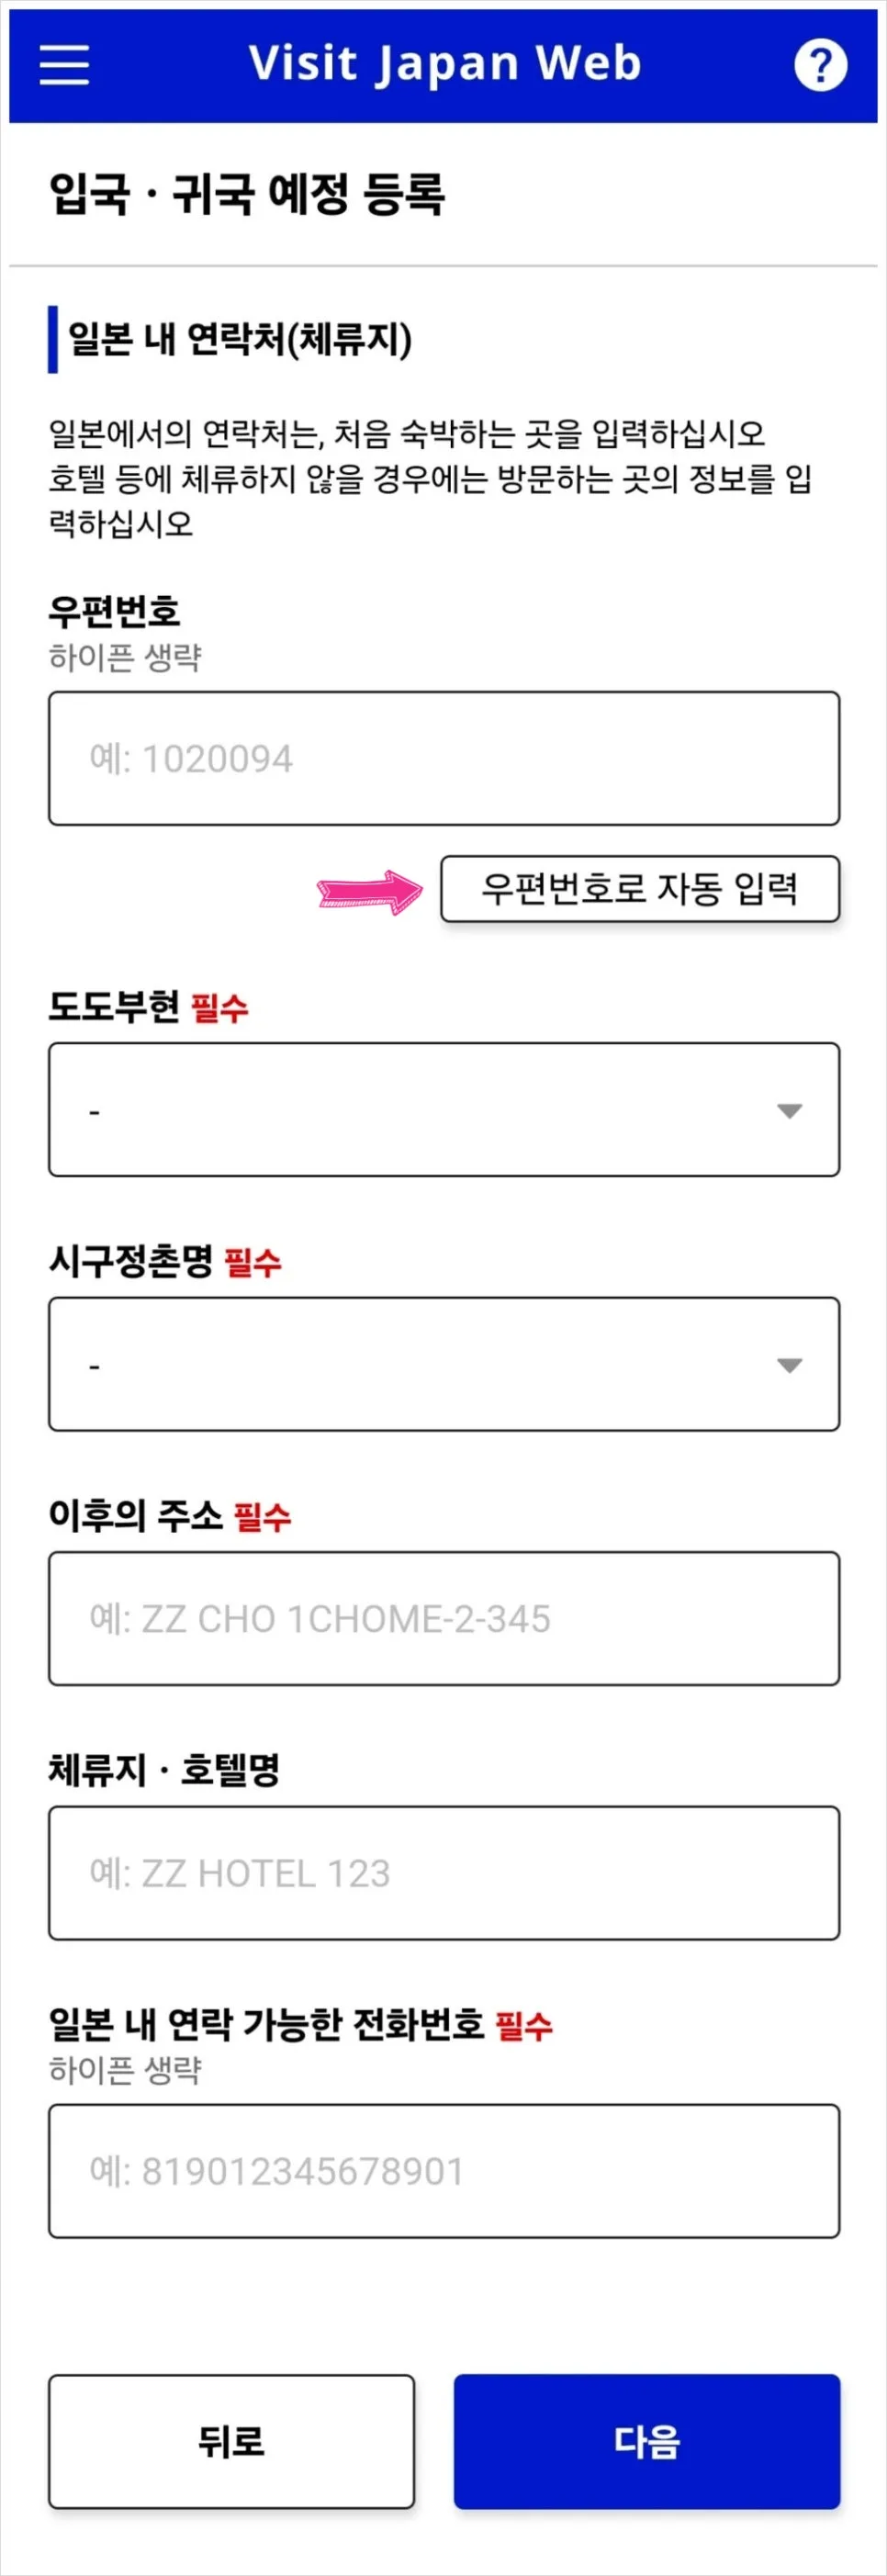
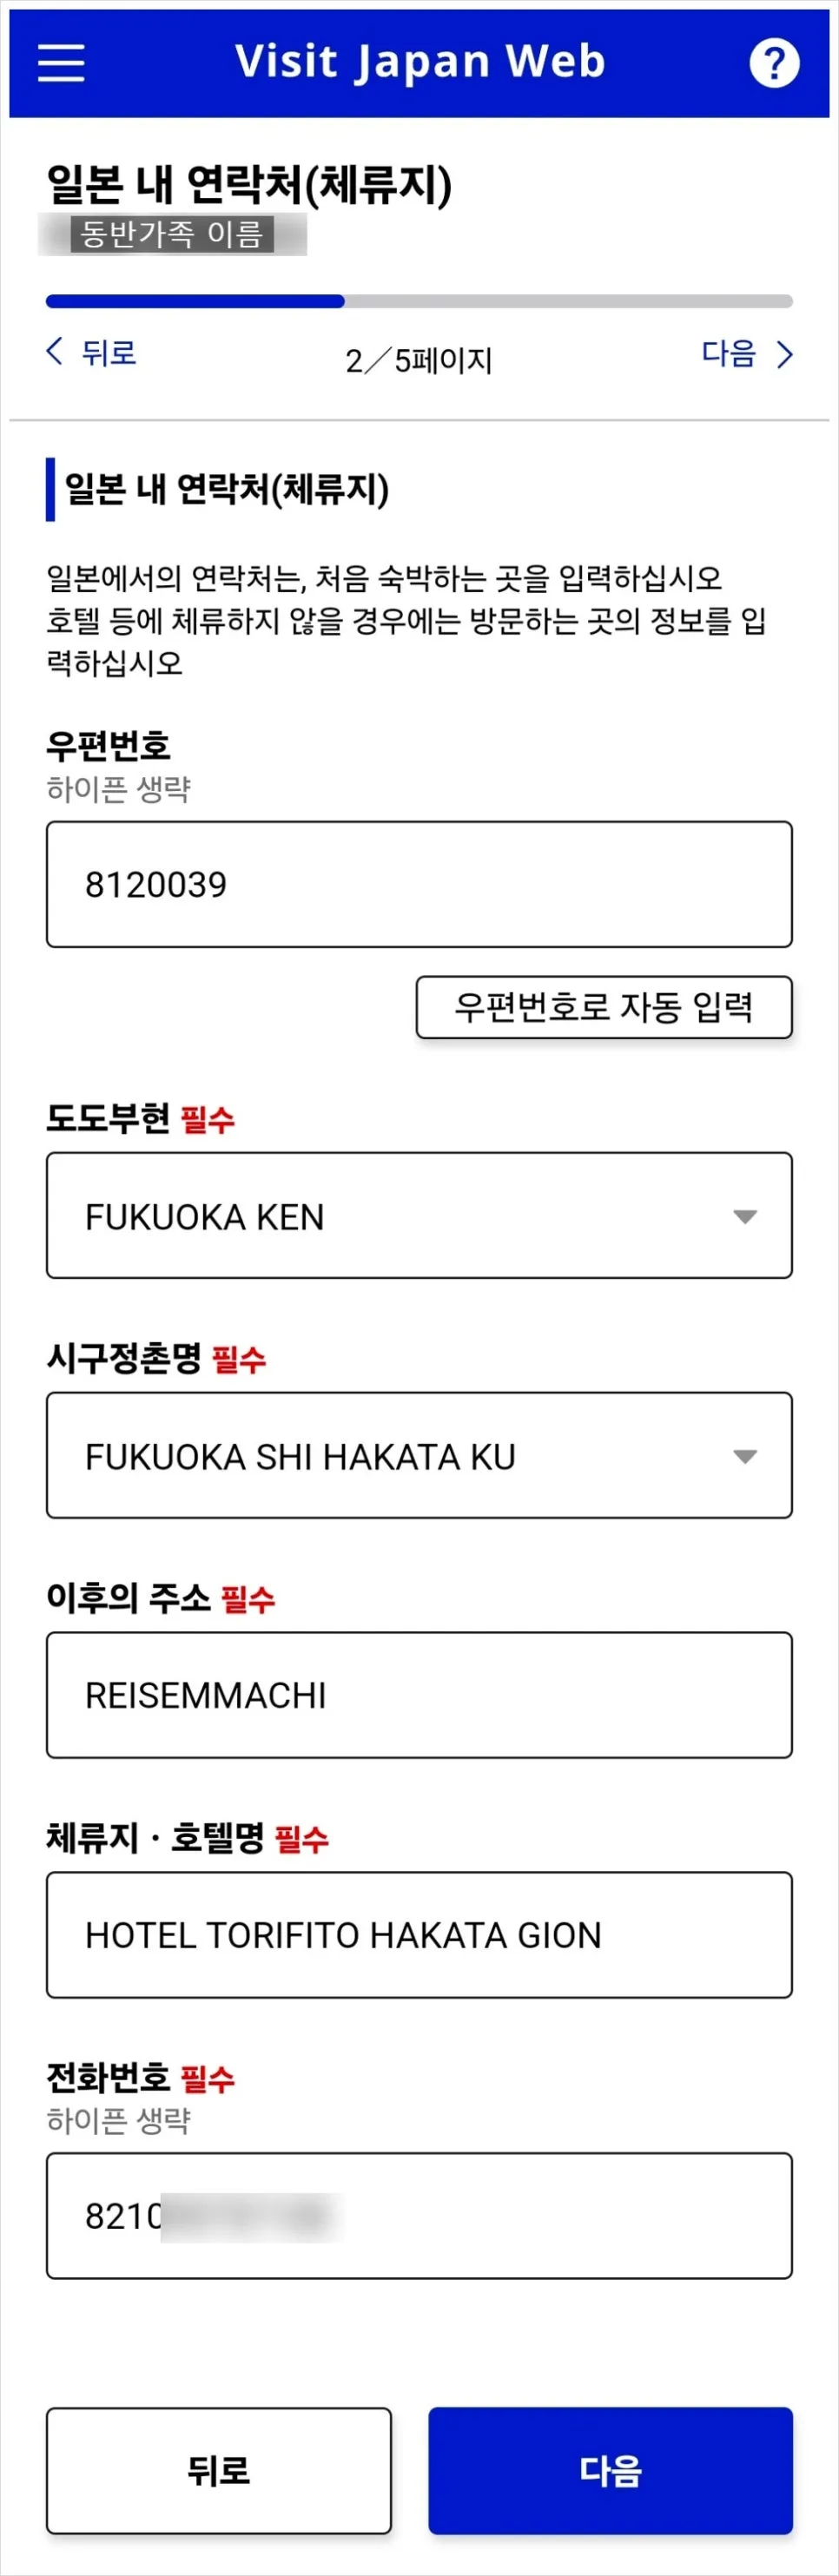
Next, you’ll need to enter your address and contact information in Japan. You can type everything manually, but it can feel surprisingly tricky the first time, so using the “Auto-fill by postal code” feature is much easier.
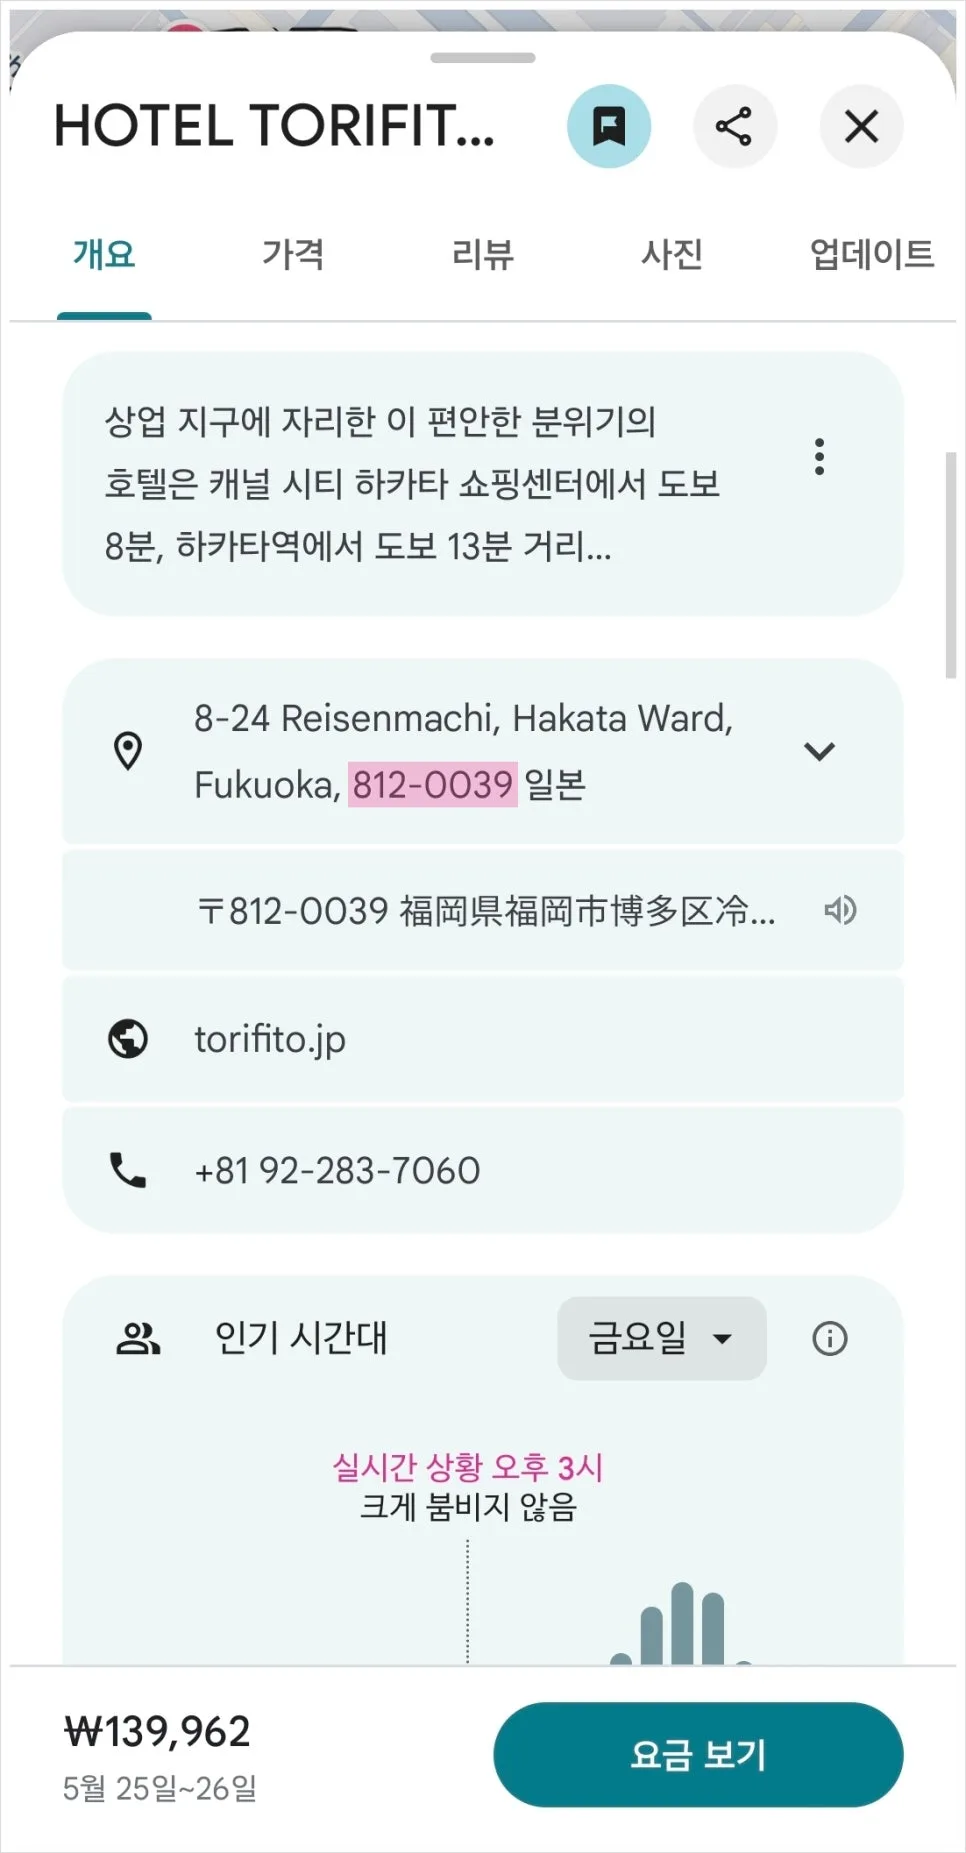
If you search for your hotel, Airbnb, or other accommodation on Google Maps, you’ll usually see a 7-digit postal code at the end of the address.
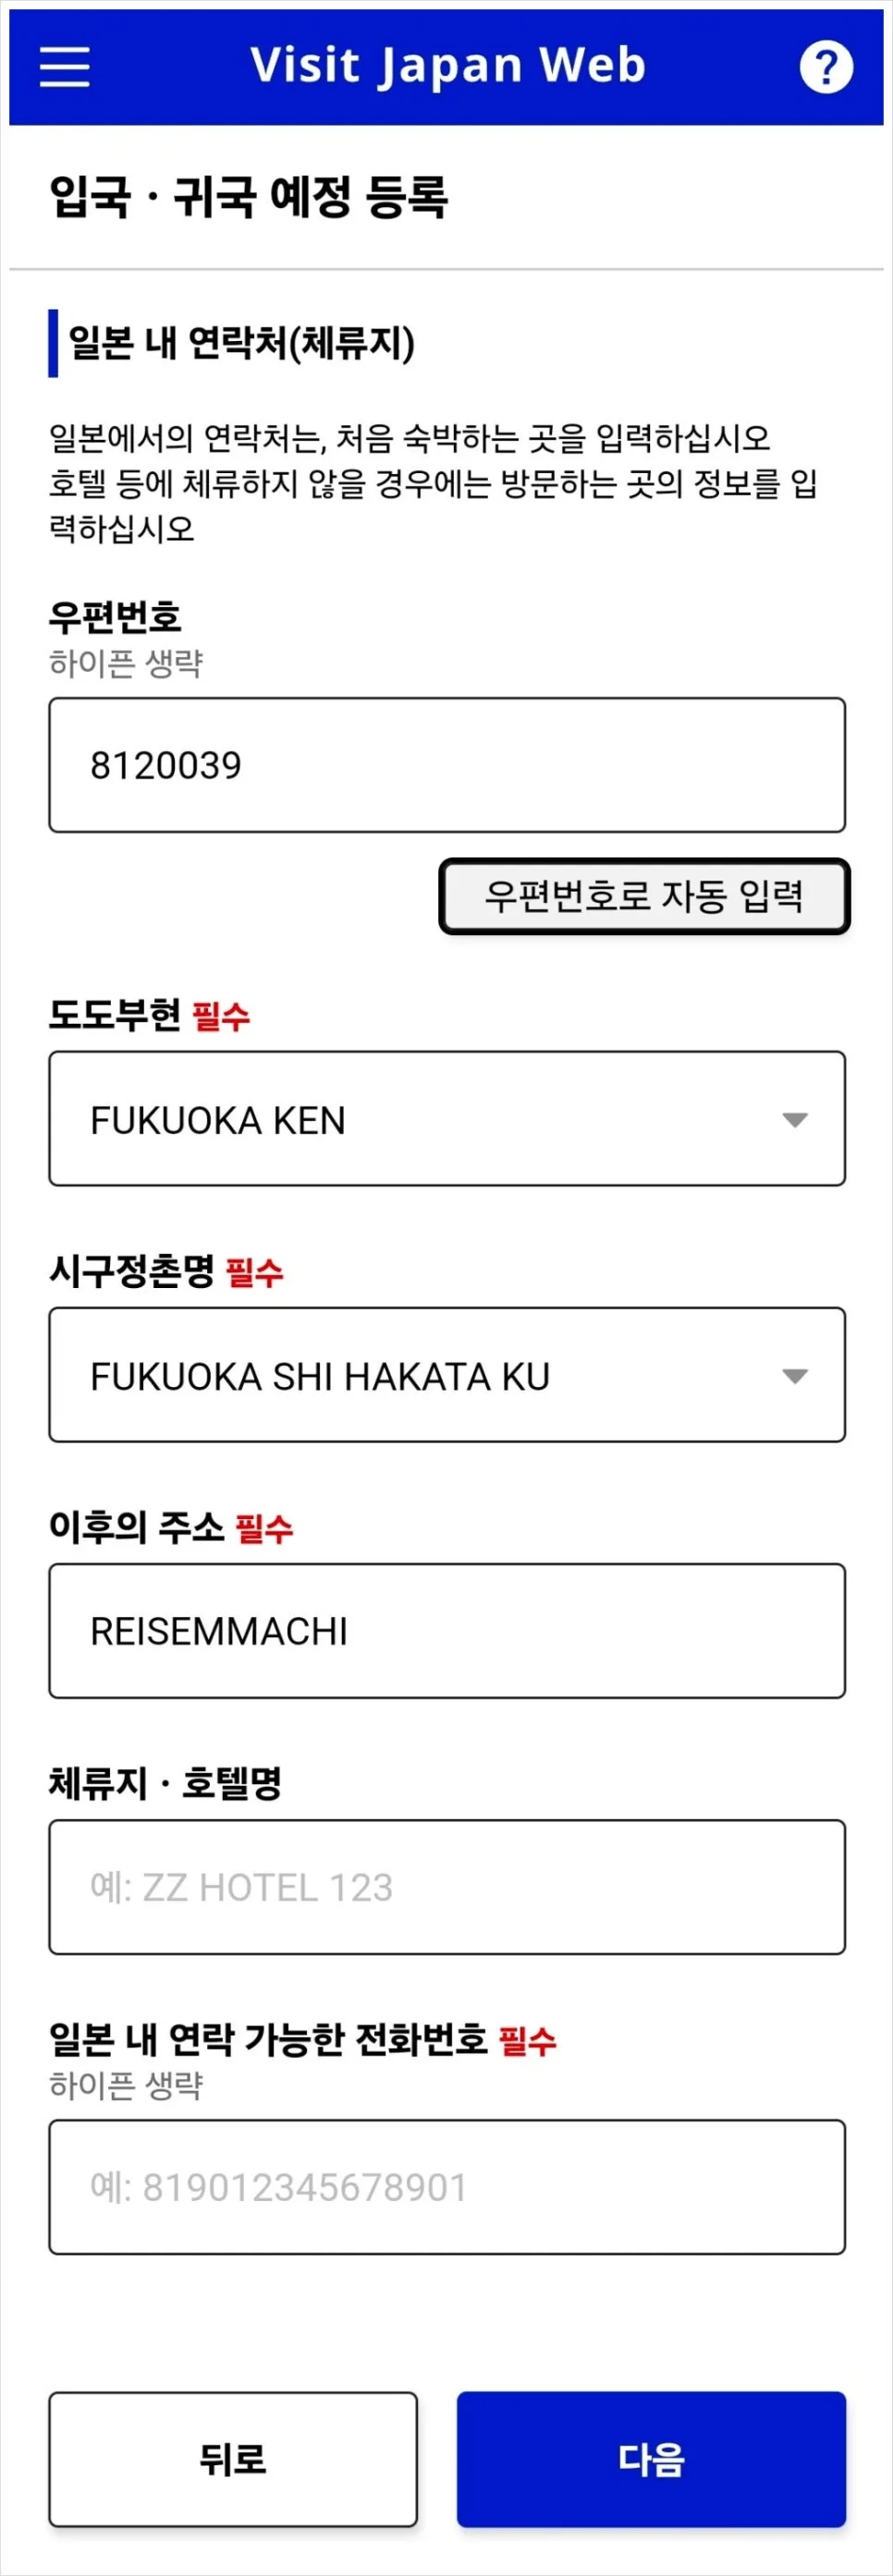
Enter that postal code without the hyphen and tap “Auto-fill,” and the top three address fields will populate automatically.
After that, for the hotel name and phone number,you can either enter the hotel’s contact information or use your own number in the format 82)10-XXXX-XXXX.
If you don’t have any accompanying family members, your itinerary registration is finished here. If you do, there’s one more step below.
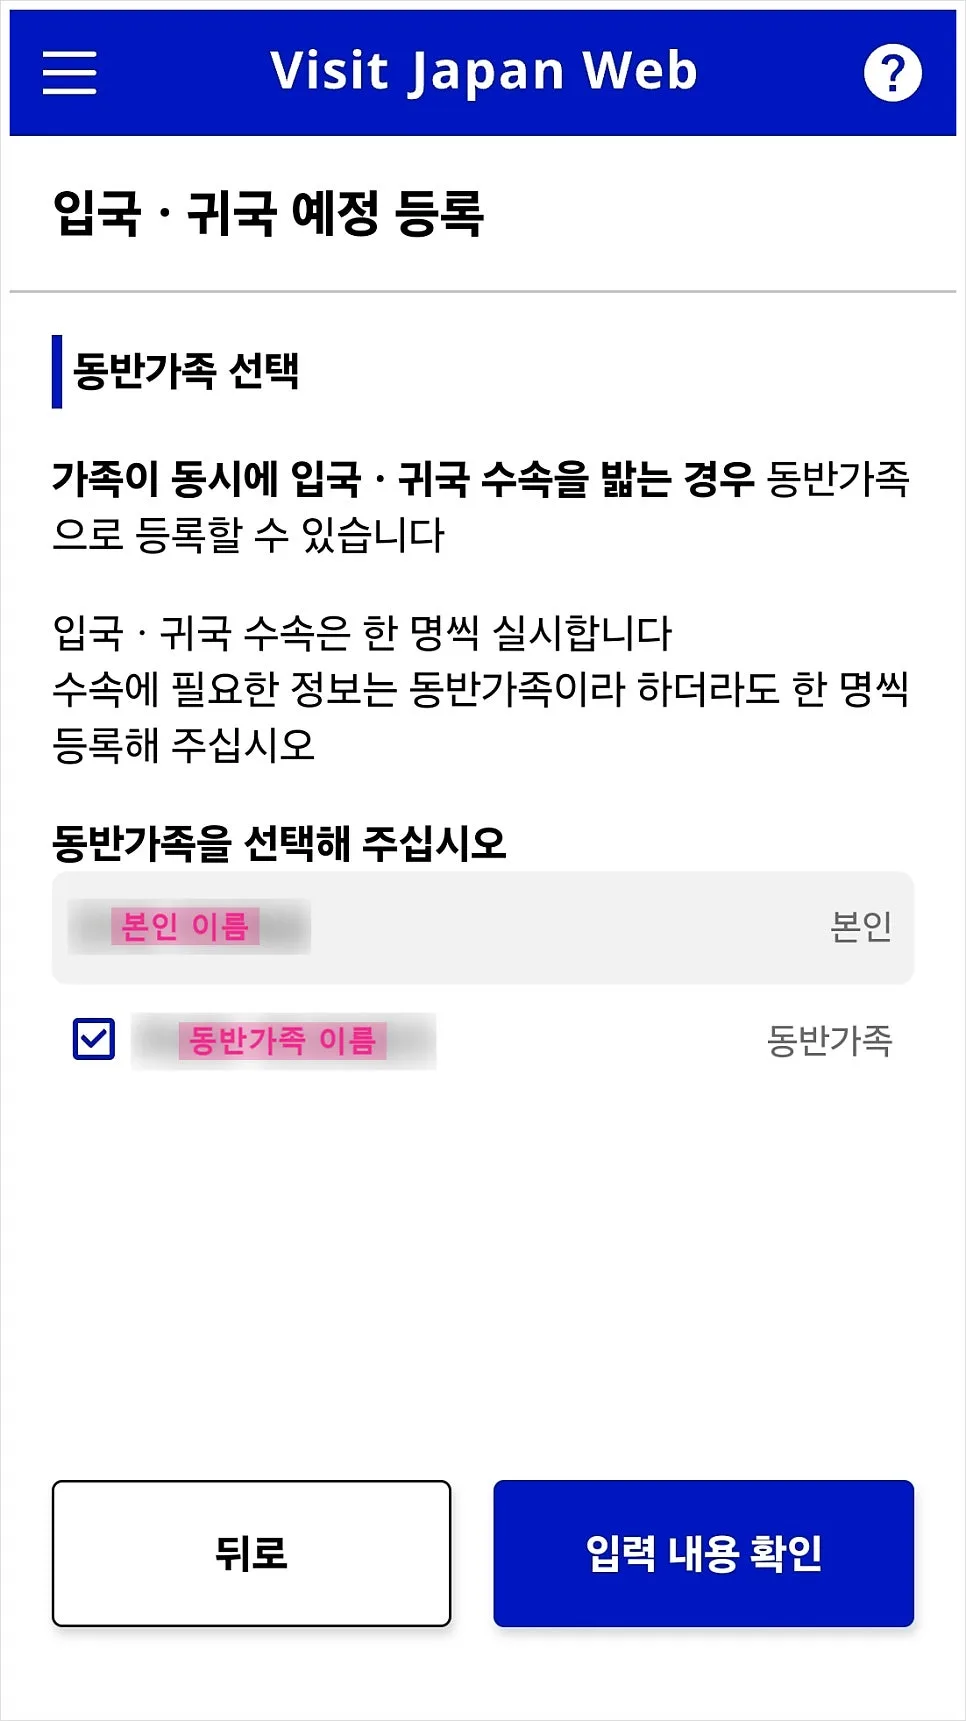
Check the box for the accompanying family member and tap confirm.
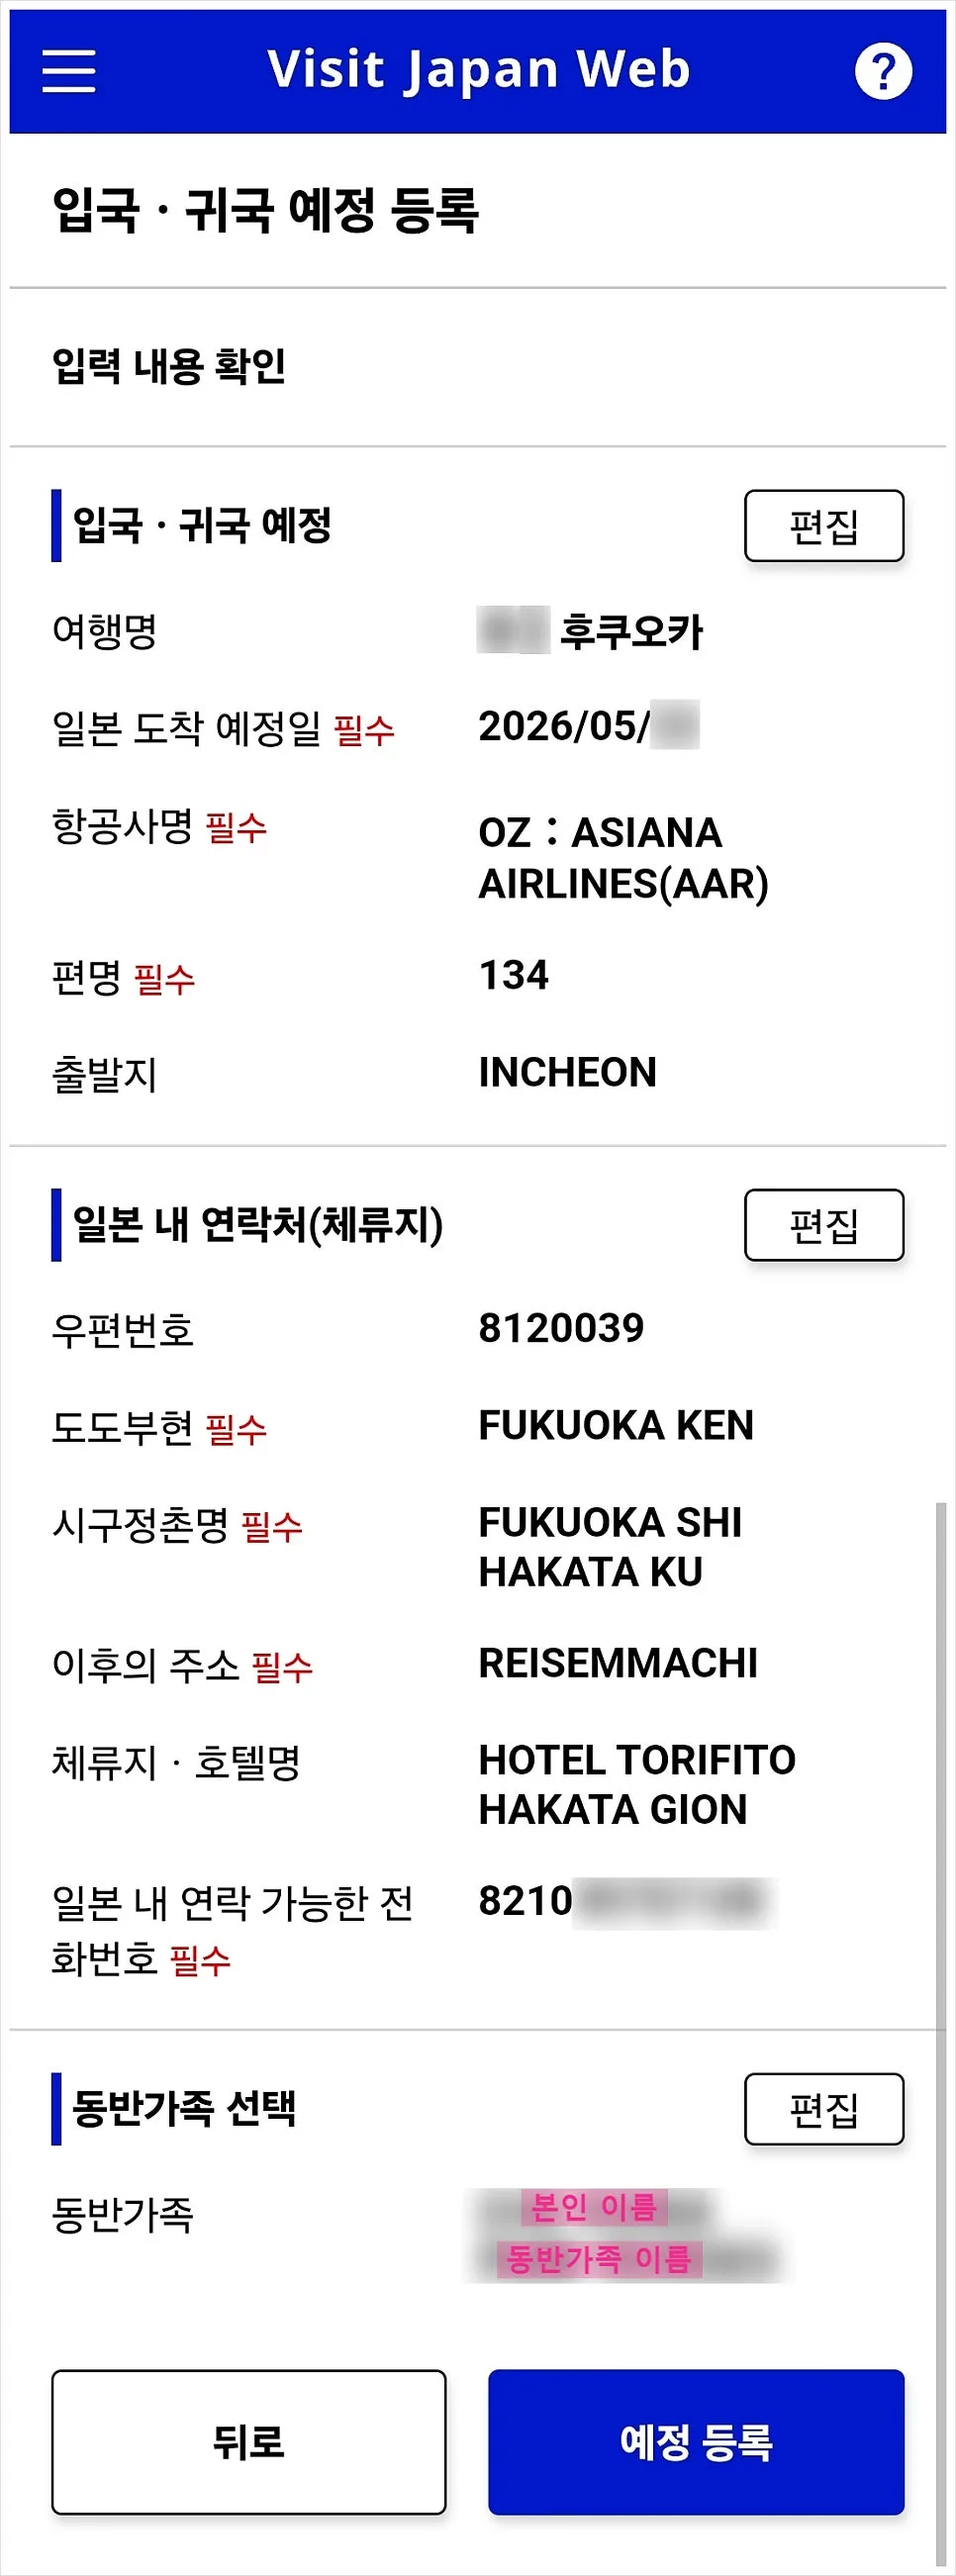
This is the page where you review all the information you entered.
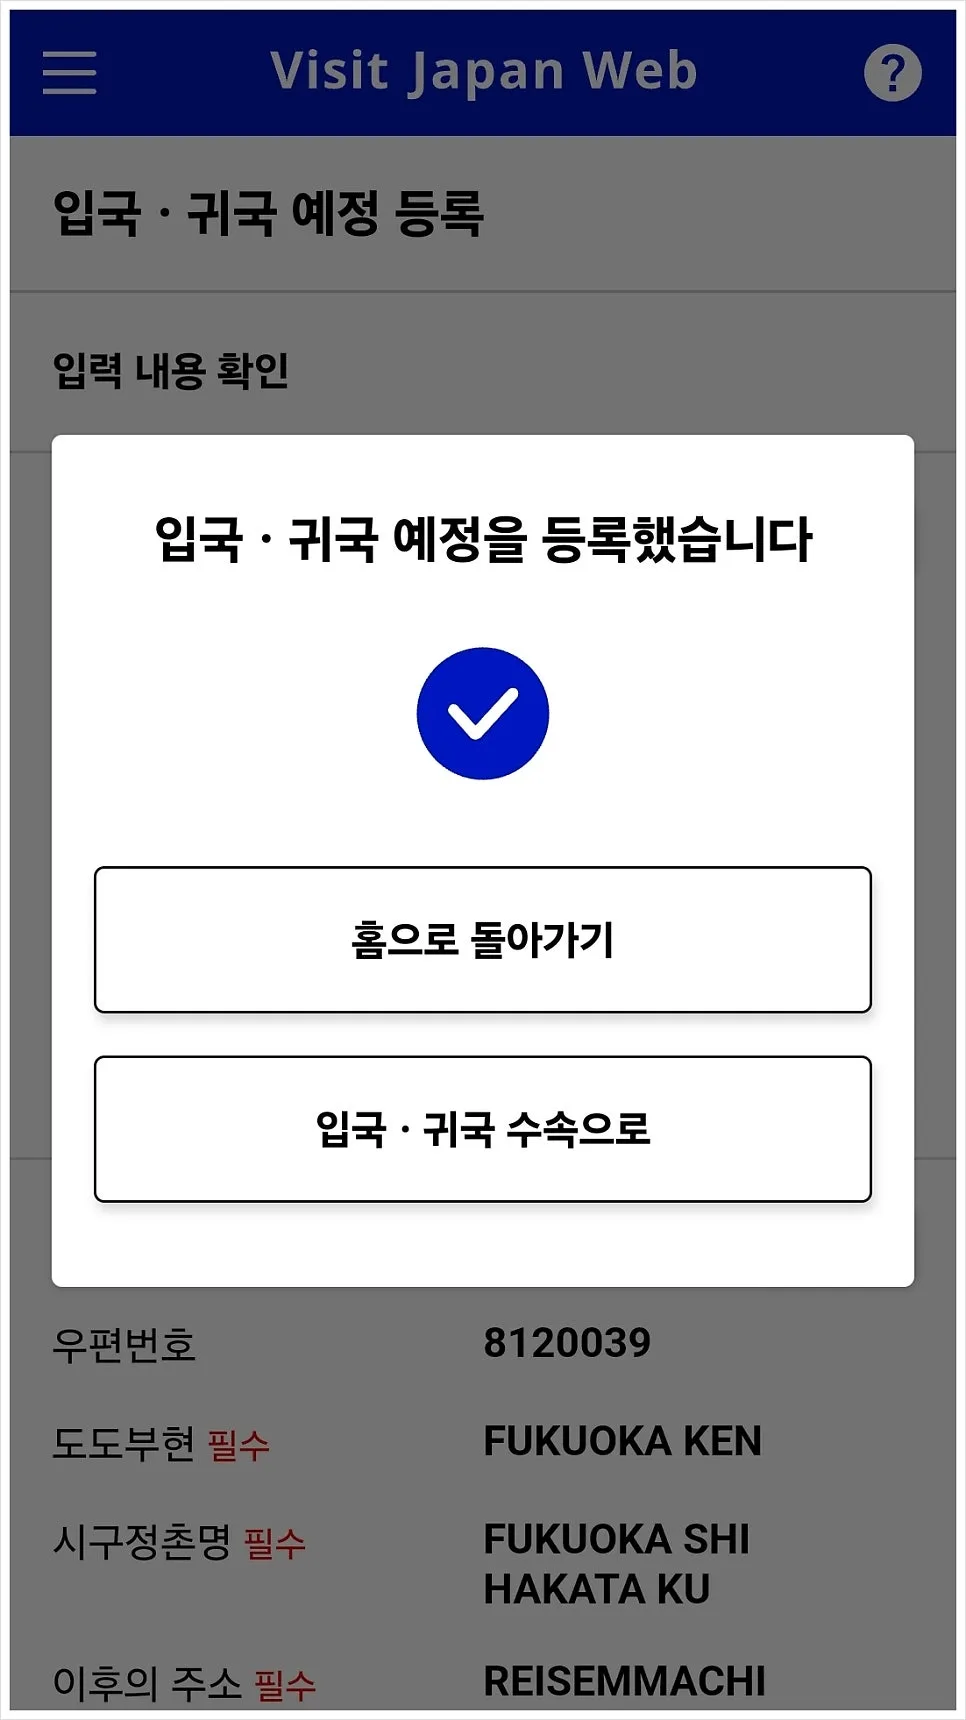
In the pop-up window, tap “To entry/return procedures.” Even if you accidentally go back to the home screen, that’s okay—you can simply tap immigration and customs from the home page and continue there.
4. Complete Japan arrival procedures
Now it’s time to fill out the arrival form. Here, “return” refers to Japanese nationals returning to Japan after traveling abroad. It does not apply when a Korean traveler returns to Korea after visiting Japan.
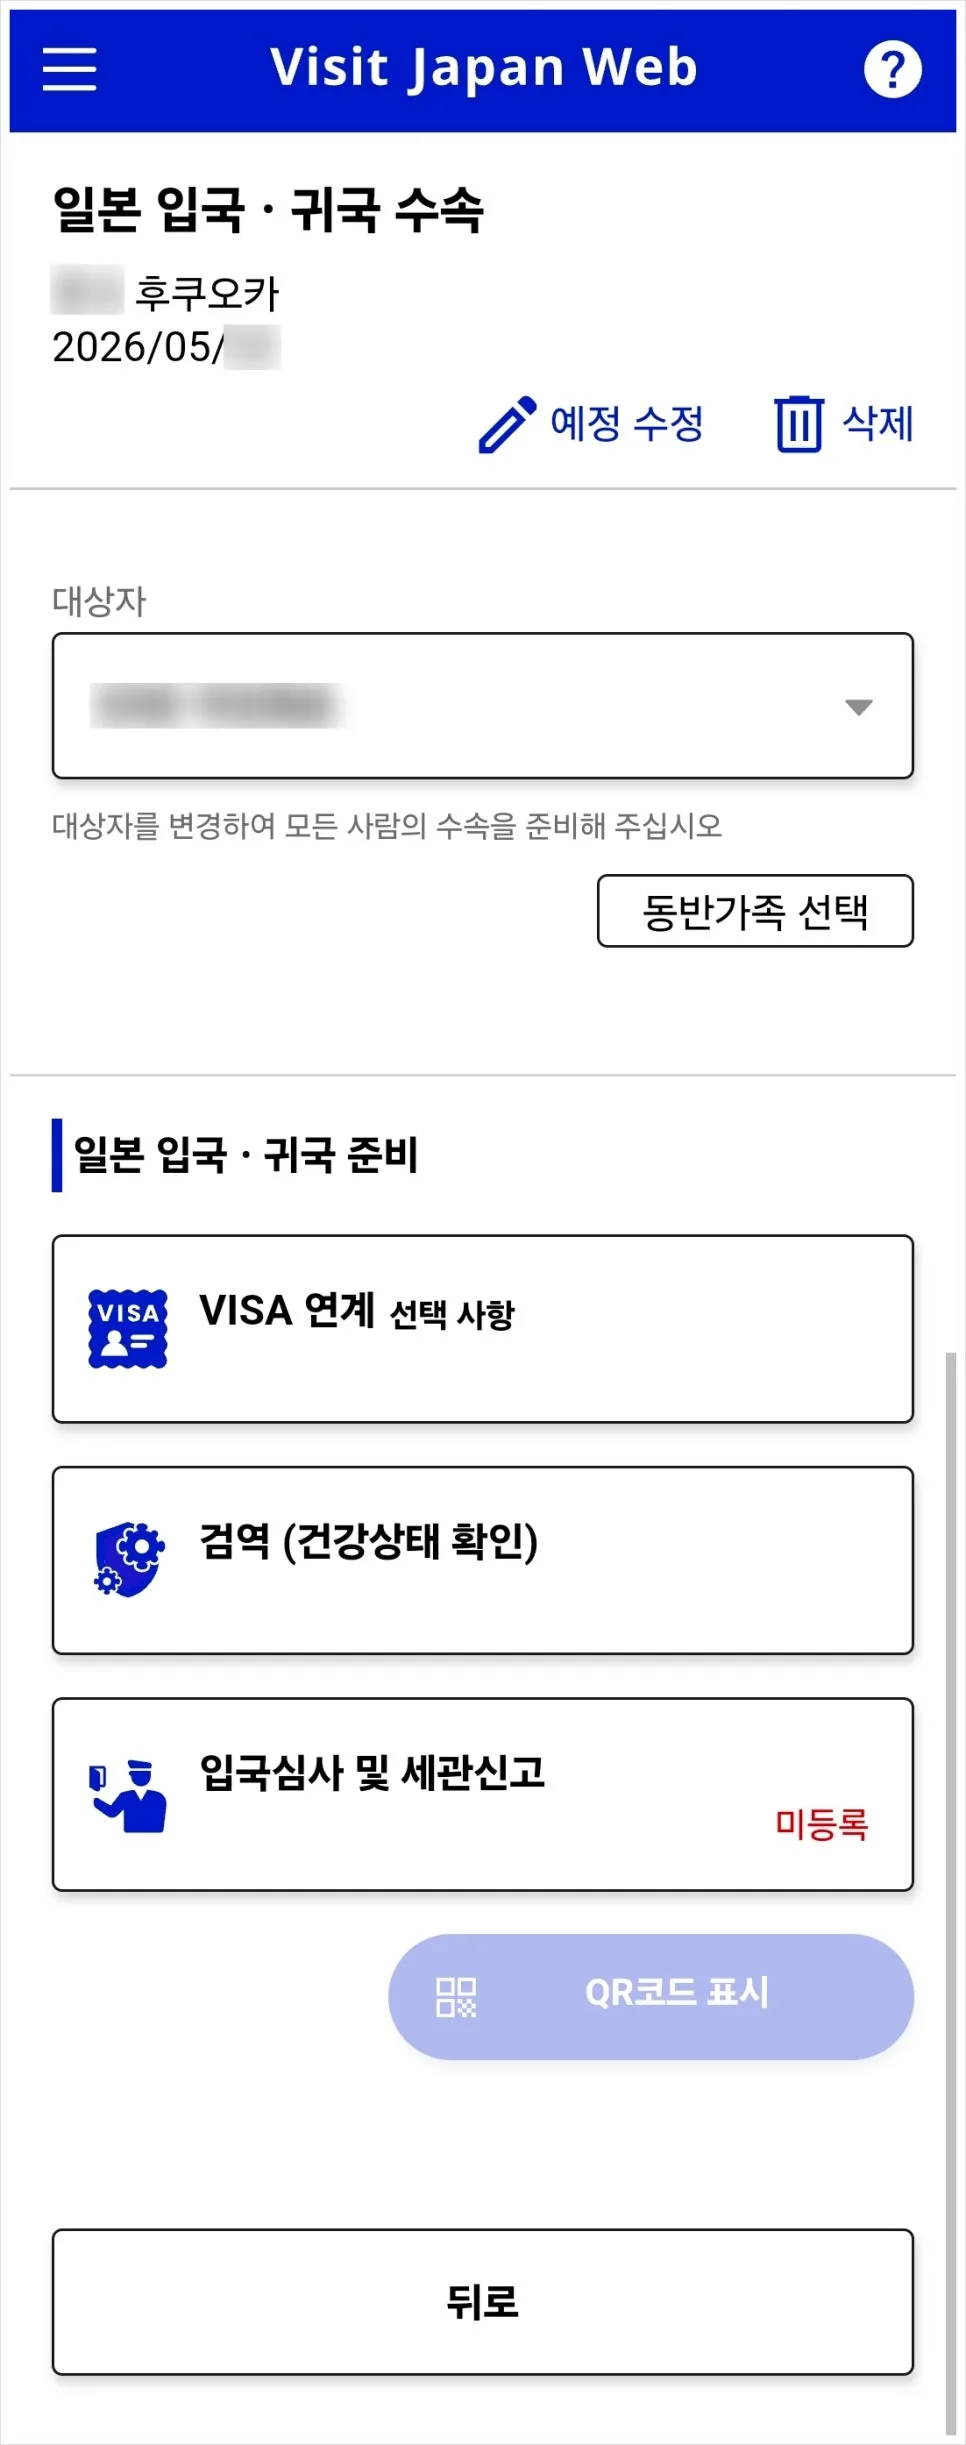
Tap “Immigration and customs declaration” here.
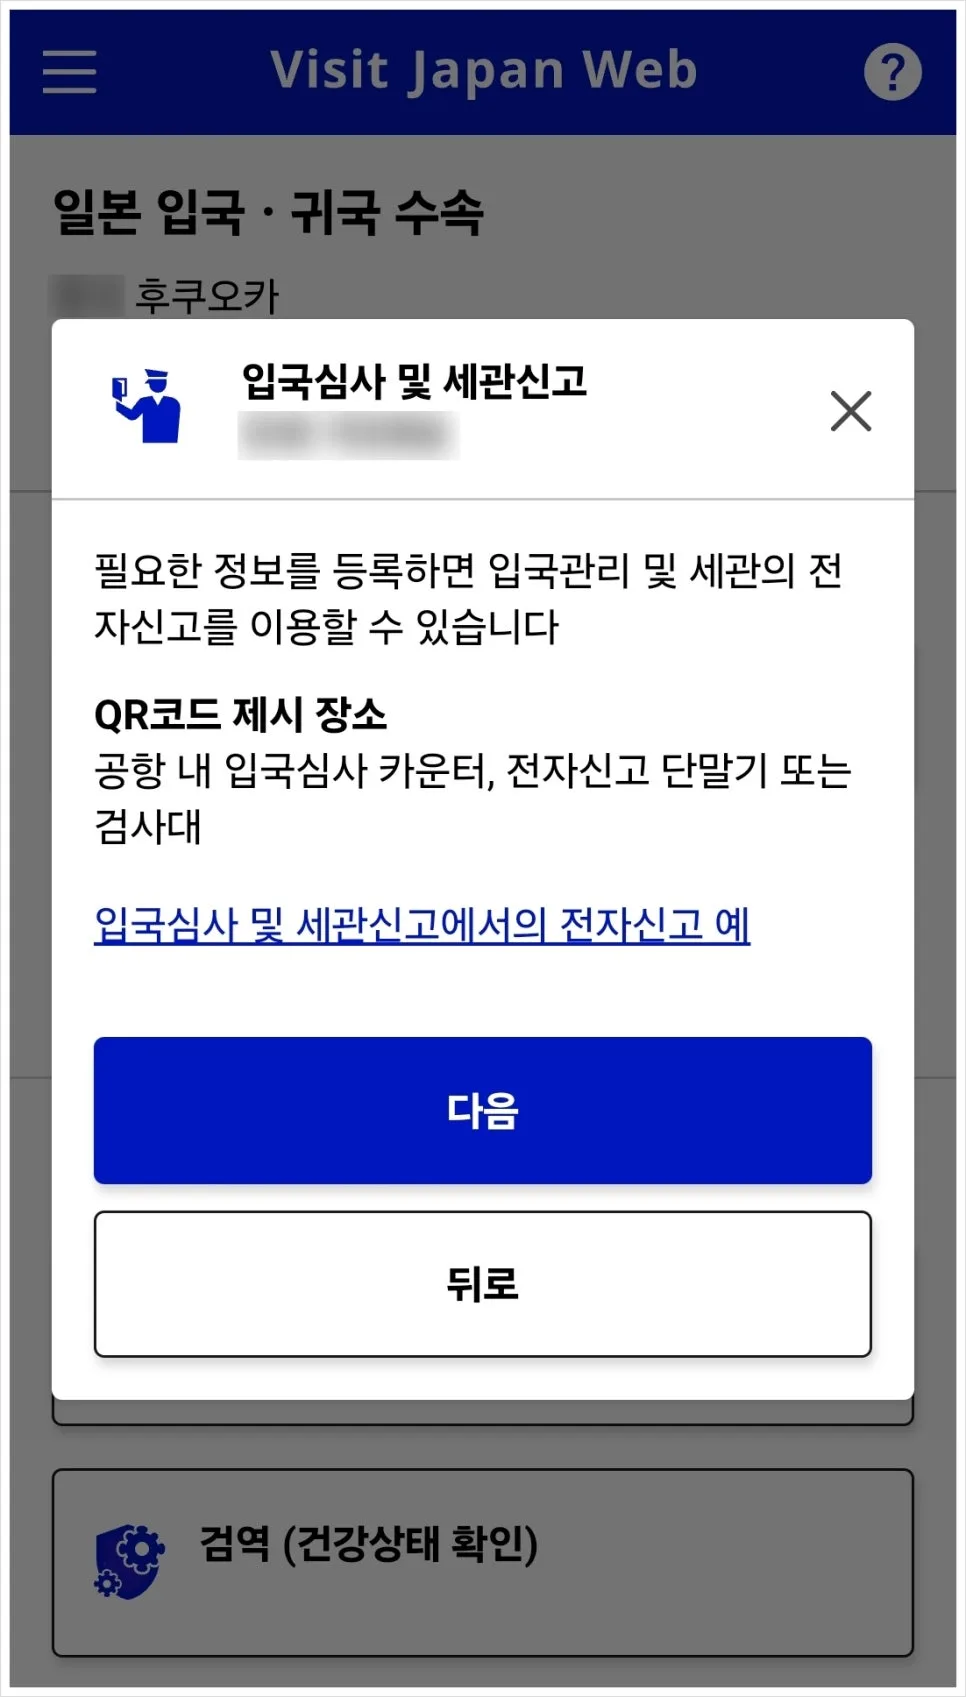
Read through it, then tap “Next.”
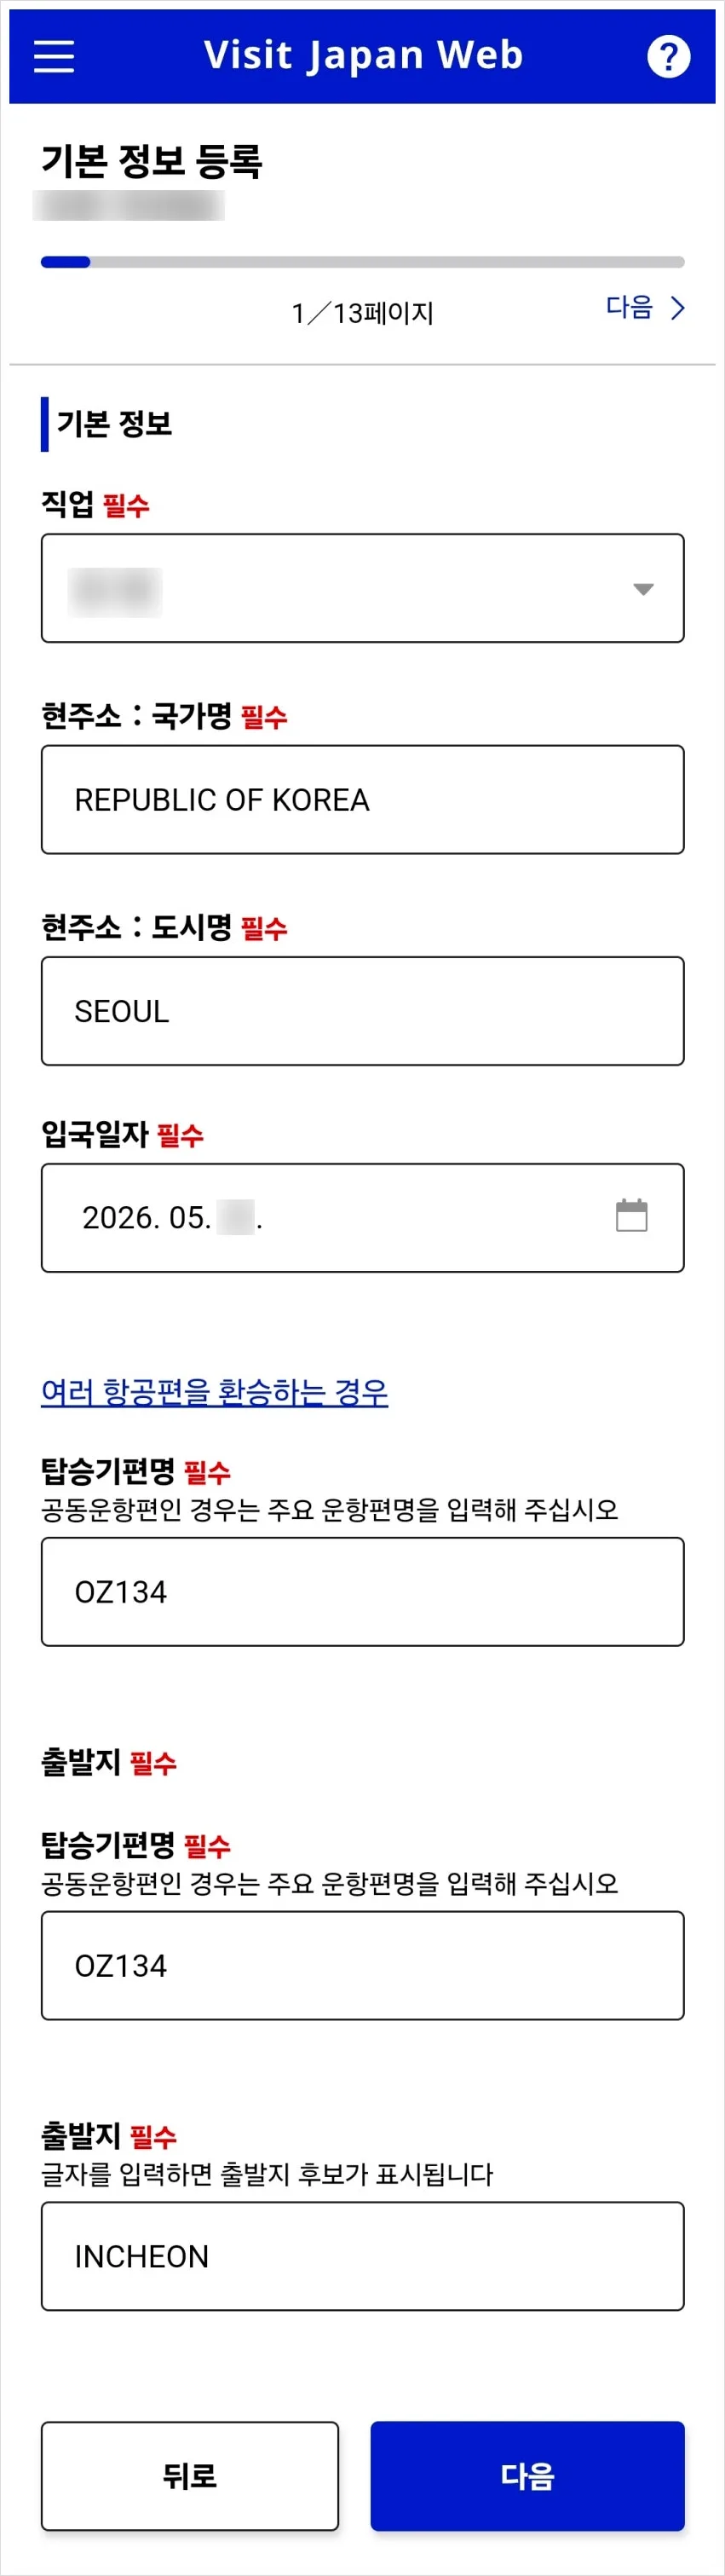
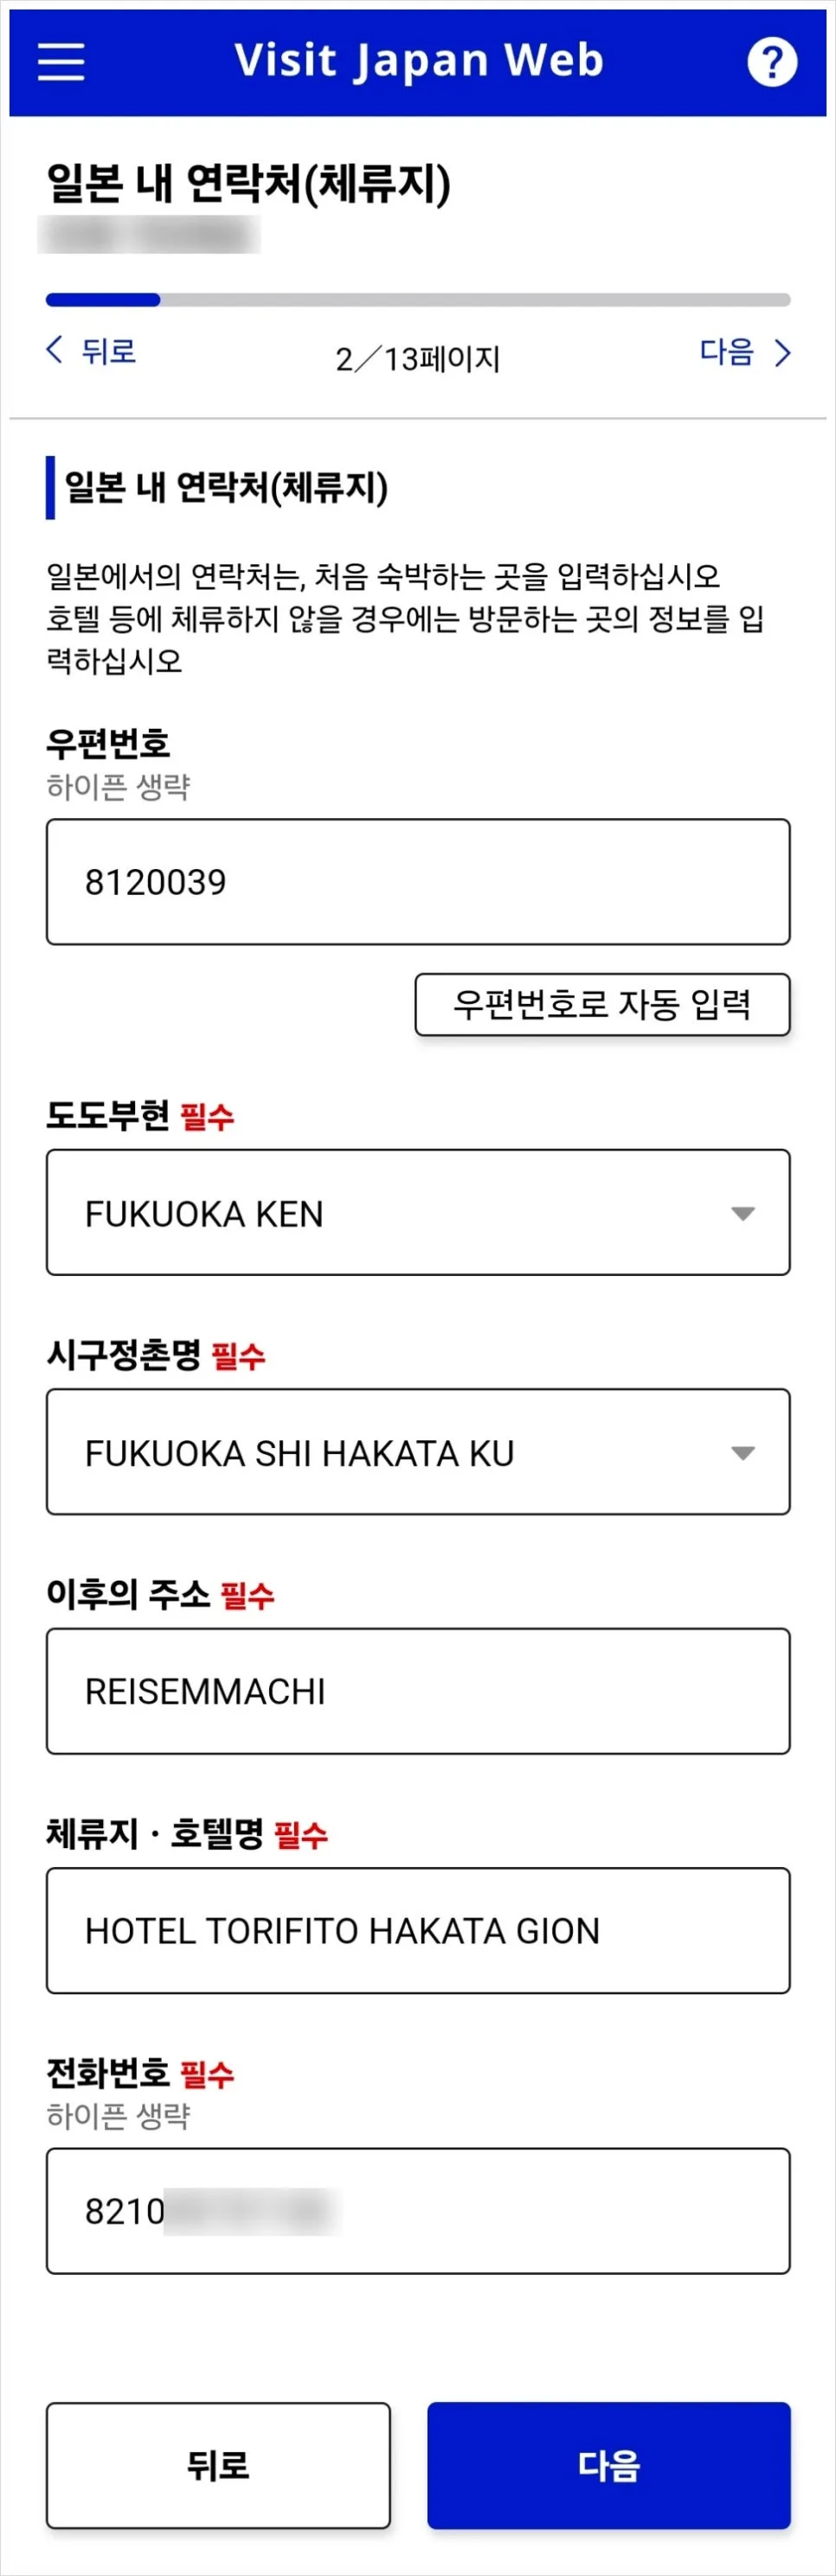
The information you entered earlier will already be filled in automatically.
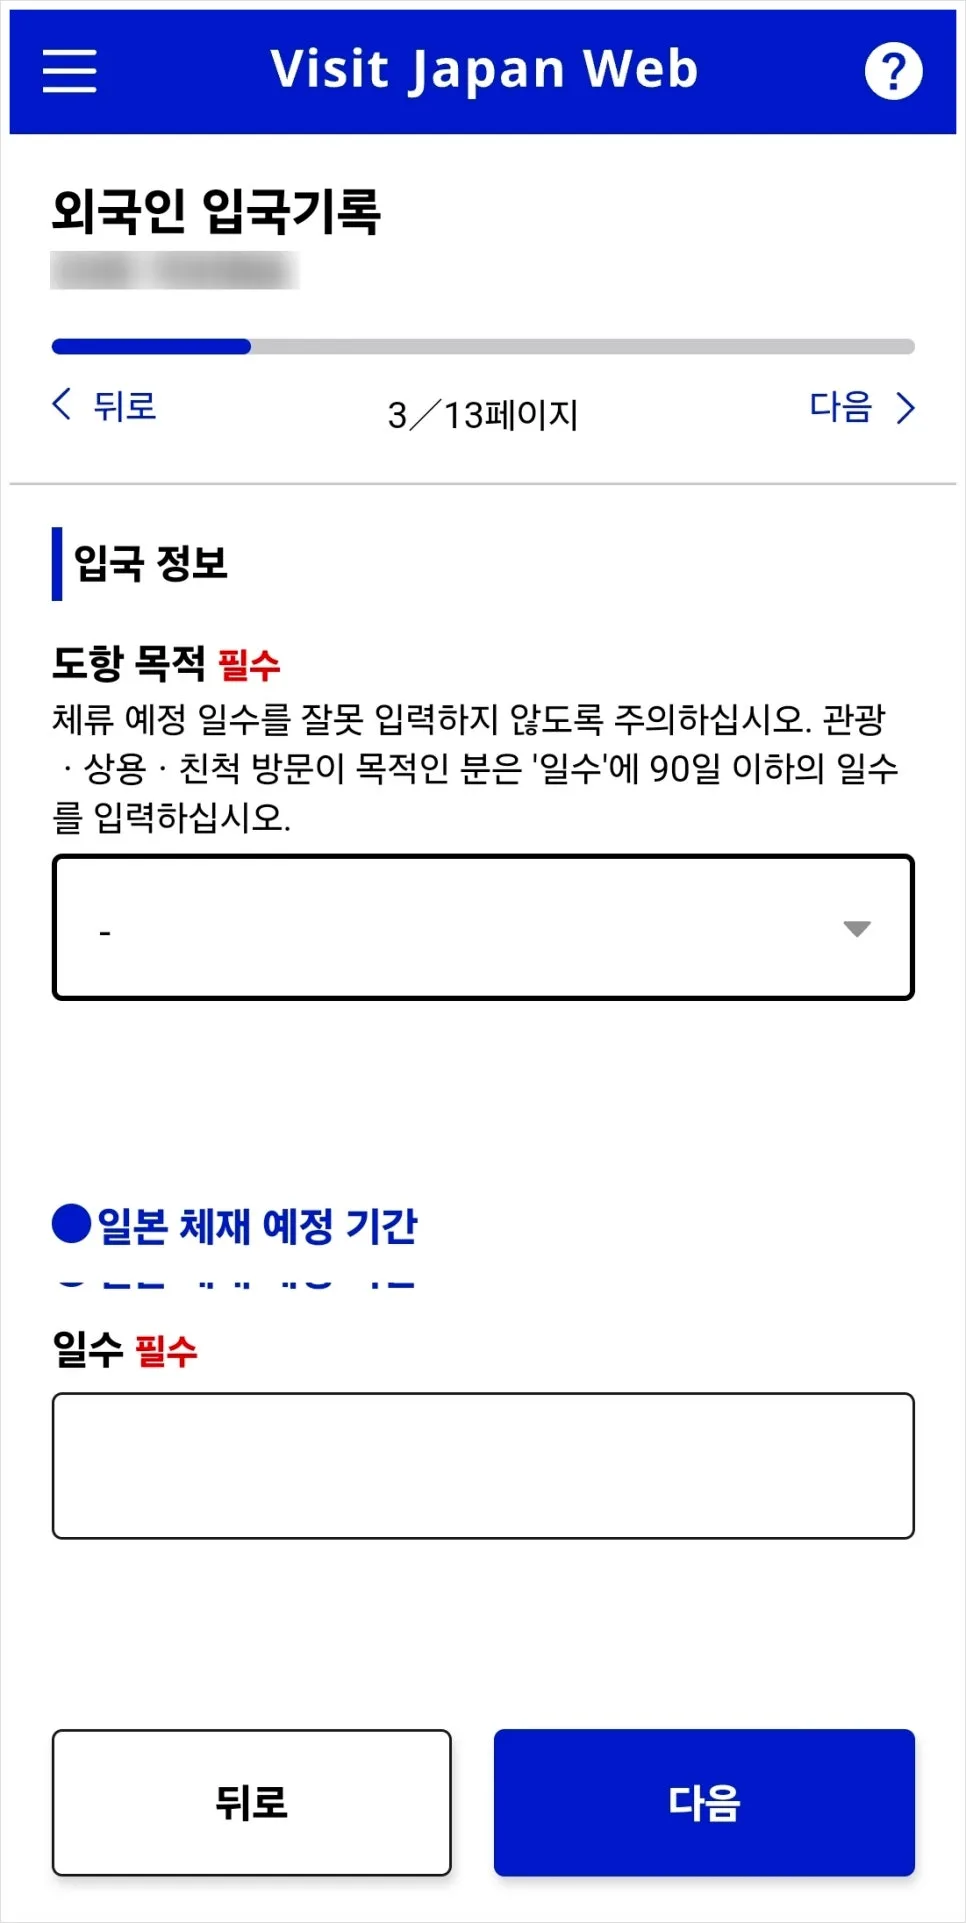
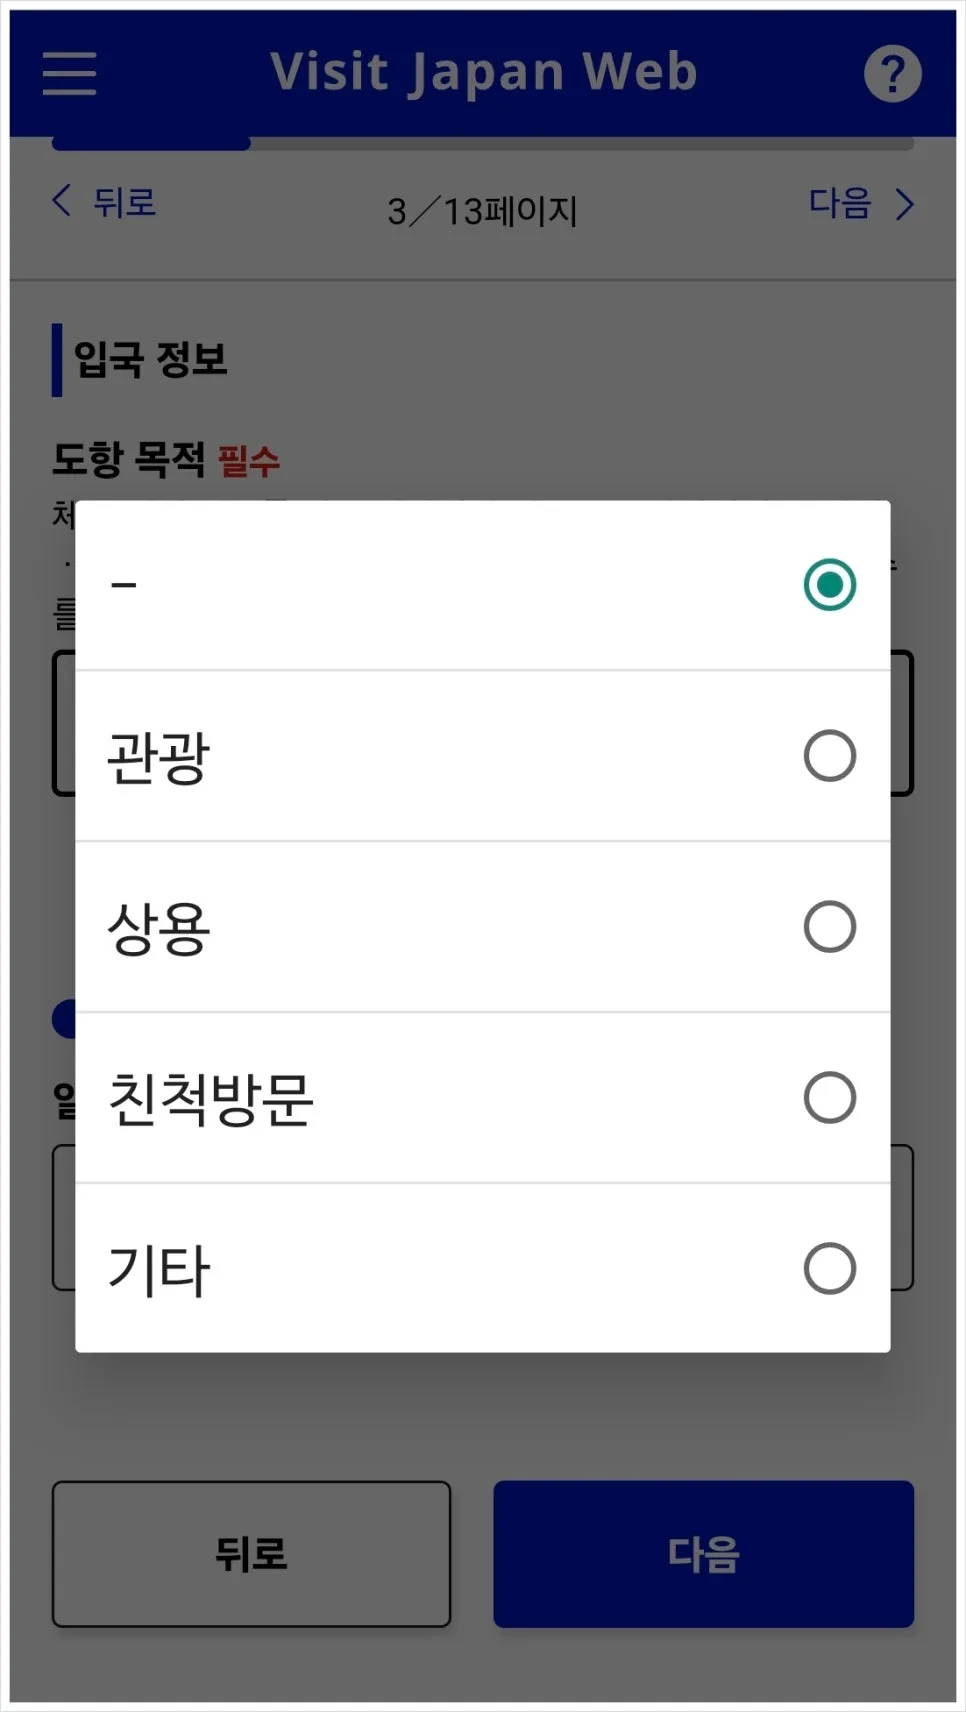
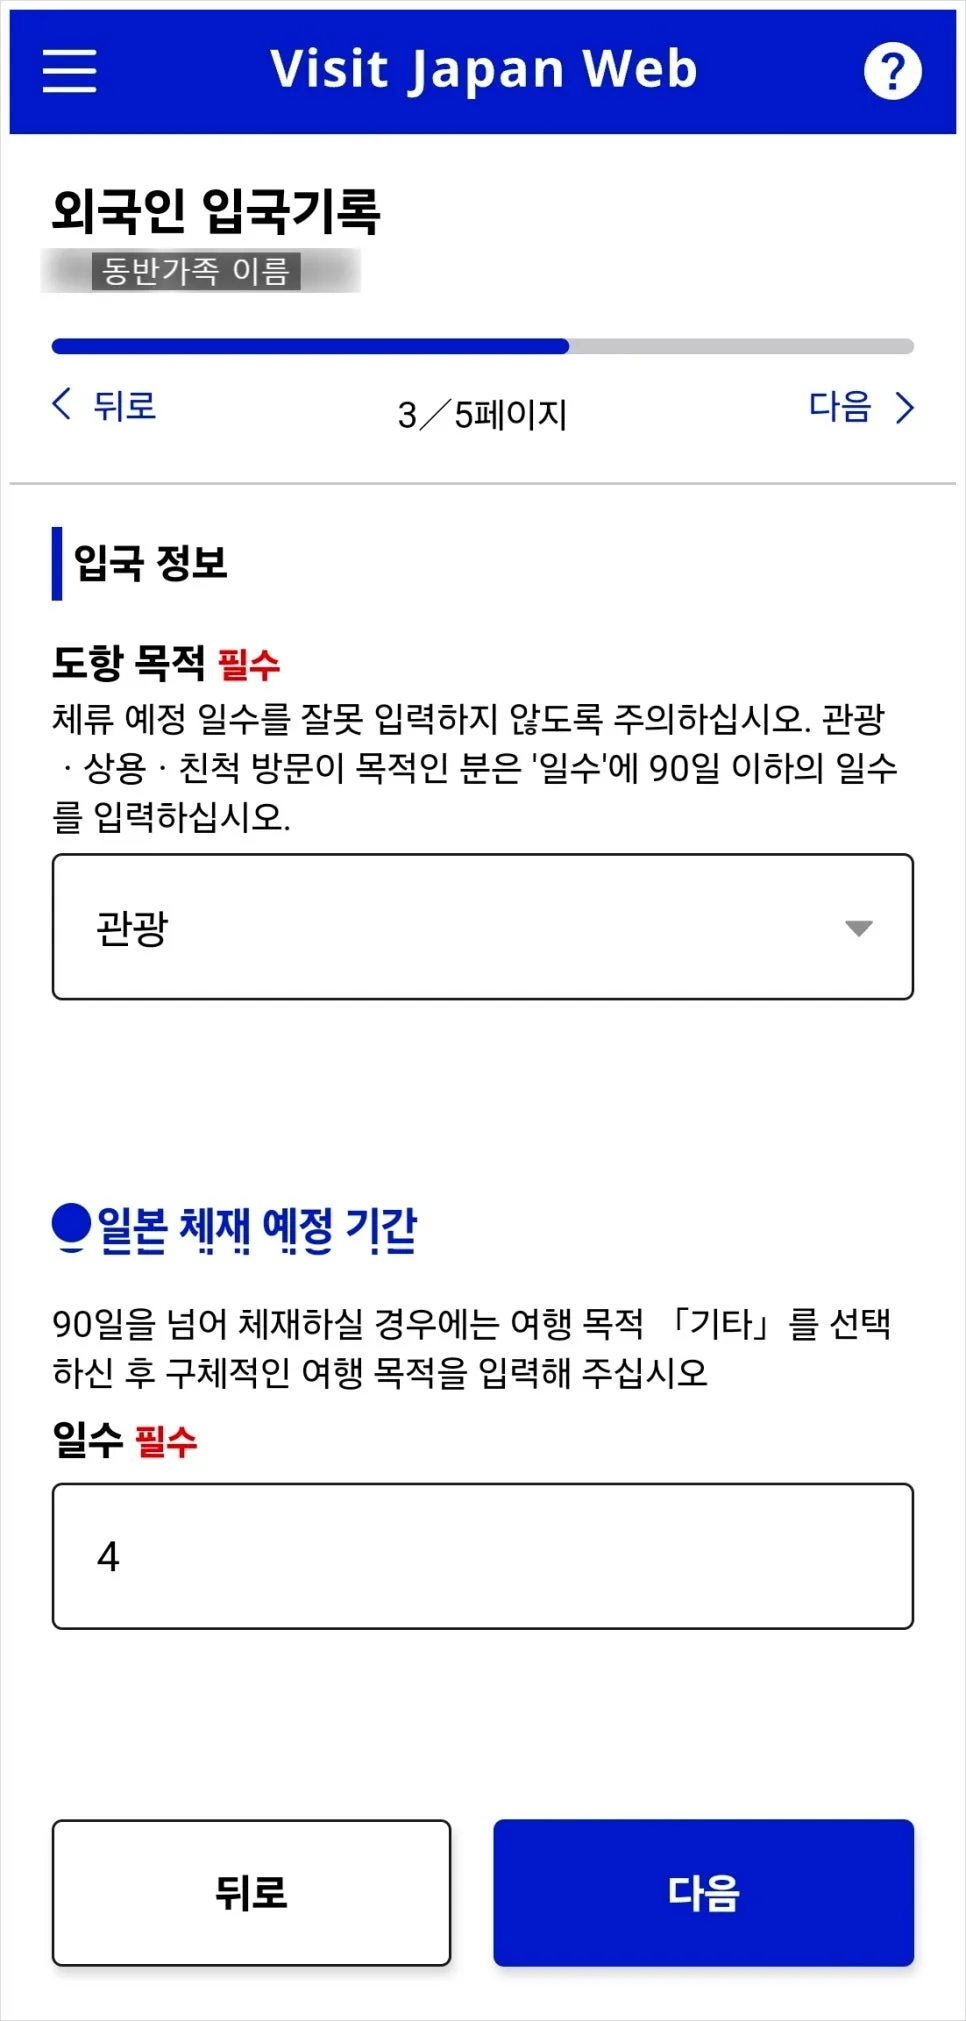
So you can start from this point. Purpose of visitwill usually be tourism, so select “Tourism.” Length of stayshould be entered as a number only. For a 4-night, 5-day trip, enter 5.
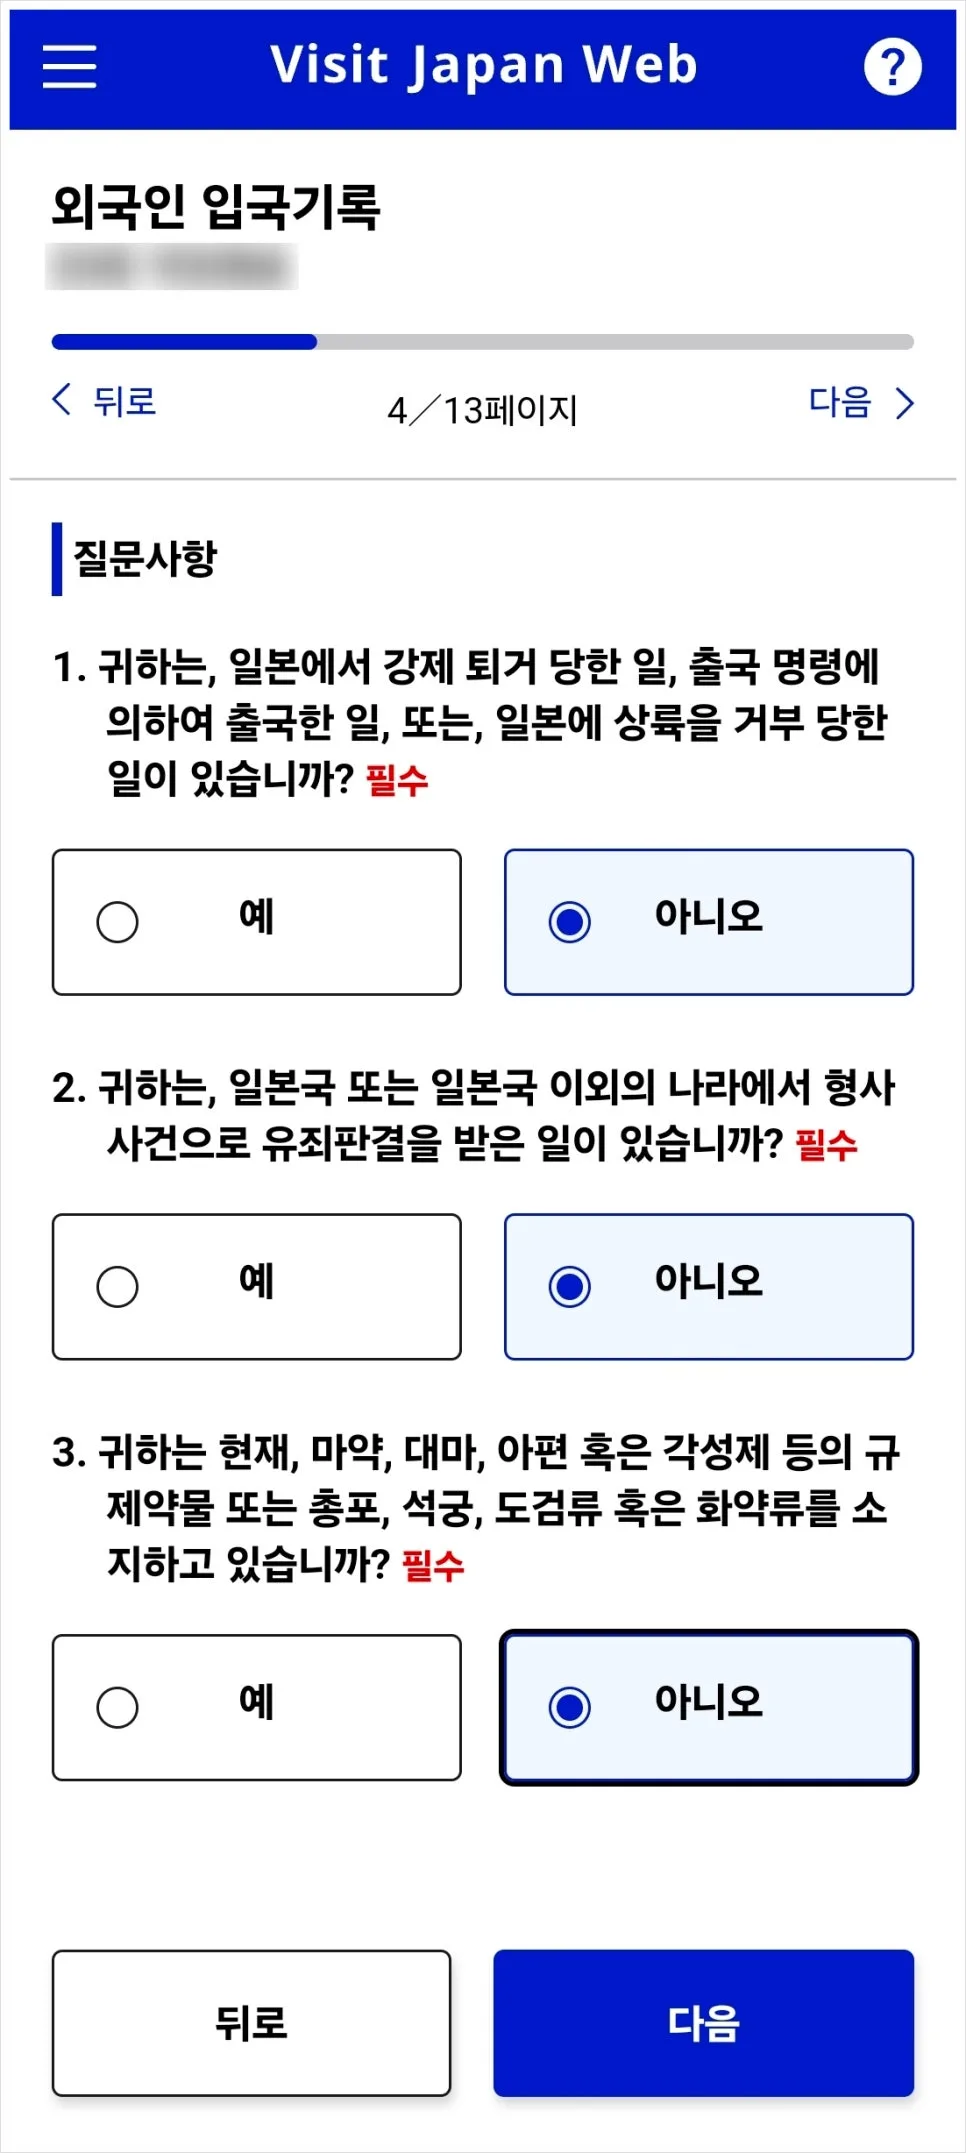
For the questions on the left, choose “No” for all of them.
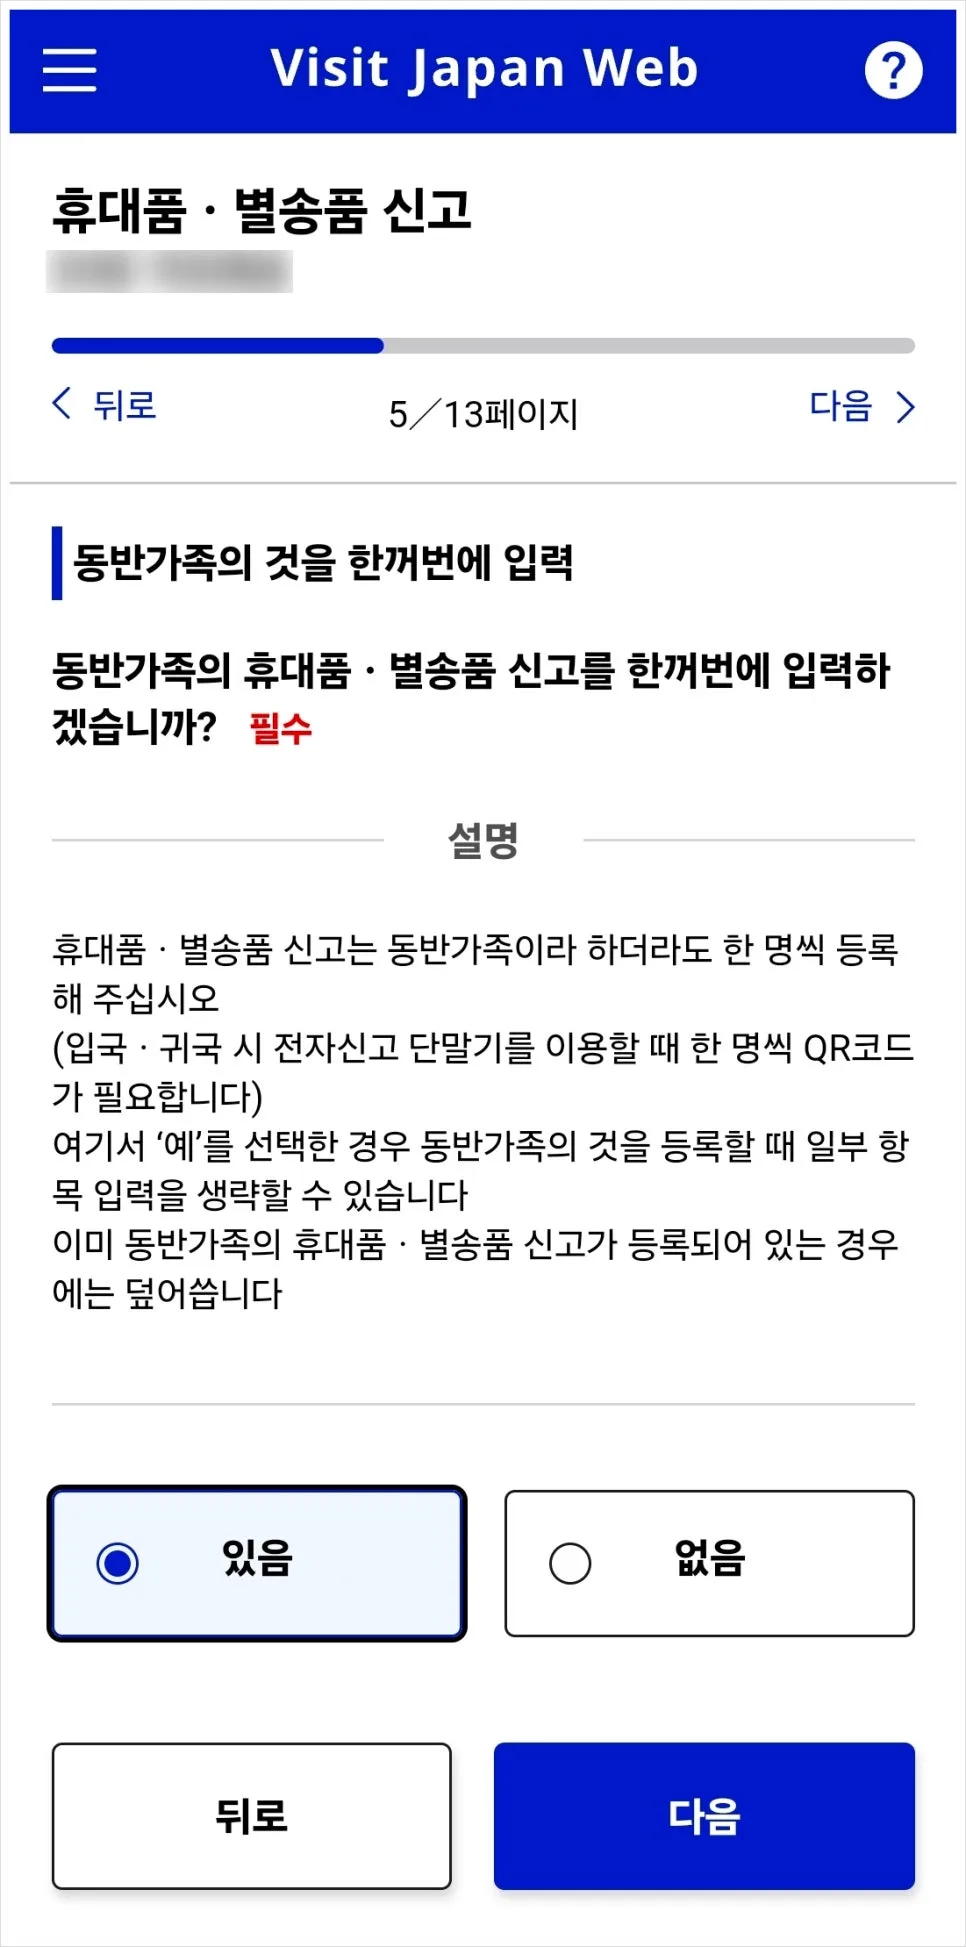
For the question about accompanied family members’ unaccompanied articles or personal effects, it’s more convenient to choose “Yes.” That way, only the representative traveler needs to answer the customs questions once for the whole group.
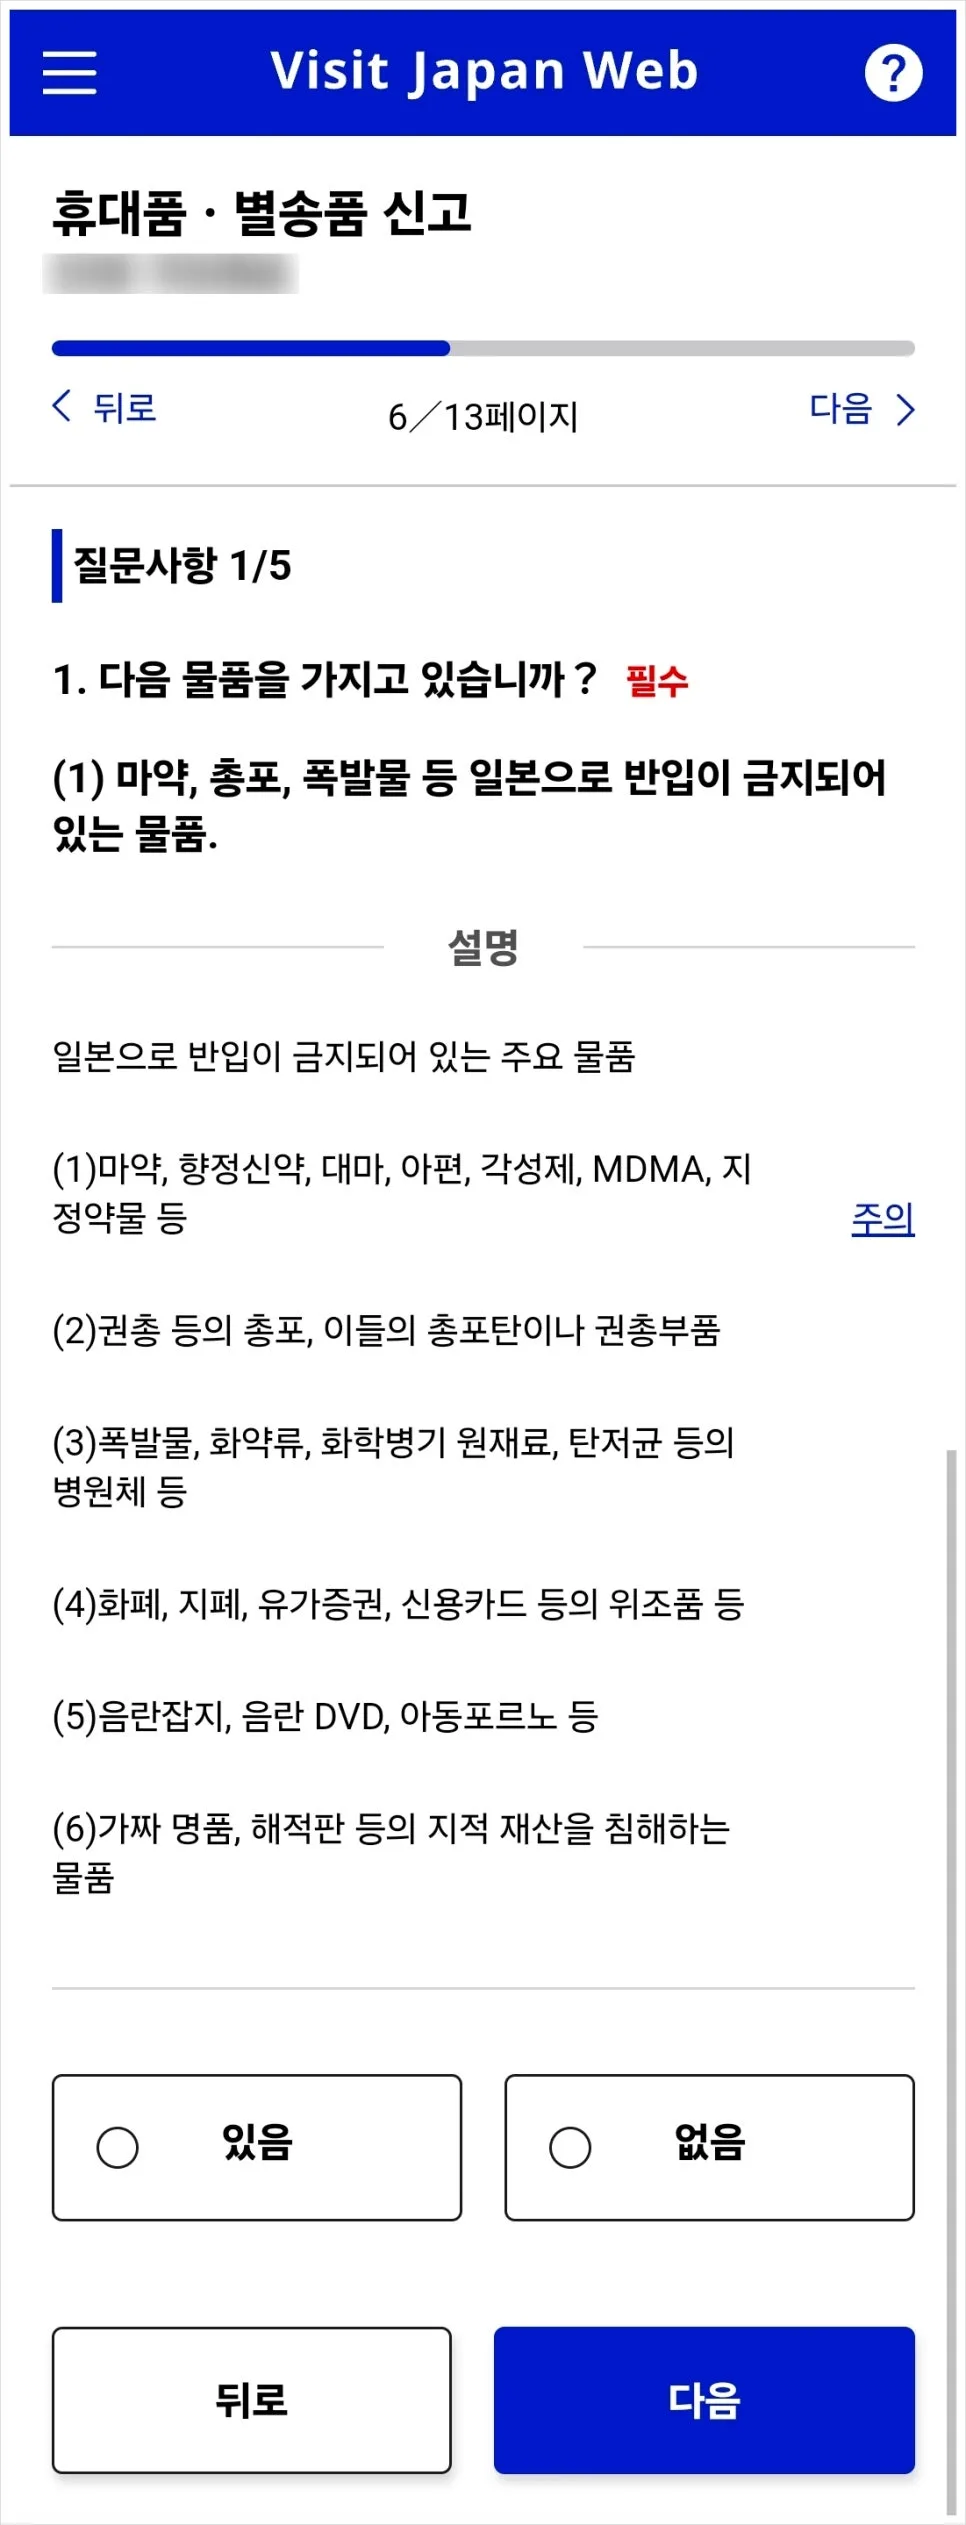
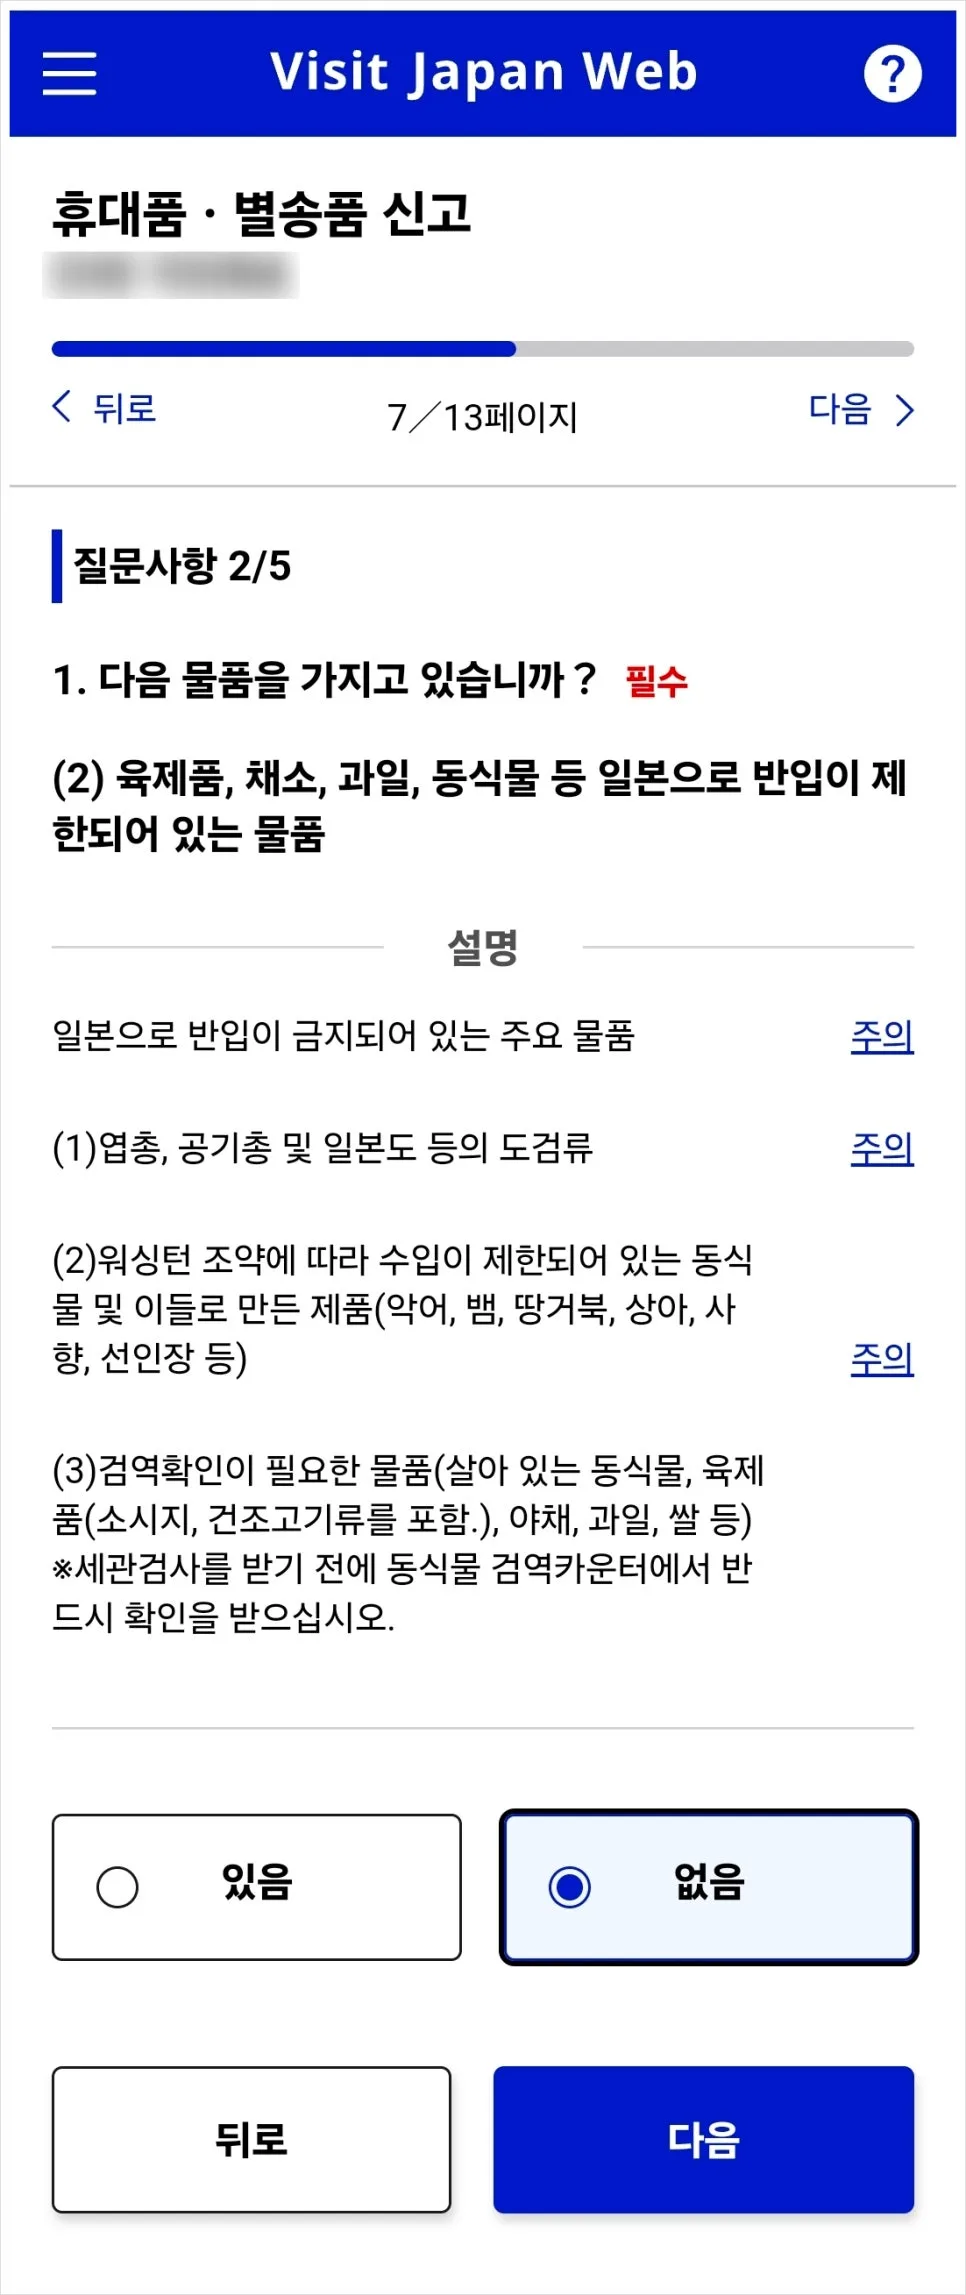
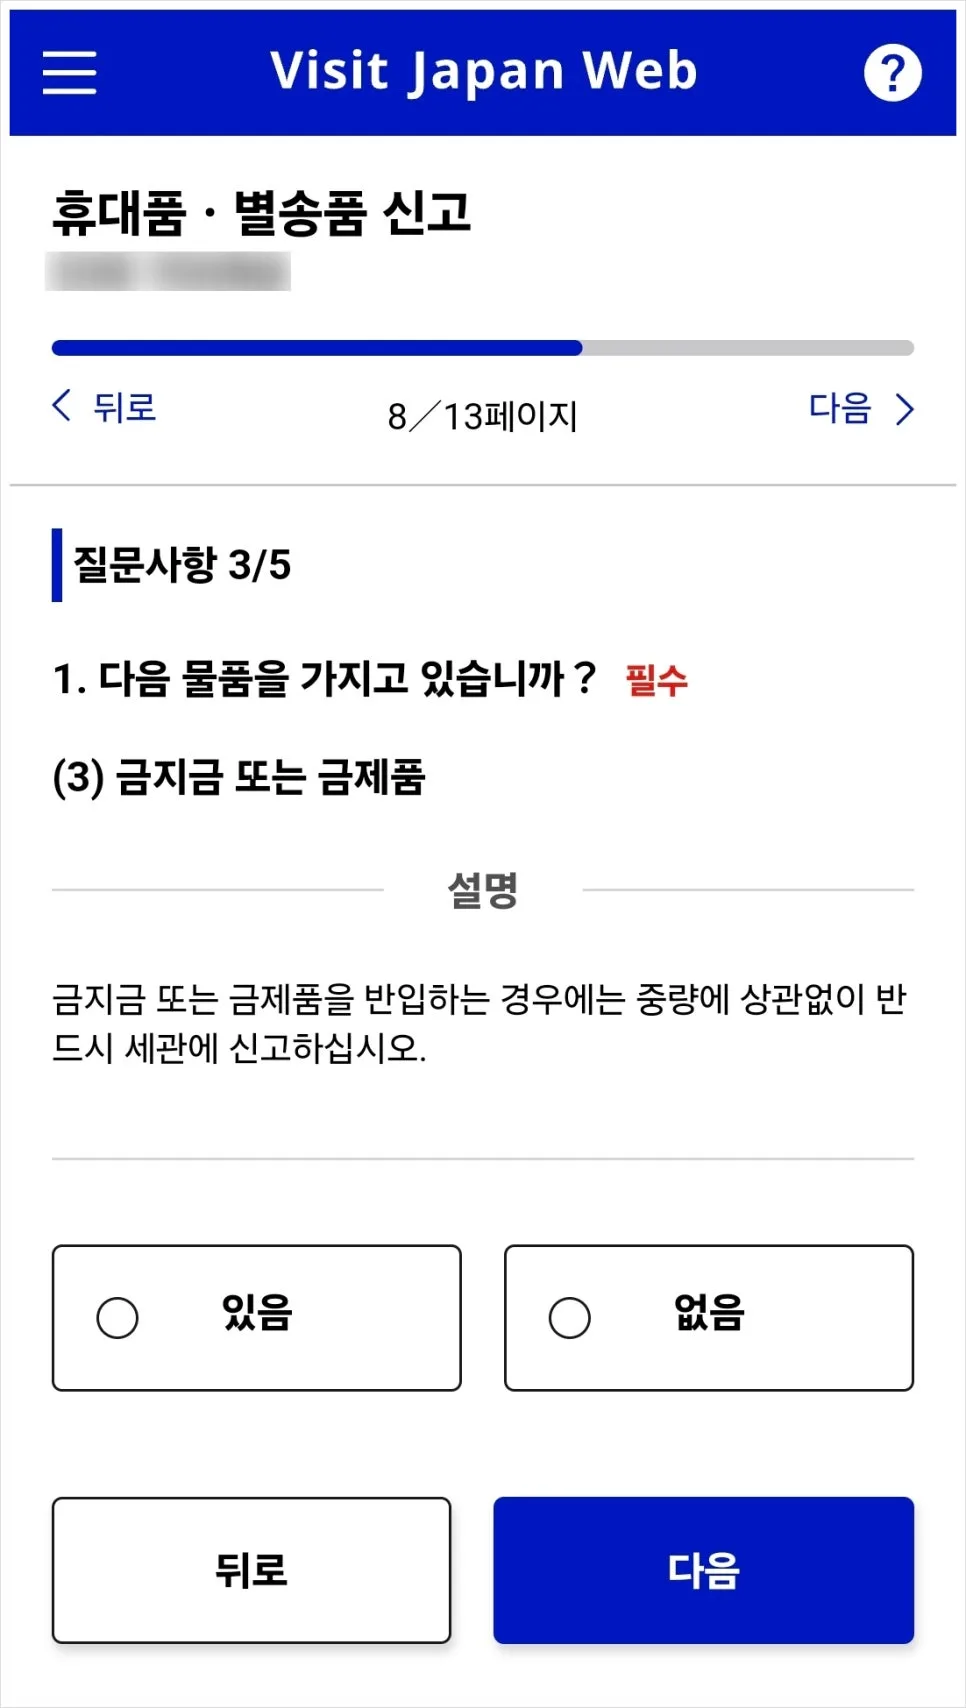
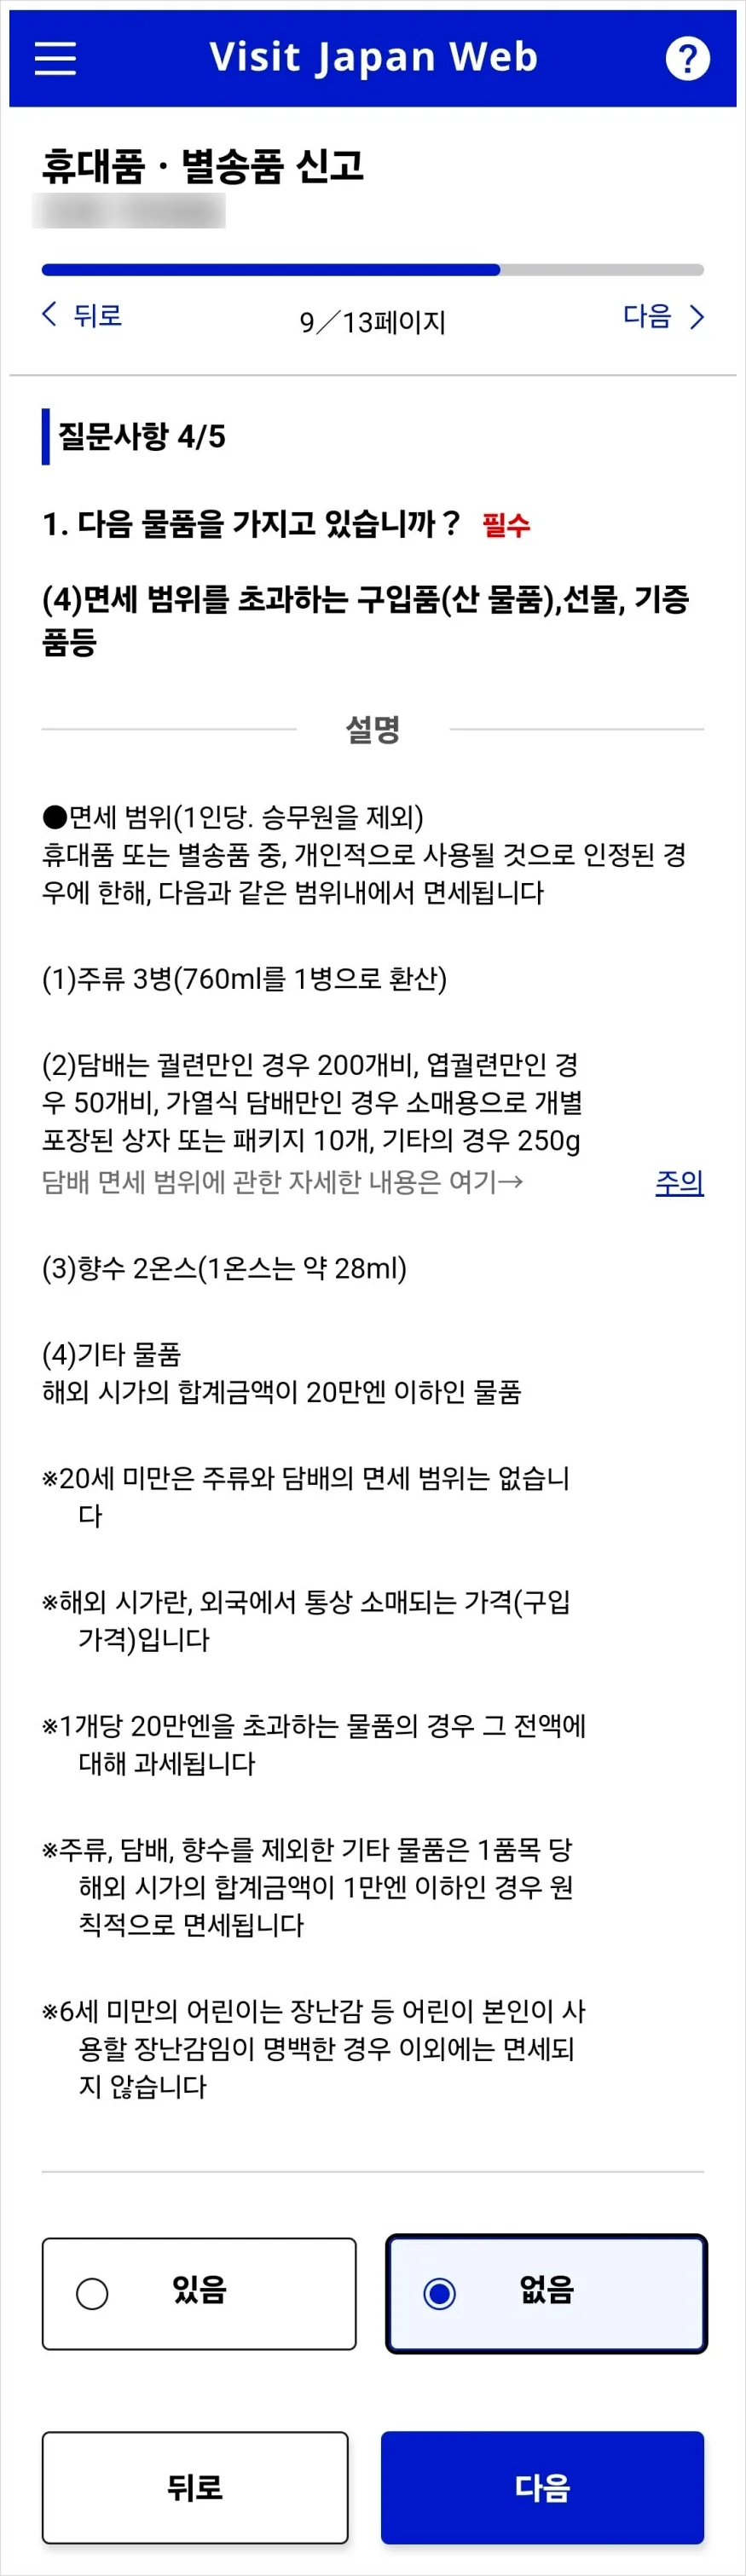
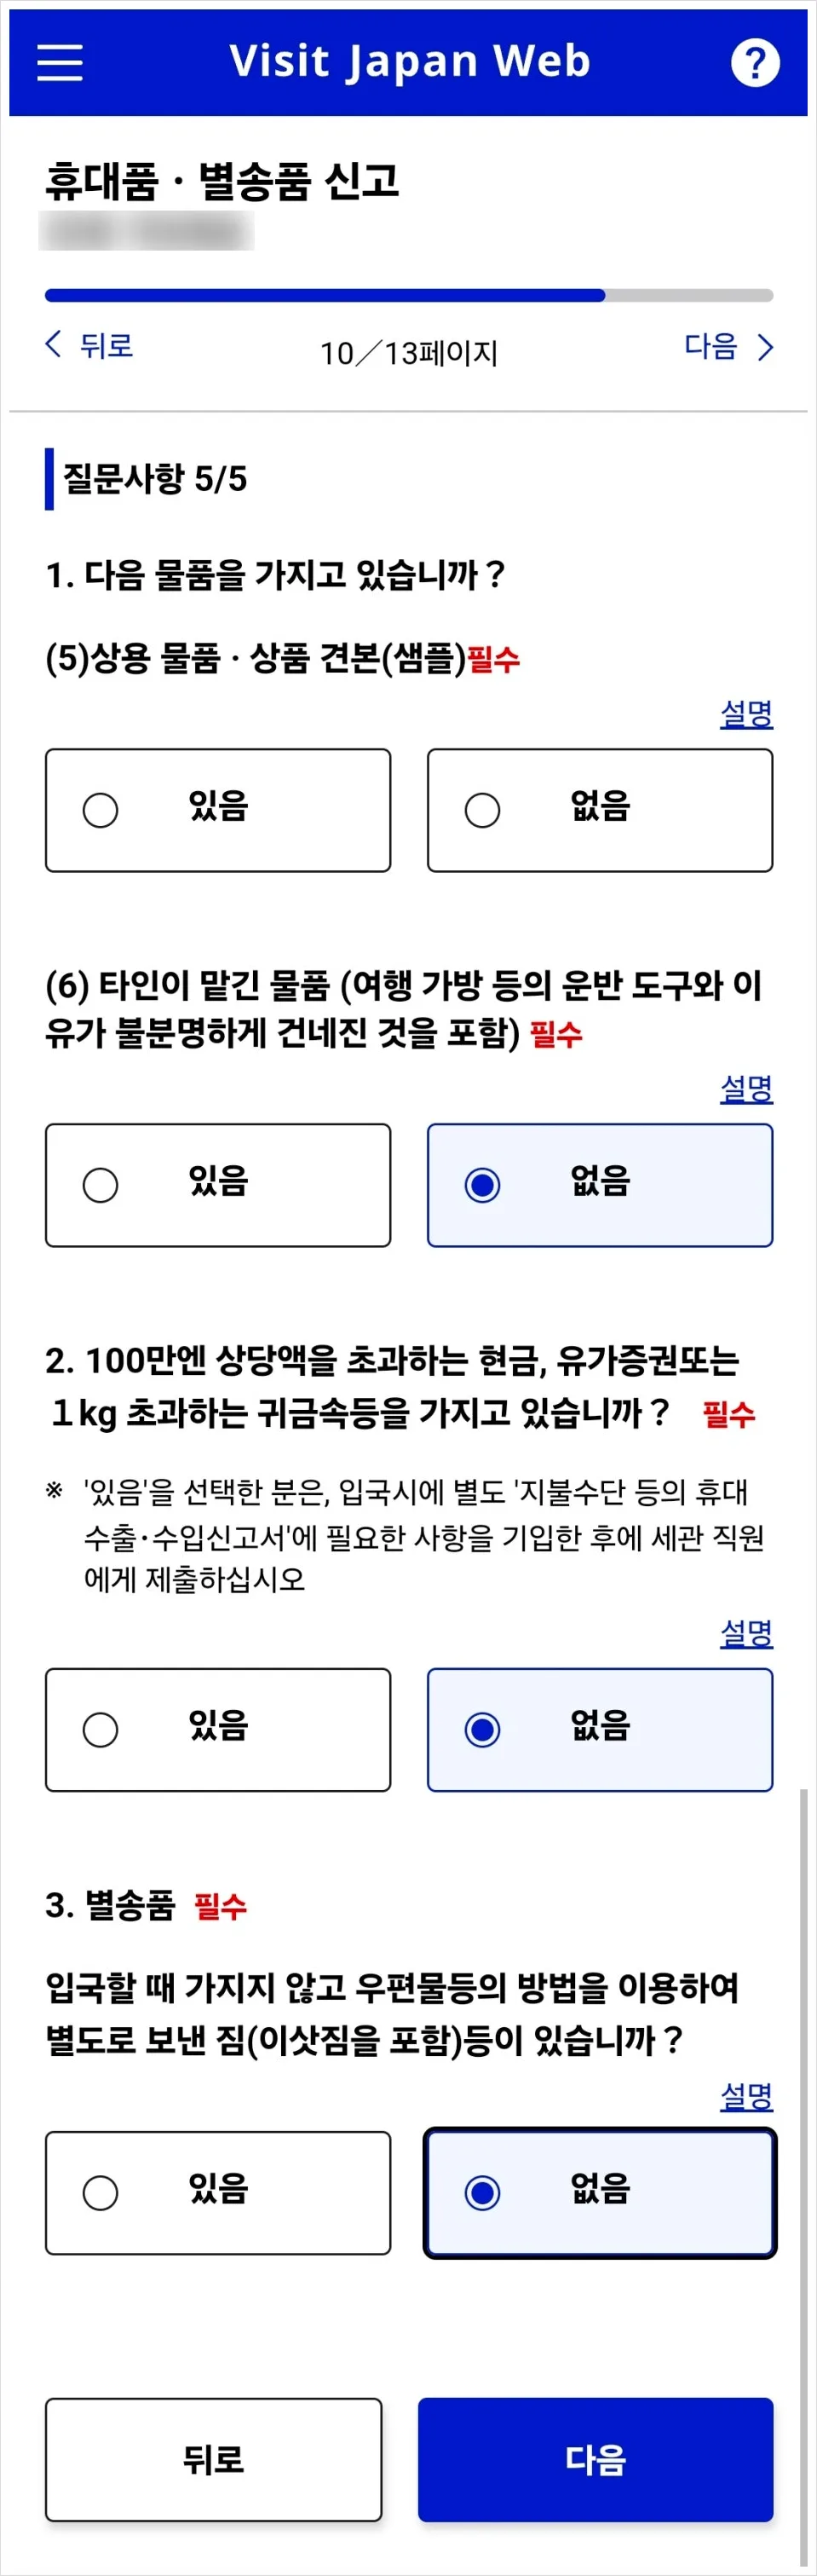
In most cases, you’ll select “No” for everything, but if any item actually applies to you, of course choose “Yes.”

Then you’ll see a review page. Give it a quick check, and if everything looks right, tap “Register.”
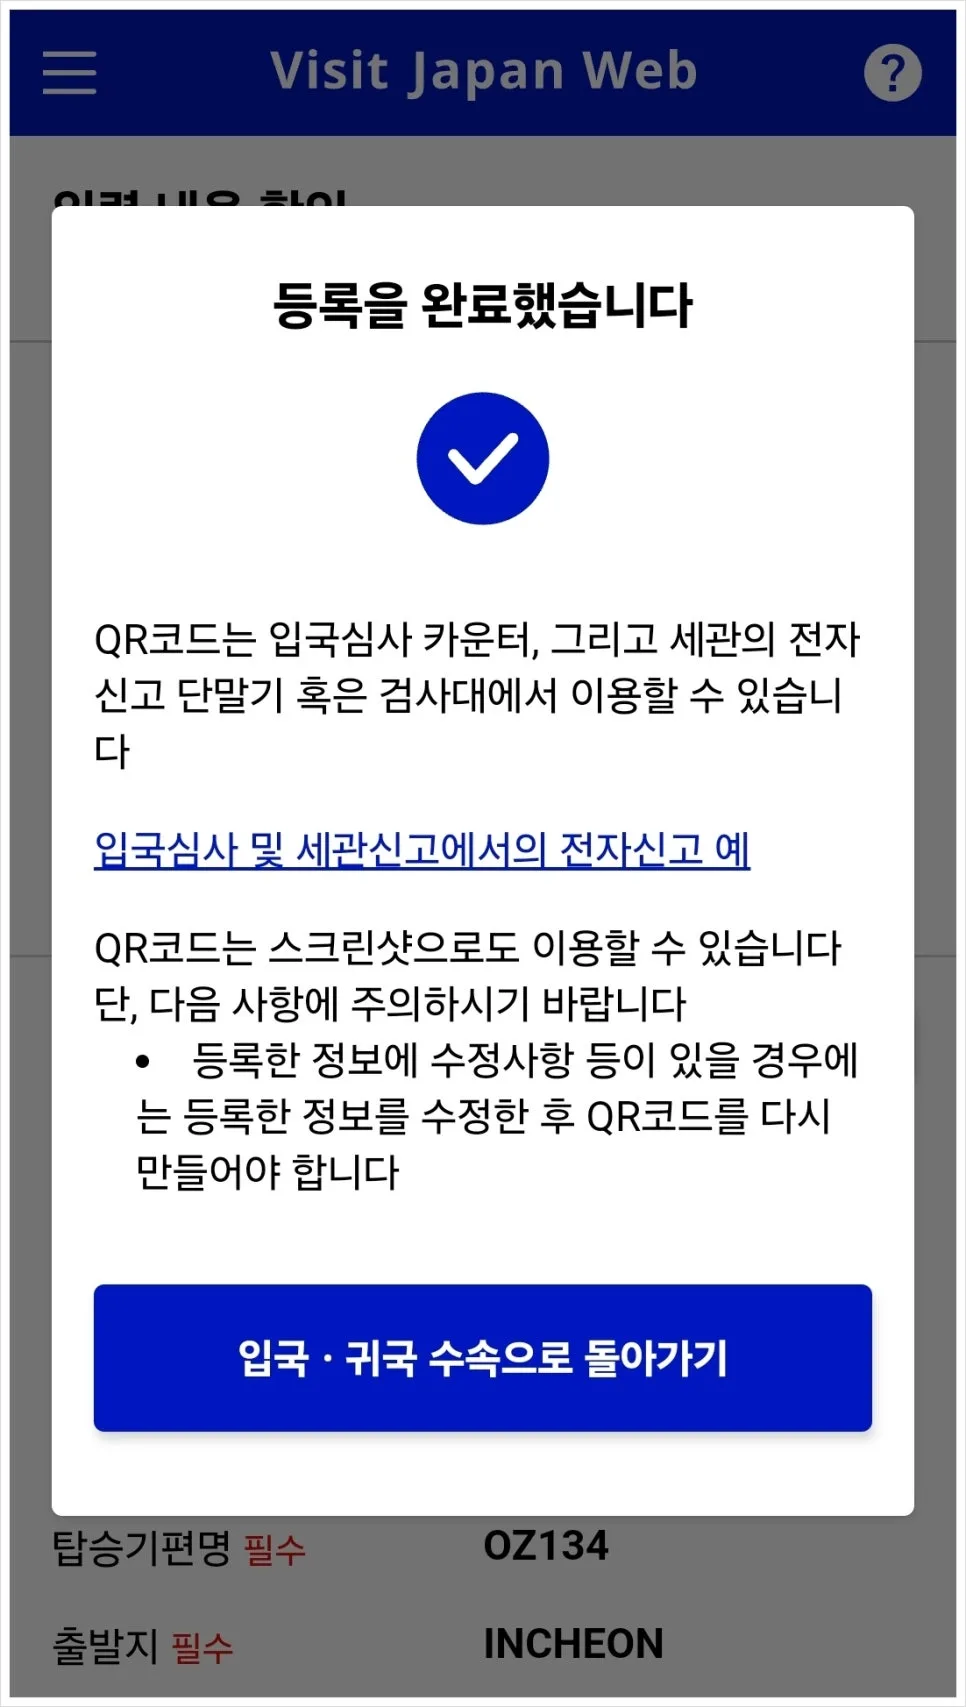
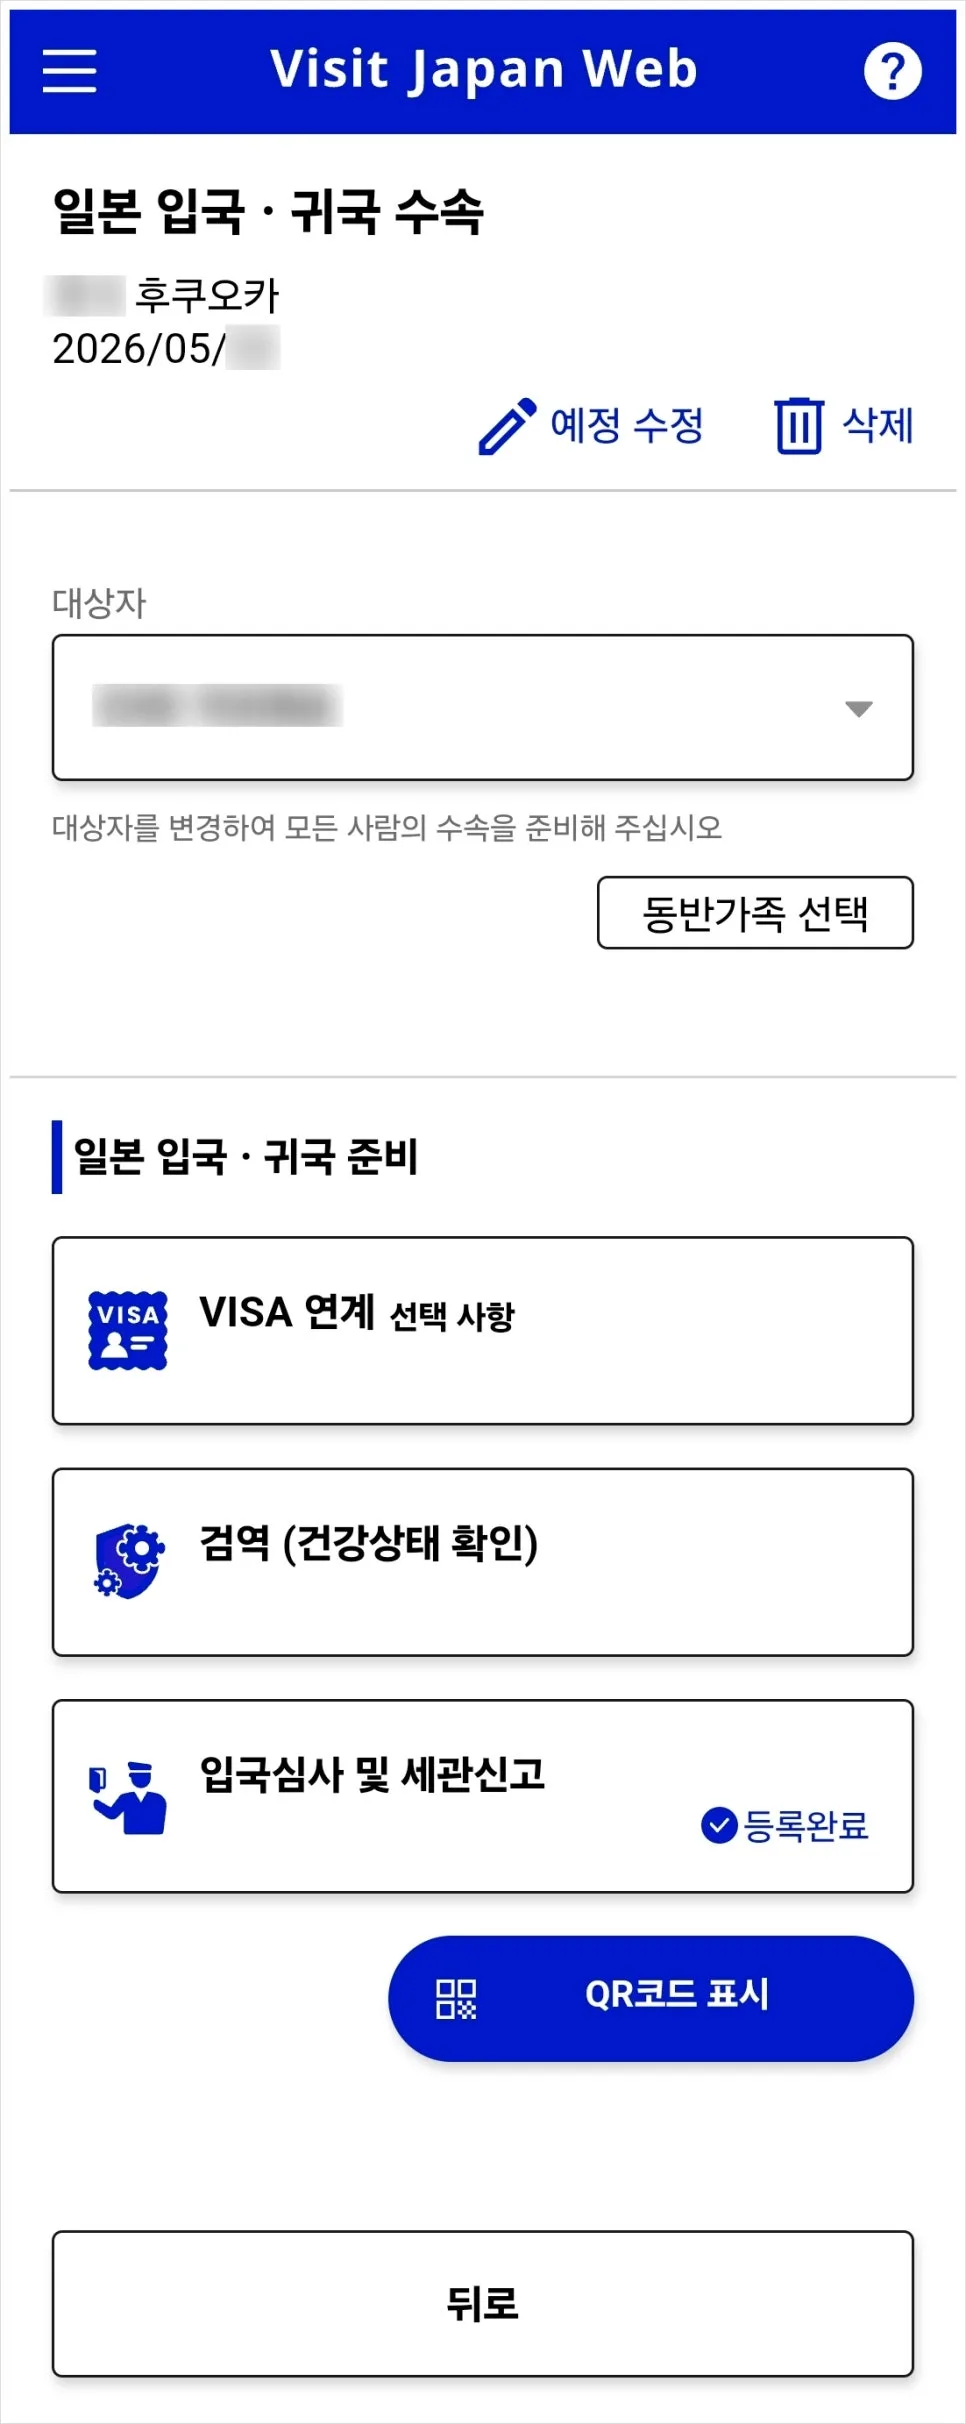
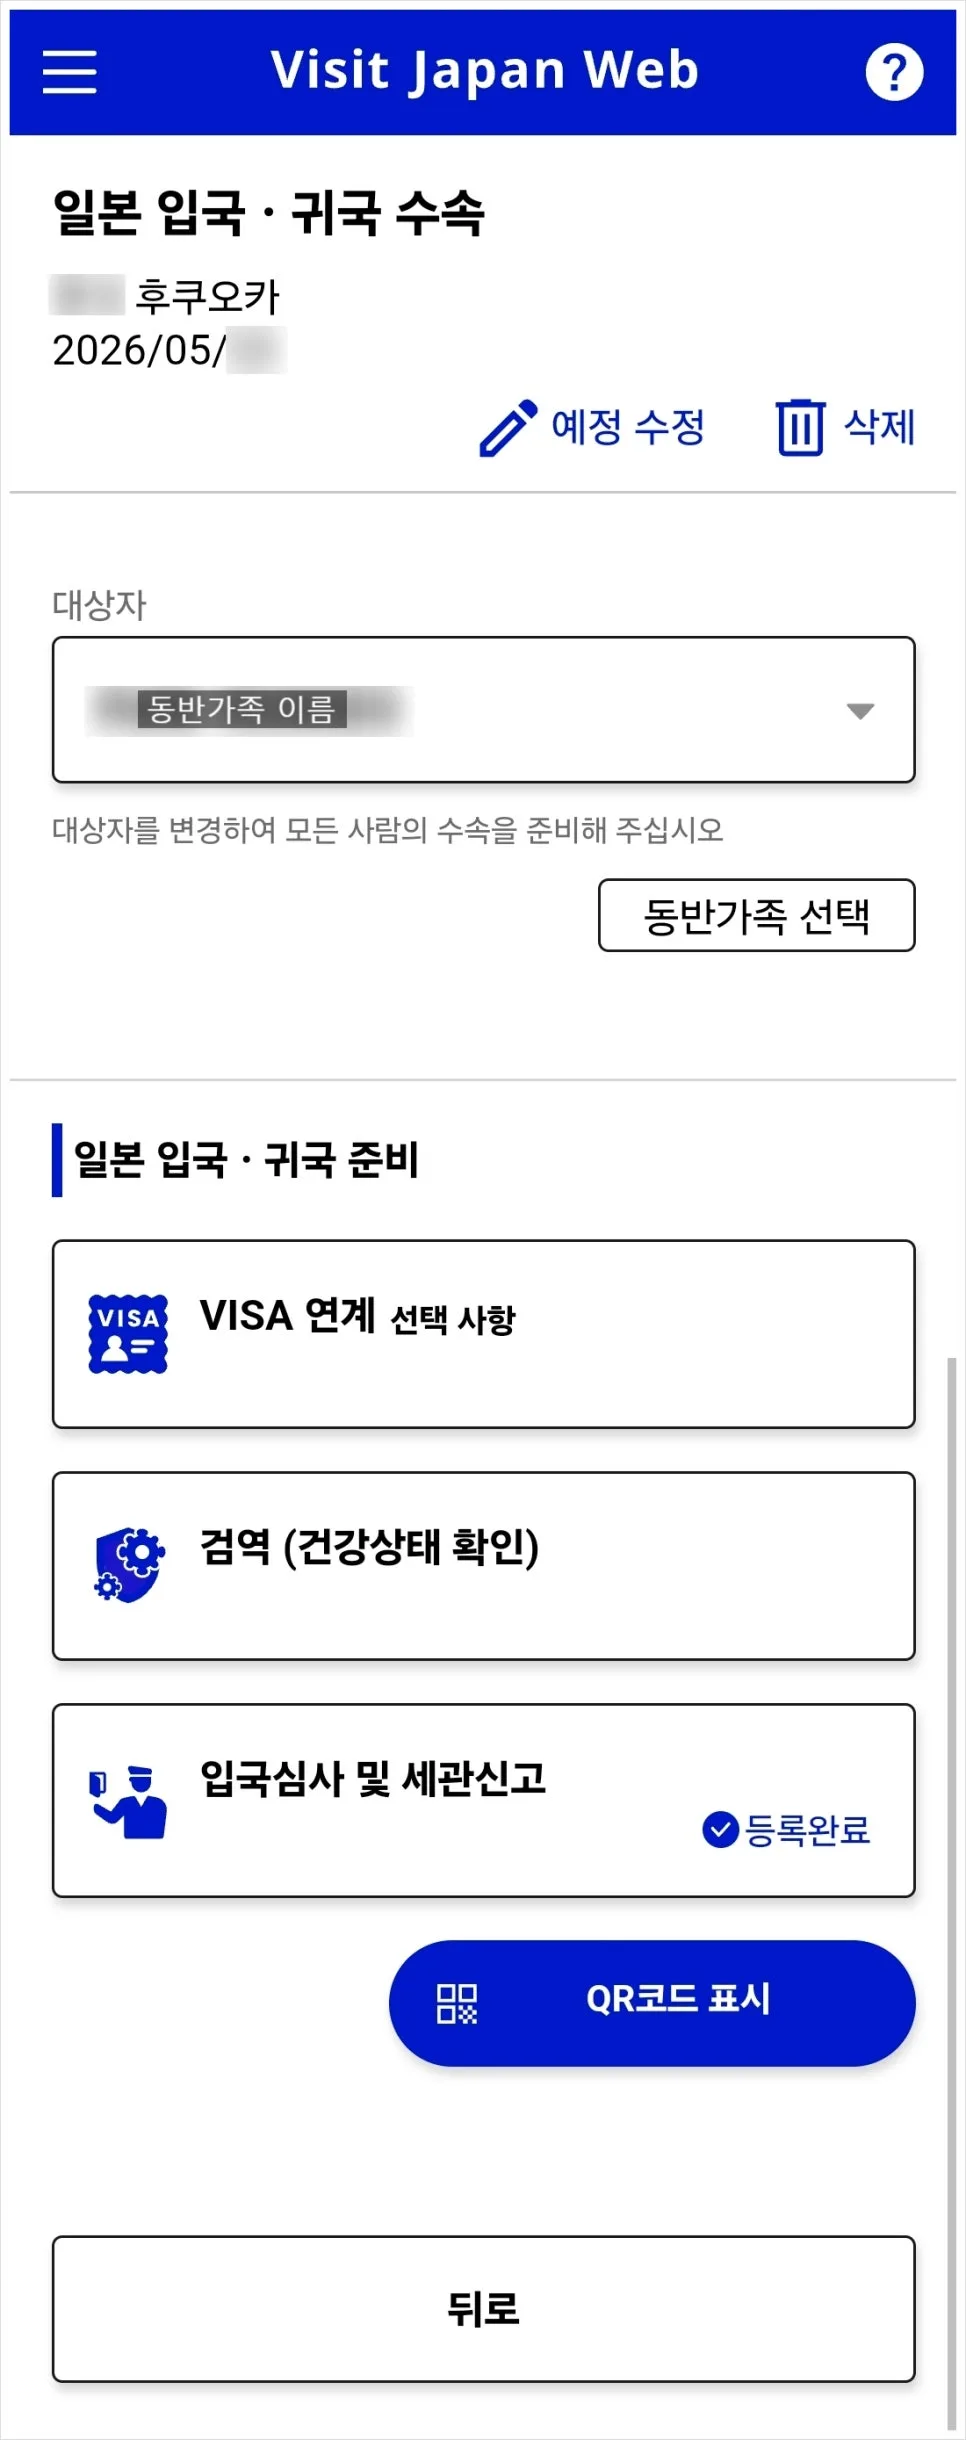
Once that’s done, the home screen will show “Registration complete” under immigration and customs declaration.
At that point, the “Display QR code” button at the bottom will become active.
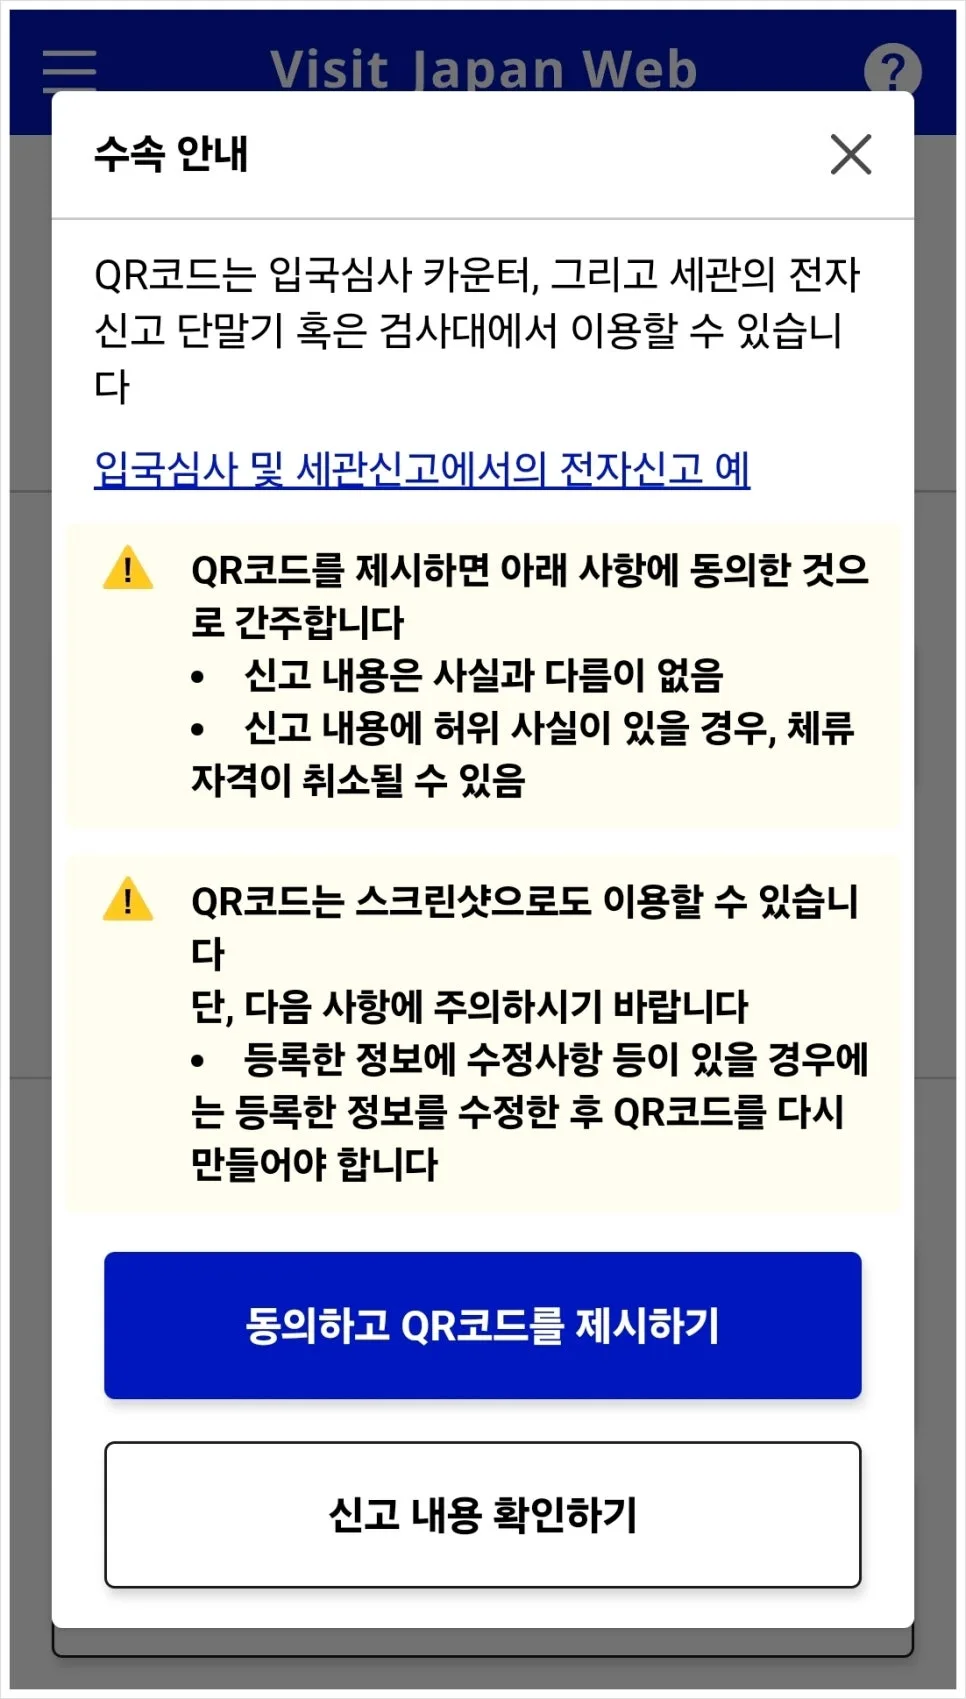
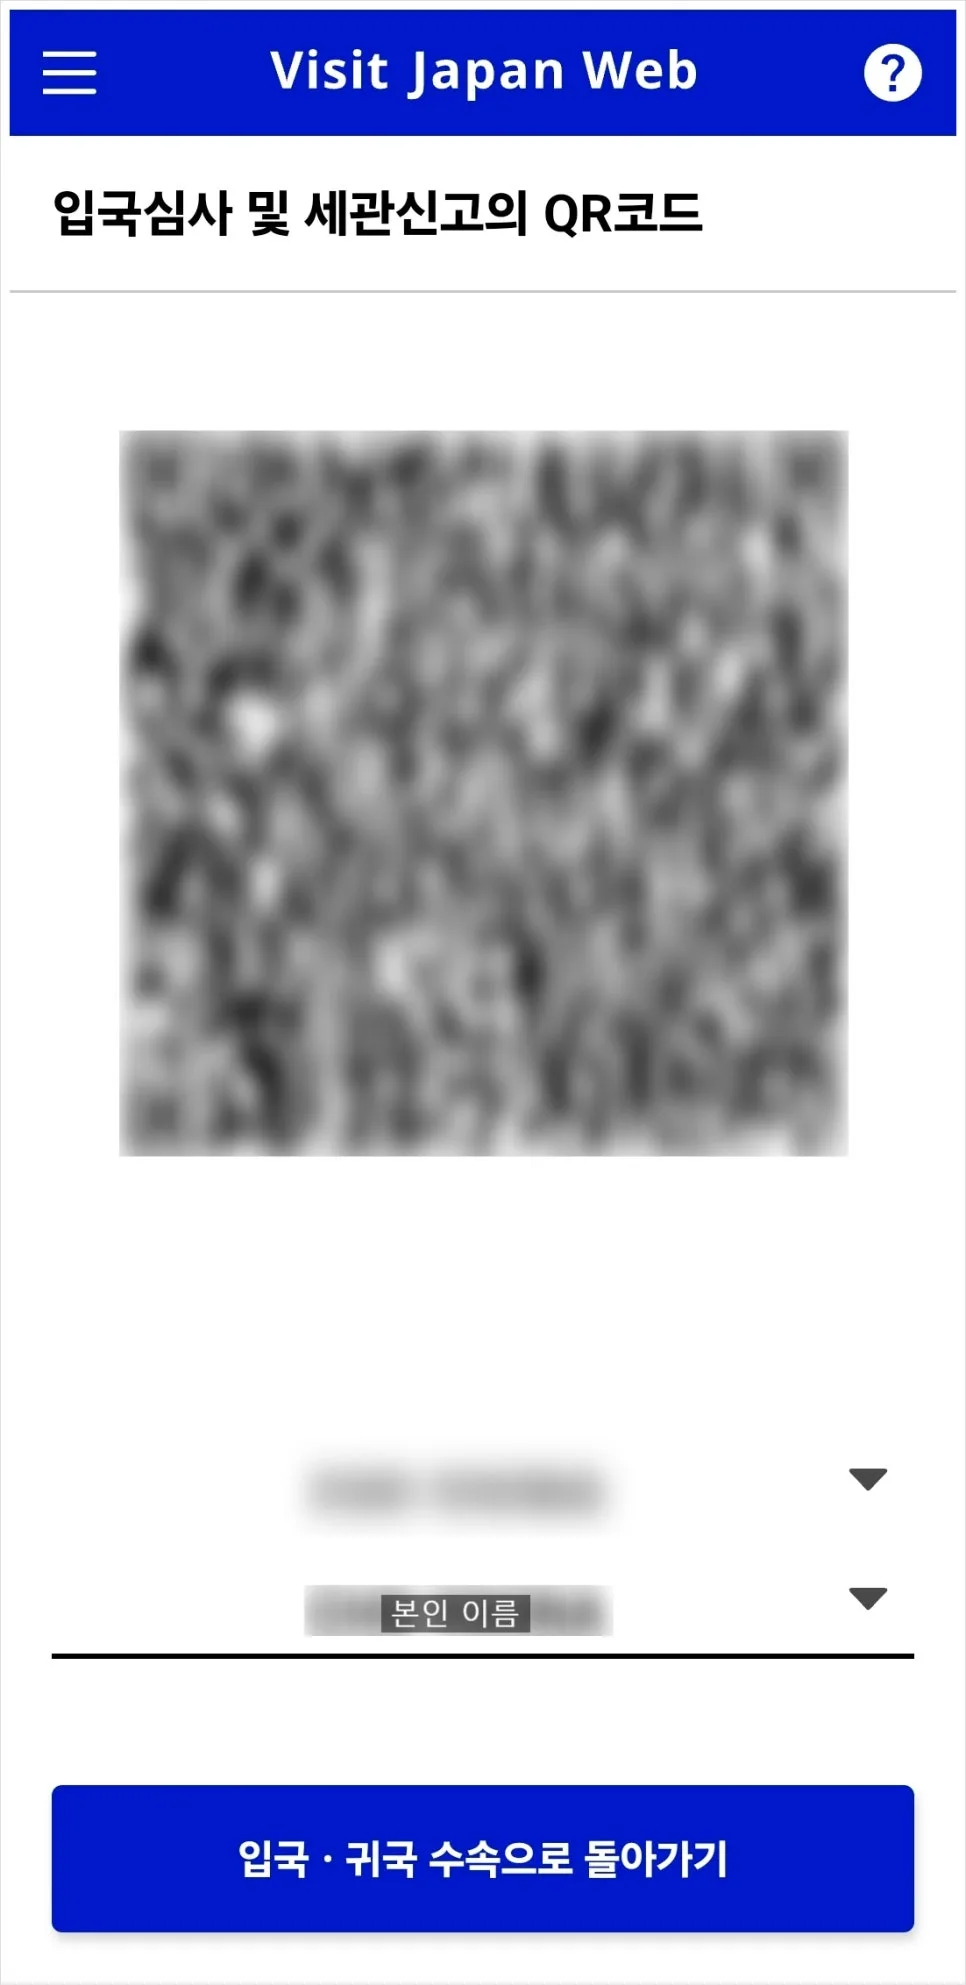
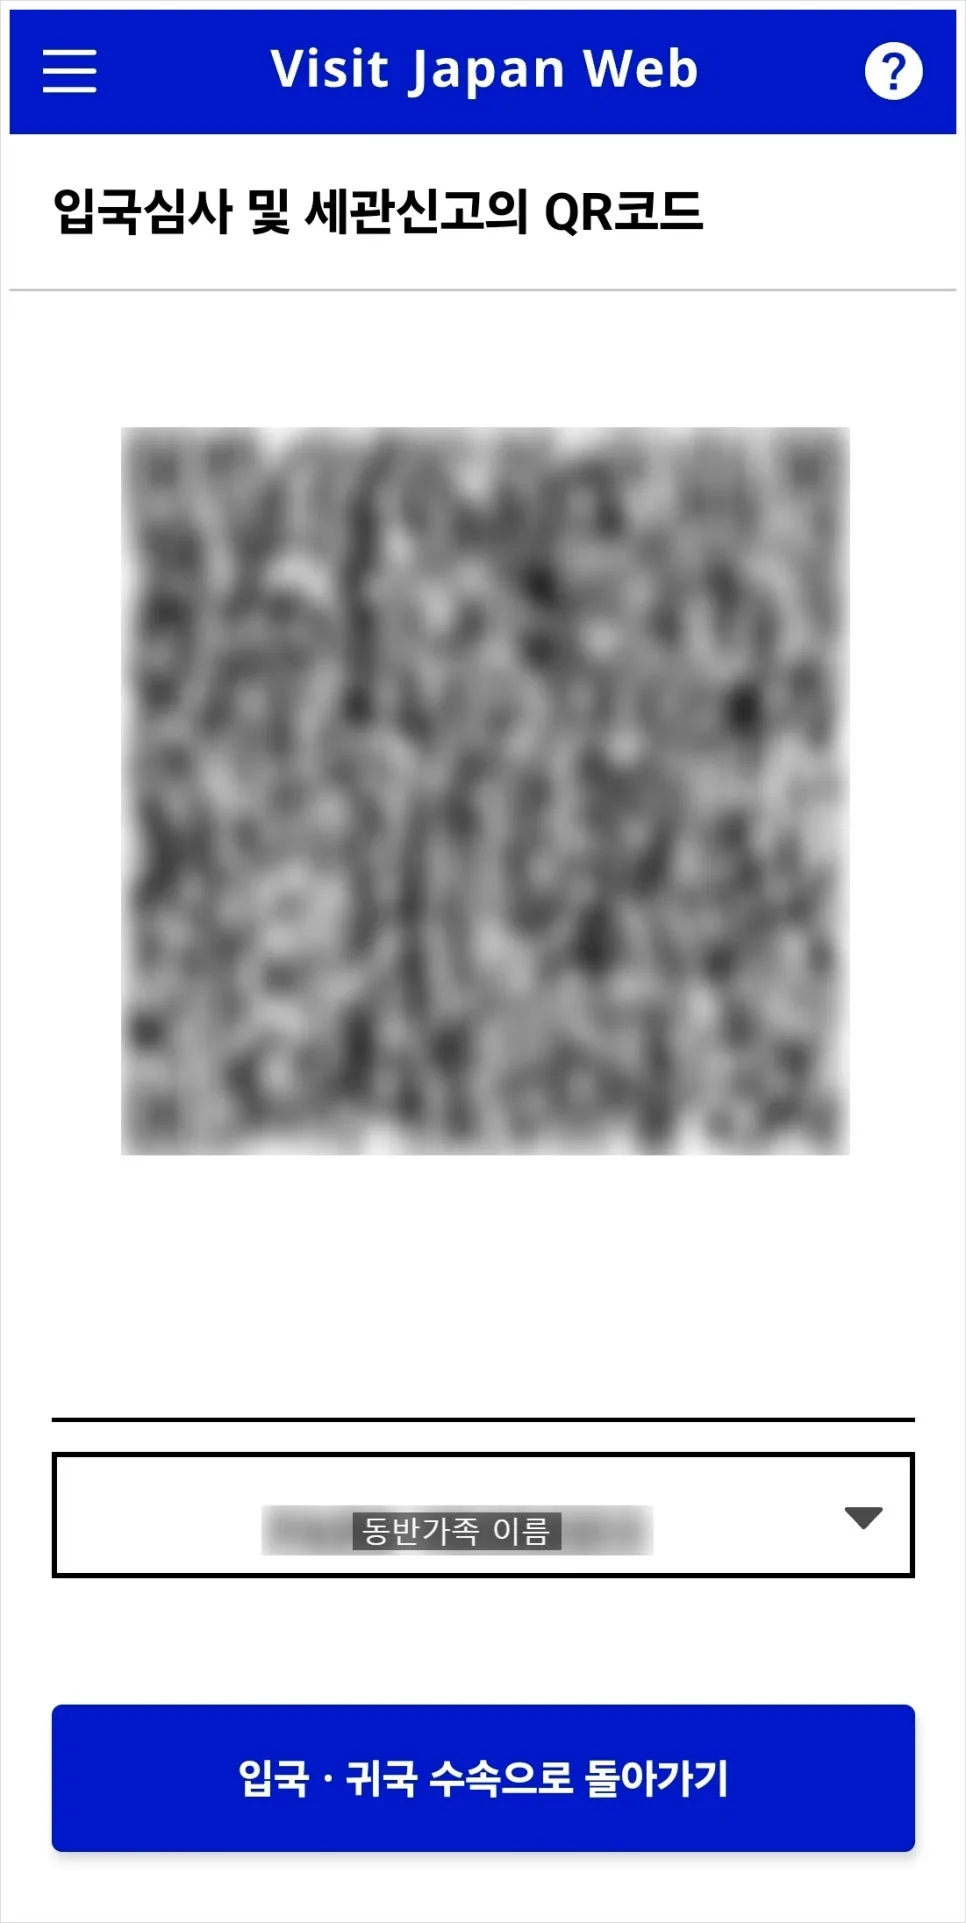
Tap it and your QR code will appear. Screenshot it right away. Once you land in Japan, logging back in at the airport to pull up your Visit Japan Web QR code can be hectic, so save a screenshot and bookmark the page too.
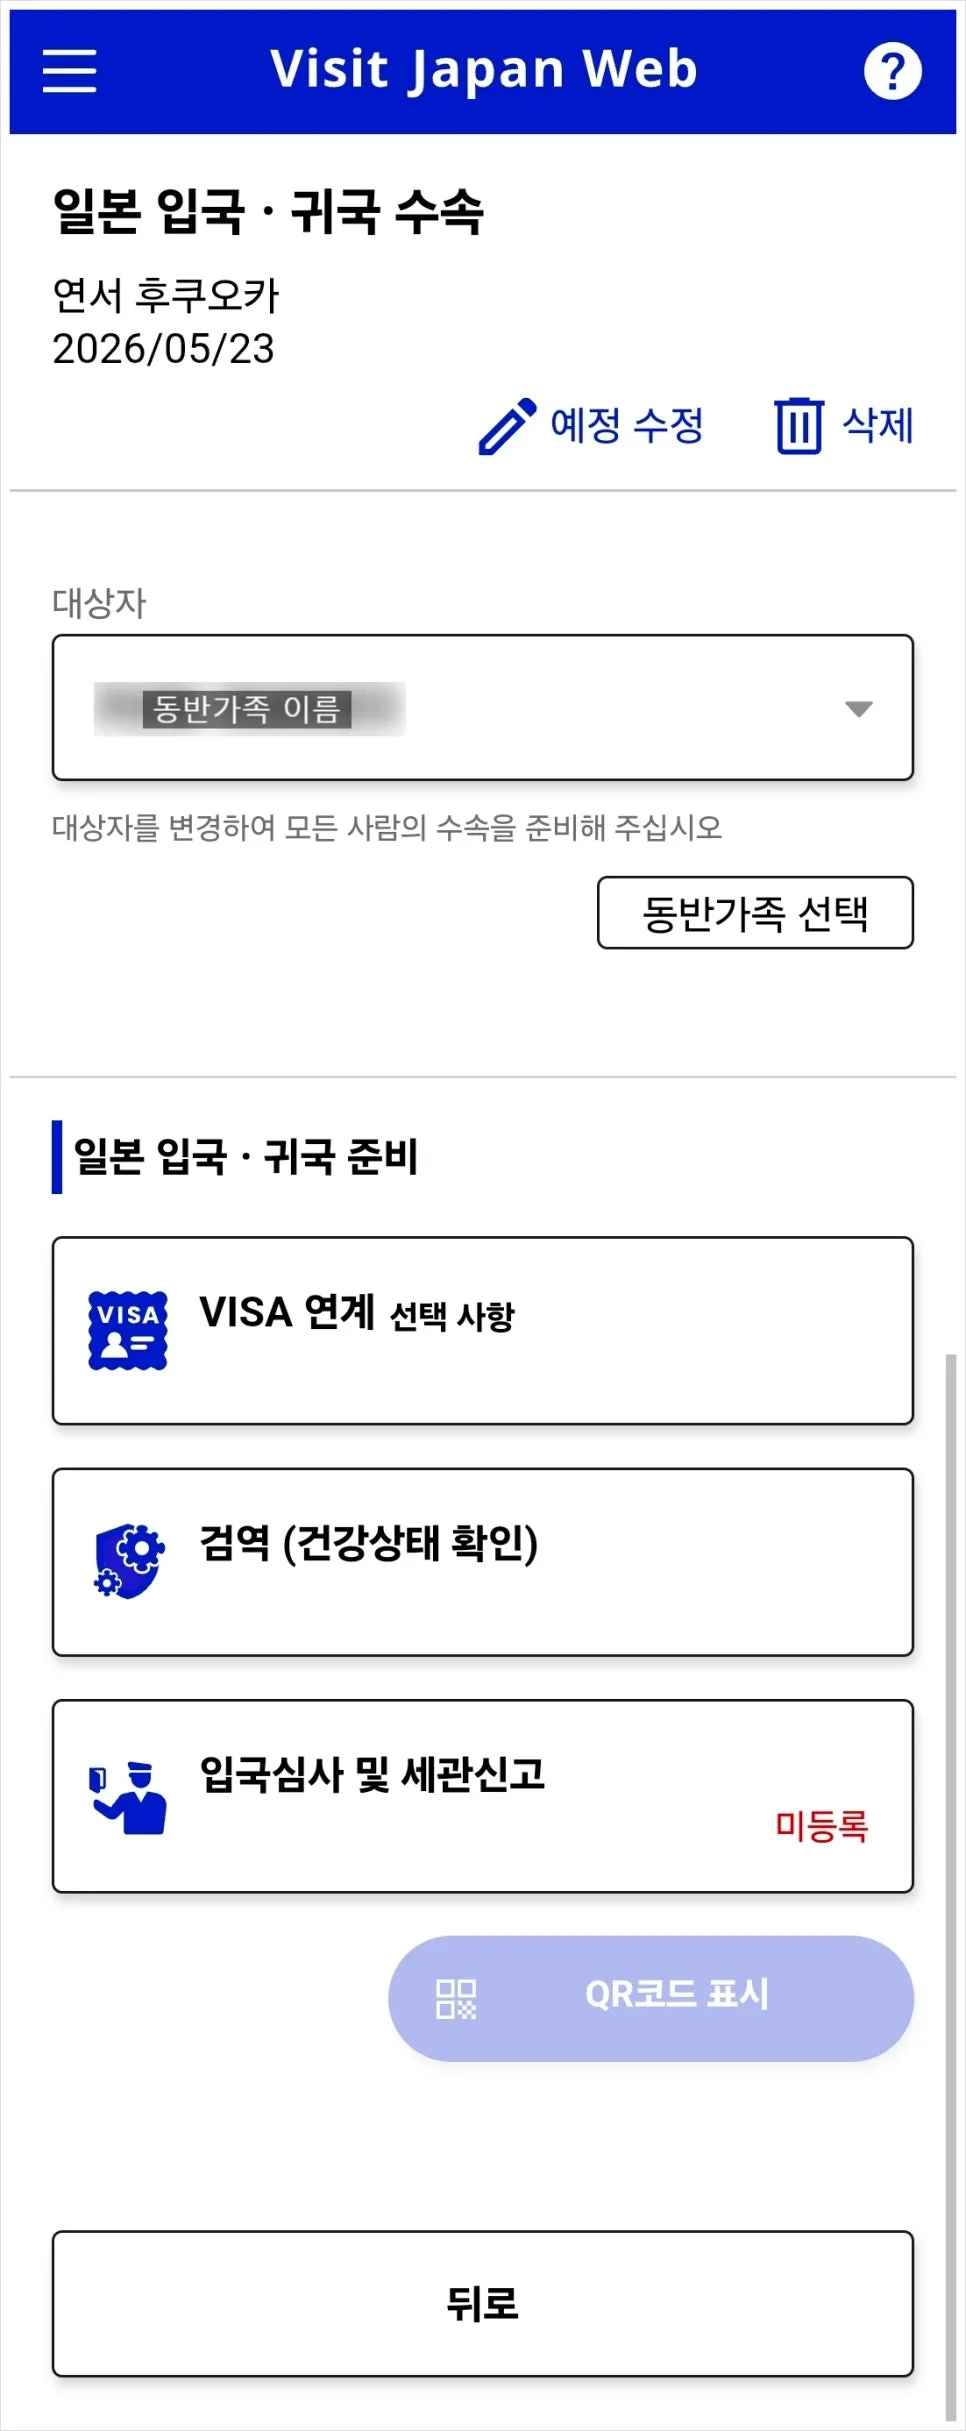
Next, you’ll want the QR code for your accompanying family member as well. Under “Person,” select the family member’s name that you registered earlier.
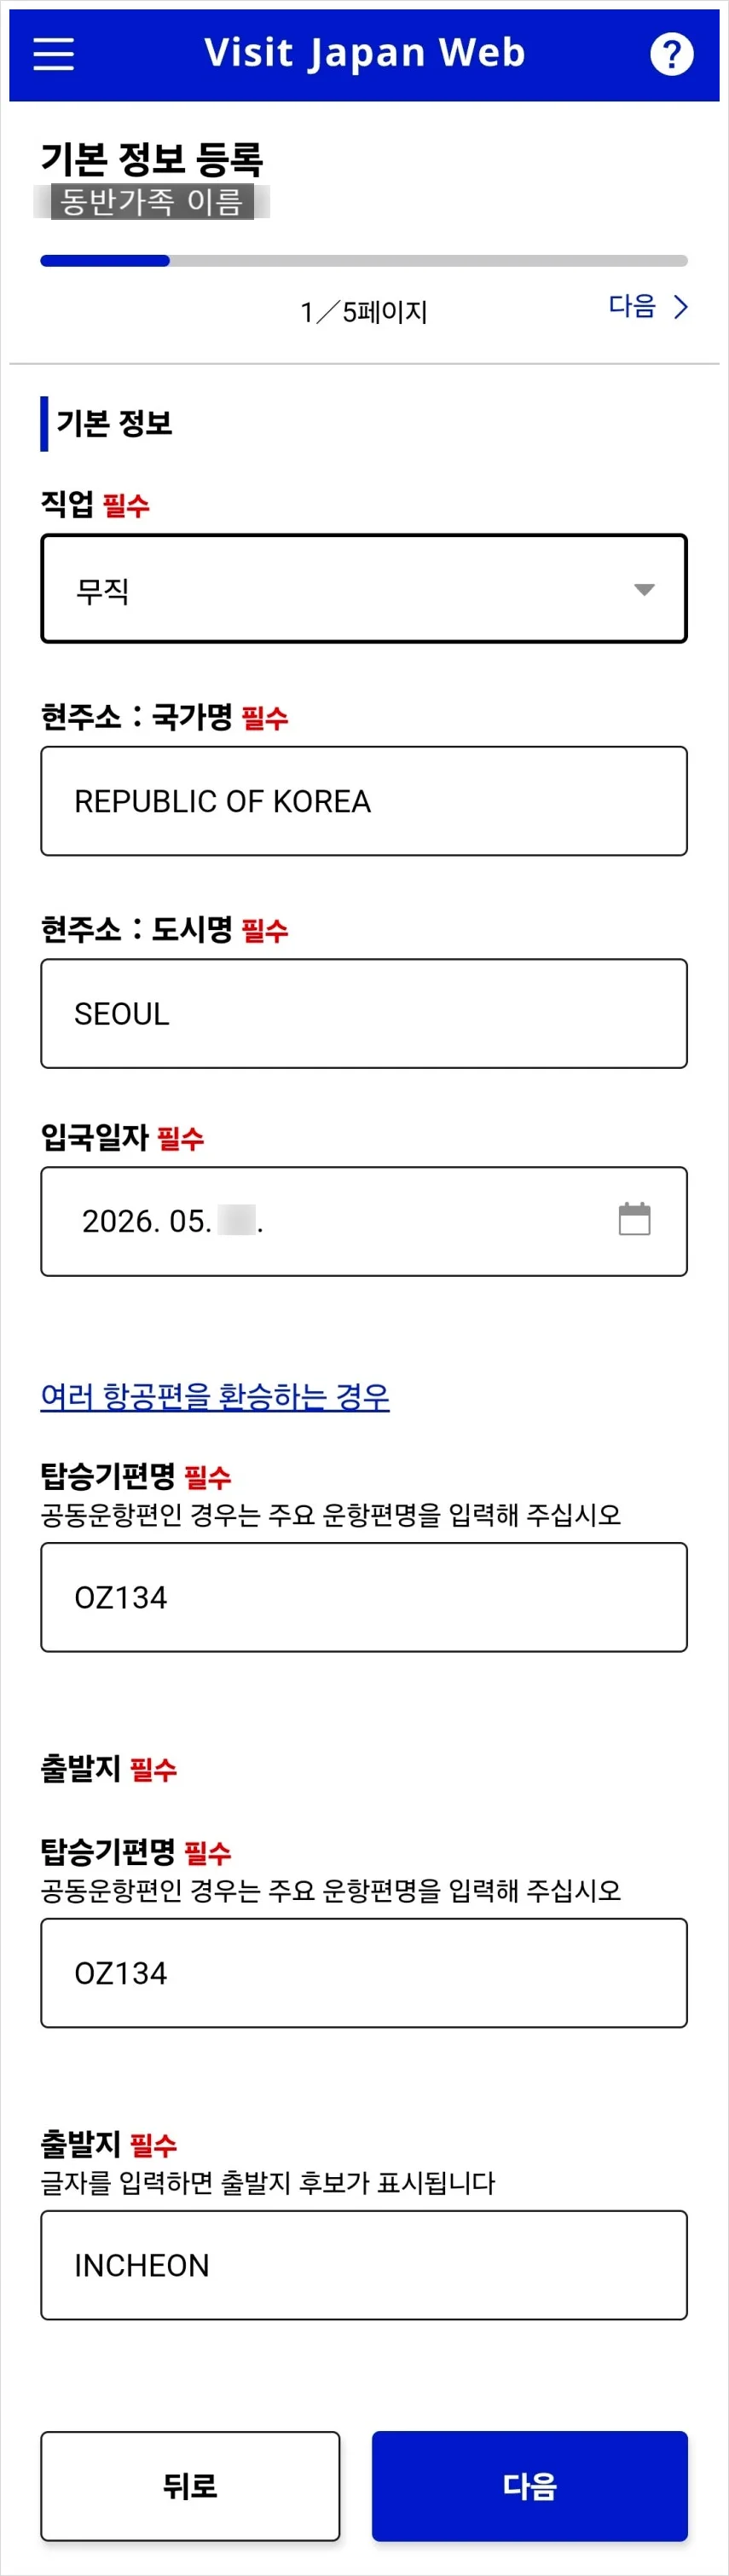
Then follow the same steps as you did for yourself. Remember how you selected the option to submit customs information together for accompanying family members?
If you did, you won’t have to answer all those questions again, and you’ll just see a review screen like this.

That completes the accompanying family member’s arrival form too.
Be sure to screenshot and save each family member’s QR code in advance.
One important thing to know: when passing through the electronic declaration kiosk, even family members need their own individual QR codeone by one.
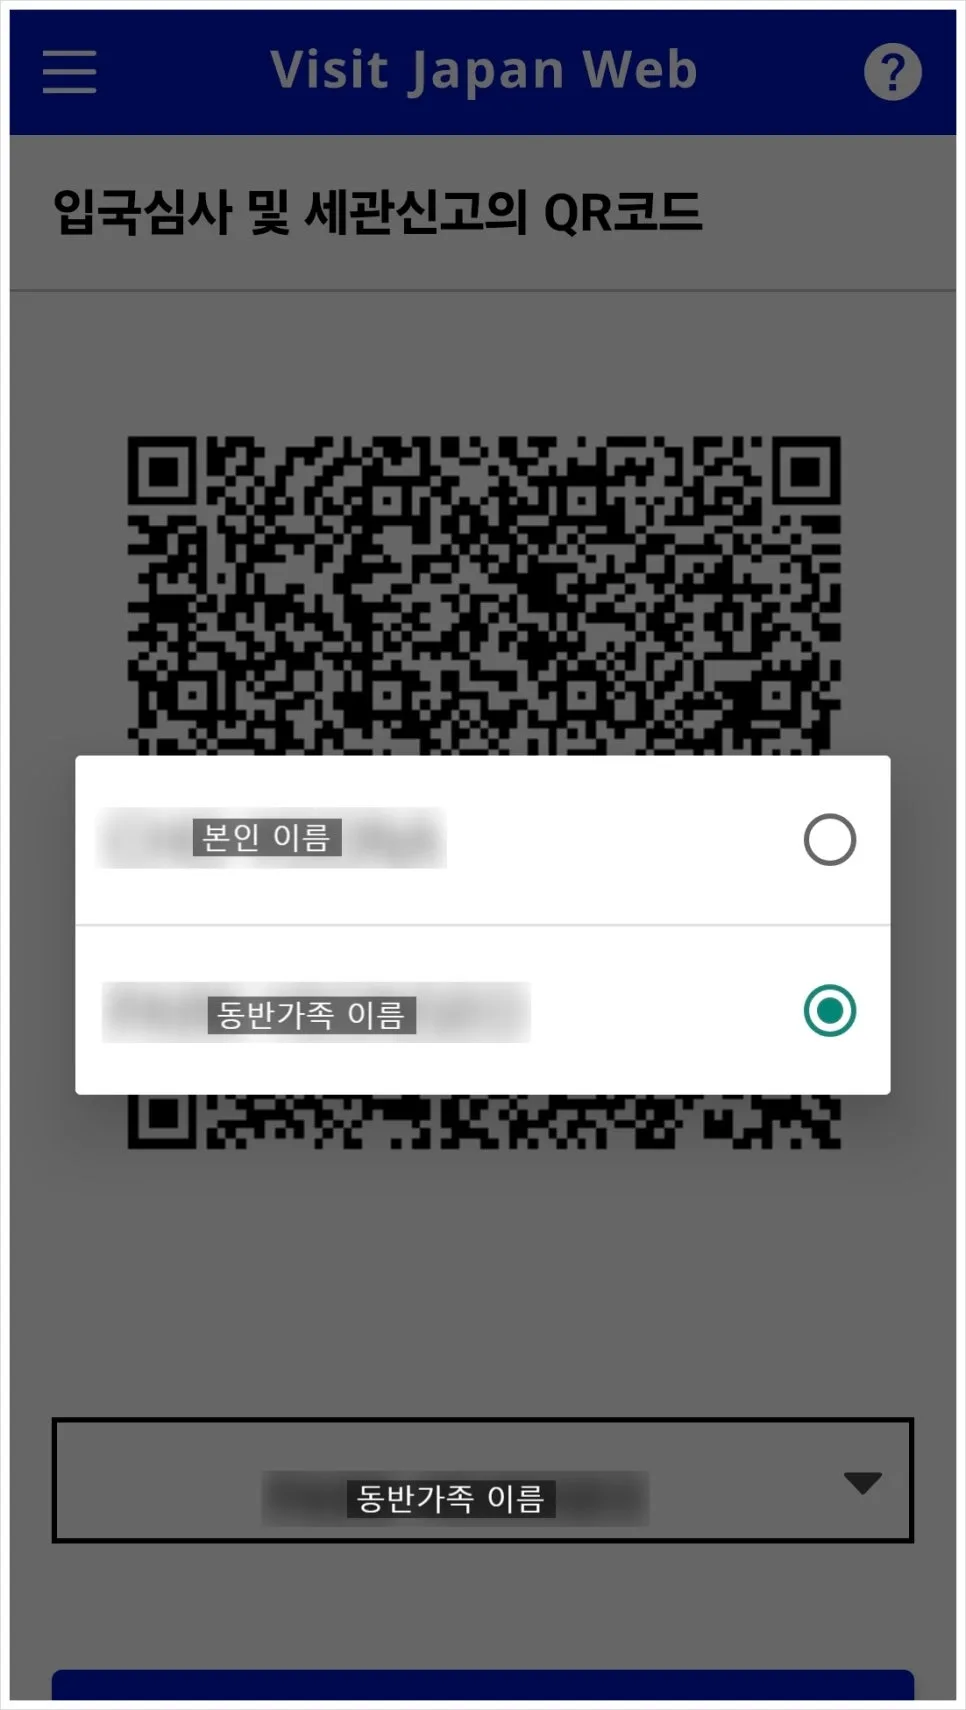
On the QR code screen, you can tap the name at the bottom to switch between your code and your family member’s code, but like I mentioned, it’s still best to save separate screenshots for each person.
5. At the airport in Japan
If you prepared your QR code before departure, all you need when you arrive in Japan is your passport and QR code.
Show your passport to the immigration officer, then scan your QR code at the machine they point you to. You’ll also go through fingerprinting and a facial photo scan. Each accompanying family member has to do this individually too.
After immigration, pick up your luggage, and before exiting the airport, scan that same QR code one more time at the electronic customs declaration kiosk in the customs inspection area.
And that’s it—you’re officially through Japan entry. Have an amazing trip to Japan!